
Well… Hello there! Welcome to this month’s edition of the Stamper’s Dozen Blog Hop!
This month, we will be focused on TOOLS! And, you have to admit, Stampin’ Up! has given us some amazing tools!!!
While it sometimes changes from day to day, my favorite things right now are punches. I mean, come on now… Punches are so easy to use. The are portable. And, Stampin’ Up! gives us a great selection of them.
I don’t really have any true project for you today, but instead, I am going to share with you a life-changing tip for the Pick-a-Punch punches. I originally saw this on Nigezza Creates. I am not sure if the idea originate with her or not, but it was not my idea… Just one I hadn’t seen before and thought maybe you hadn’t either.
Let me ask you… What is the worst thing about the Pick-a-Punch?
I have only be able to find one negative! Sometimes, you want to punch something that is too small to feed into the punch! You grab your piercing tools, maybe even your Take a Pick tool but nothing you have on hand can help punch that sentiment at just the right spot.
Well, here is your solution…
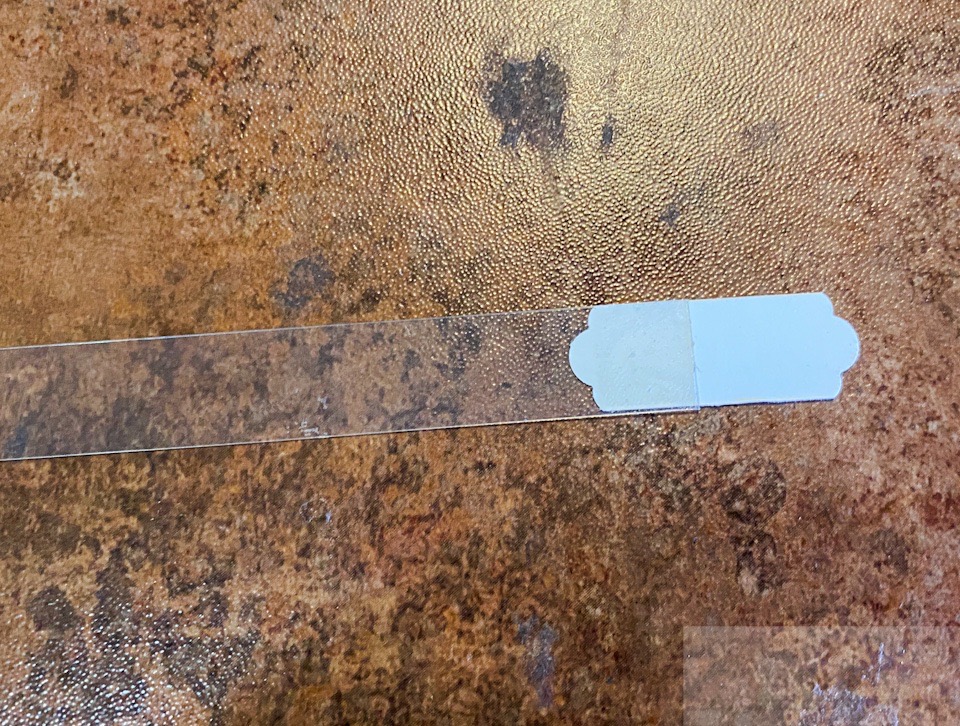
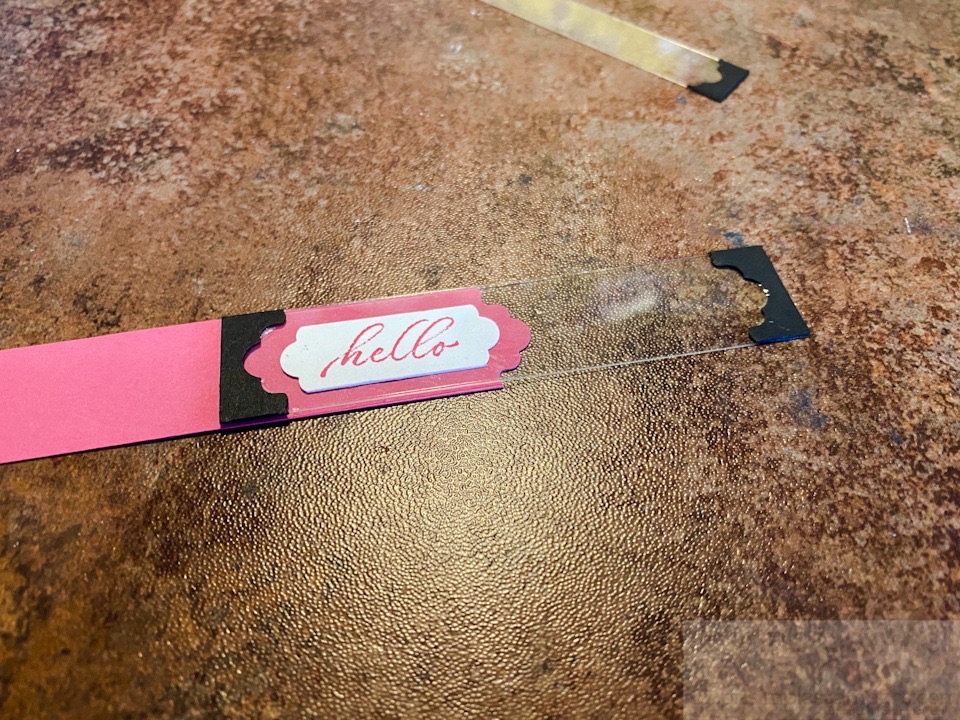
A little feeder arm. I made it out of a stripe of Window Sheet. Just cut it to the width and dab a wee bit of Tombow Multipurpose glue at the tip of it and let it dry. This provides a sticky spot for the sentiment you want to punch, but not too sticky that it ruins the sentiment.
See how you can easily slip it into the punch now! Genesis.. I know, right!
So, right about now I bet you are asking yourself how I was able to measure it so that it wouldn’t punch off the sentiment or be too long, especially given the fact that it seems a little off center.

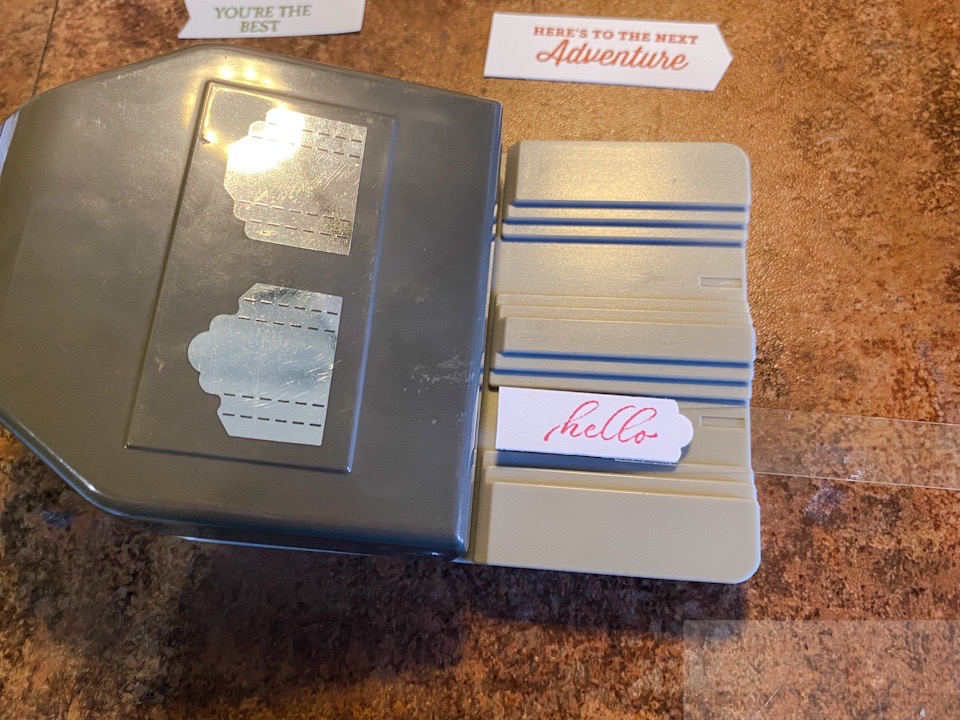
Well, I created these templates for each size of the two Pick-a-Punch punches I have: Banners and Lovely Labels. (Again… I saw Gez made these and thought they were brilliant!)
Each of these punches has two different end shapes in three different sizes. That means each punch has six different options.
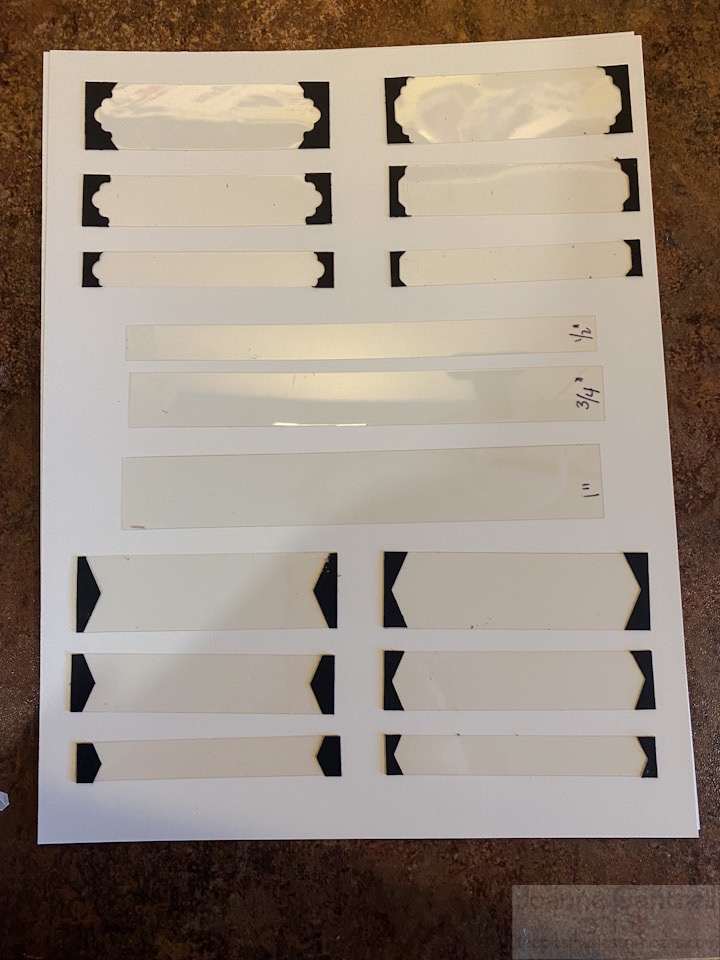
I used the window sheets and Basic Black cardstock. I cut the Window Sheet to 3-1/2″ wide. Then I cut off strips 1/2″, 3/4″, and 1″ wide. I cut four of each width for my punches.
I then cut the black cardstock into the same widths and punched two of each available option. I then used Tombow to glue the tiny punched ends that are usually discarded to the strips of window sheet.
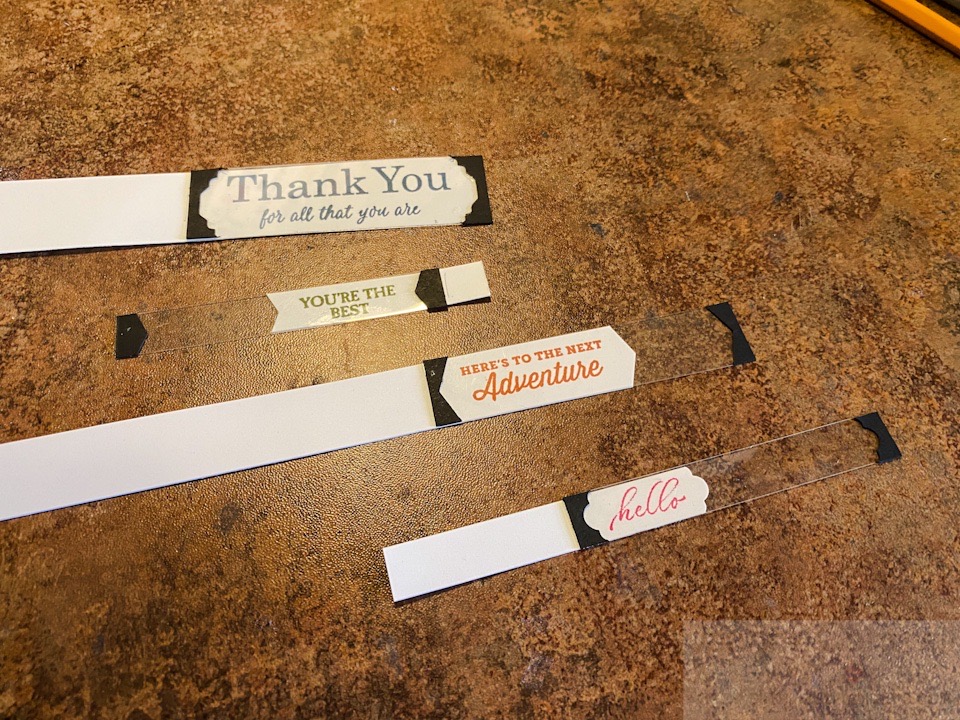
To use, just lay it over the stamped sentiment and line up one side of it with the template. I used a pencil to mark that end then used the Paper Snips to trim it off. Then you can slide it into the punch.
Once you punch one end, line up and mark the other side.
These will also help line up the layers as well.

Well, that’s all I have for you this month.
Here are the links to the other ladies’ favorite tools….
Stamper’s Dozen June 2021 Blog Hop
- Joanne Cantrell – Keep It Simple, Stampers
- Rachel Yurkanin – Rachel’s Stamping Place
- Debbie Naylor – Unfrogettable Stamping!
- Bonnie O’Neill – Bonnie Stamped
- Donna Burk Schneidtmiller – Donna Stamps
- Rose Grunewald – Country Cards by Rose
- Jodi Petersen – Jodi’s Card Designs
- Patty Chenail – Stamp-Patty’s – Stamping in My Flops
- BJ Peters – Create & Feel Great
- Judy Garza – Creativity Released
- Sharon Hashimoto Burkert – As the Ink Dries
- Carol Payne – Carol Payne Stamps
Until next time… keep it simple, Stampers!
🙂 Joanne
Not seeing any links?
They aren’t there. Could you resend? Thanks
Fabulous tips!! I’m going to have to try these!
Great tips for the punches! I will have to give them a try!
You are a genius! Thanks for sharing such great tips for these punches!!
Love the tips you shared especially using the Window Sheet.
Genius! Thanks for sharing this!
Absolutely brilliant! How do you store these?
Actually, I use the empty sleeve from some Rhinestones. 🙂