Welcome to this month’s edition of the Ink & Inspiration Blog Hop. You are currently visiting Joanne Cantrell from a tiny little town in Southern Illinois smack dab in the middle of the United States. I hope you enjoy what you see here.
Our theme for this month is Technique Savvy. That means we will focus techniques you can use to bring new life into your stamping! Some of the techniques may be familiar to you and some may be new. Just taken them for a spin and have fun!
The technique I am going to show you is called JOSEPH’S COAT. I am pretty sure it gets it’s name from the colorful coat the Joseph’s father gave him in the Bible story. This coat was the envy of Joseph’s brothers because it was just one more way the Jesse showed favor toward his favorite son. So, I am hoping you can use it to show favor to the luck recipients of the cards you make using it!
First of all… Let’s see the whole card!

Isn’t that beautiful! And, can you believe that it started with a piece of Whisper White cardstock!
Let’s see the steps I used to get to this finished product!
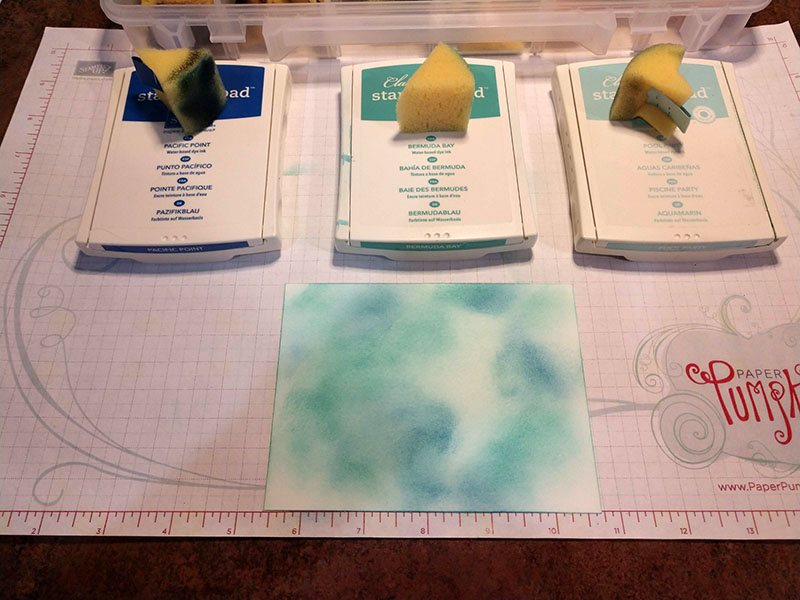
First thing you have to do is decide what stamp set and color scheme you are going to use. I love the large dragonfly form the DRAGONFLY DREAMS Photopolymer Stamp Set (1429224). I thought it would be perfect to let the background shine through the beautiful detailing. Now, as for the underlying background… can’t really go wrong with blues – so I chose Pacific Point, Bermuda Bay, and Pool Party.
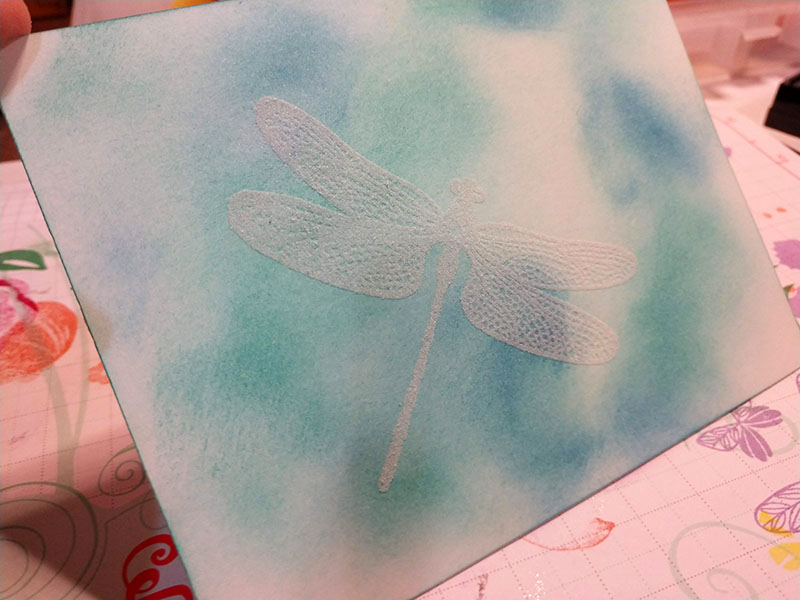
I sponged the entire layer with a light coating of Pool Party. Then I added spots of Bermuda Bay and topped it off with a little Pacific Point. I added more Pool Party where needed then a little more of the Bermuda Bay and Pacific Point. It’s all about the layering of colors. It would have been easy enough to stop there… that is a beautiful background for a crisp black dragonfly! But… keep on going – you won’t be disappointed!
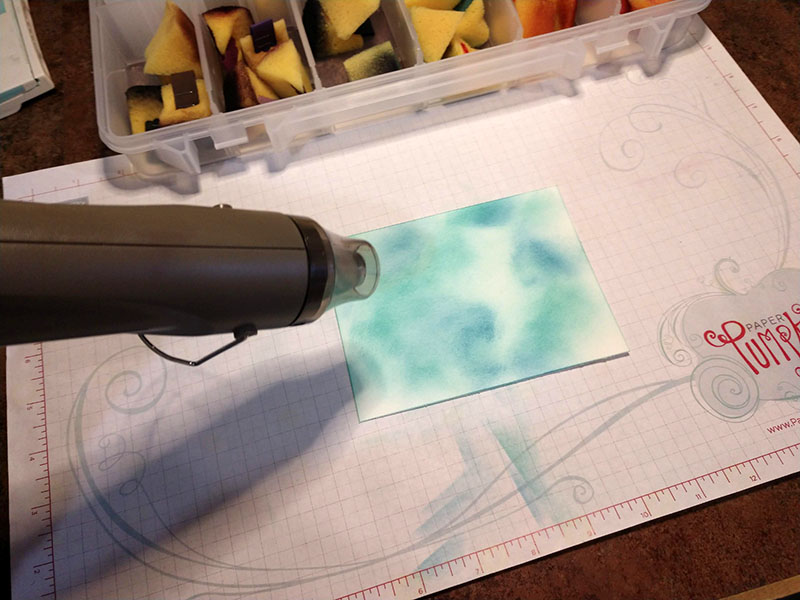
Do not skip this step… it is more important then you may think. You have just layered up tons of ink on this piece of cardstock. If you proceed straight to applying the embossing powder, it will be all over the layer. You need to use your heat tool to completely dry the layer. And, I mean COMPLETELY DRY! I learned this the hard way!
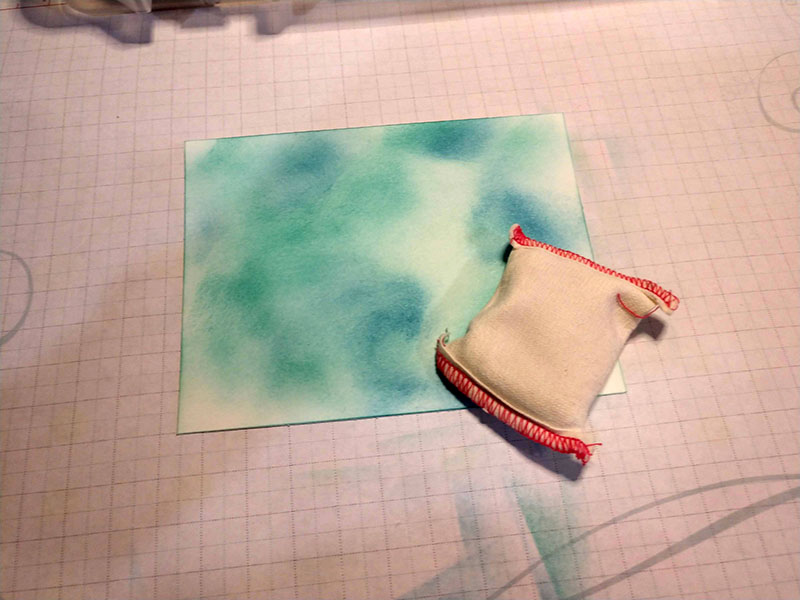
For a little added security, be sure to tap your Embossing Buddy across the entire layer. This will help insure the powder sticks only where you want it to!
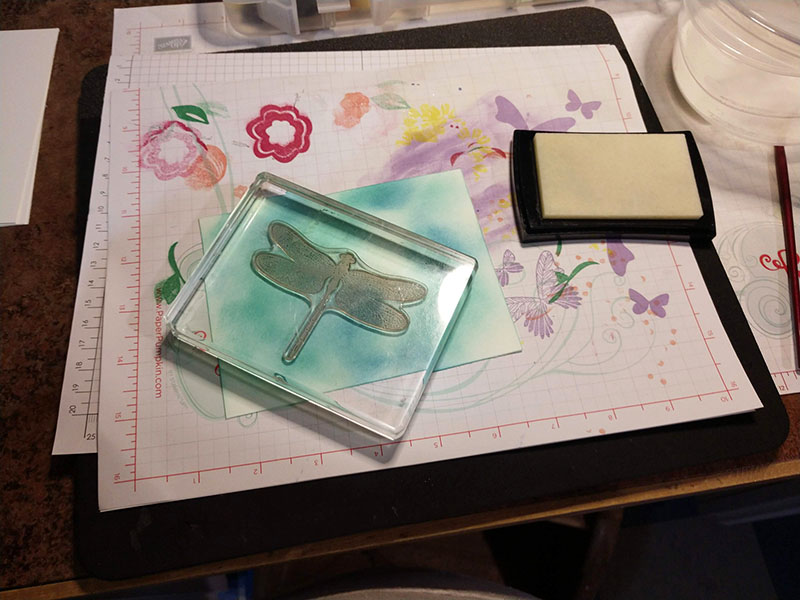
ow, ink up your dragonfly with your VERSAMARK ink by lightly tapping the stamp onto the ink pad – or the ink pad onto the stamp… which ever way you prefer… I use both directions! Then carefully stamp the image onto the layer. Be careful not to let the stamp slide. The VersaMark will make it a bit slippery. Hold the stamp there for a few seconds then carefully lift away.
Cover the layer – especially the image – with CLEAR EMBOSSING POWDER. tap off any extra. Inspect the layer for any stray pieces of powder. Sometimes it has a mind of it’s own and likes to wander all over. I use a tiny paint brush to clear off any stragglers.
Use your Heat Tool to melt the embossing powder. It will turn shiny when it is melted. Be careful not to burn it.
Now, you are ready for the next step. This is going to be scary – but it is okay. Just plunge on in and get to it! The result is worth the pain! LOL
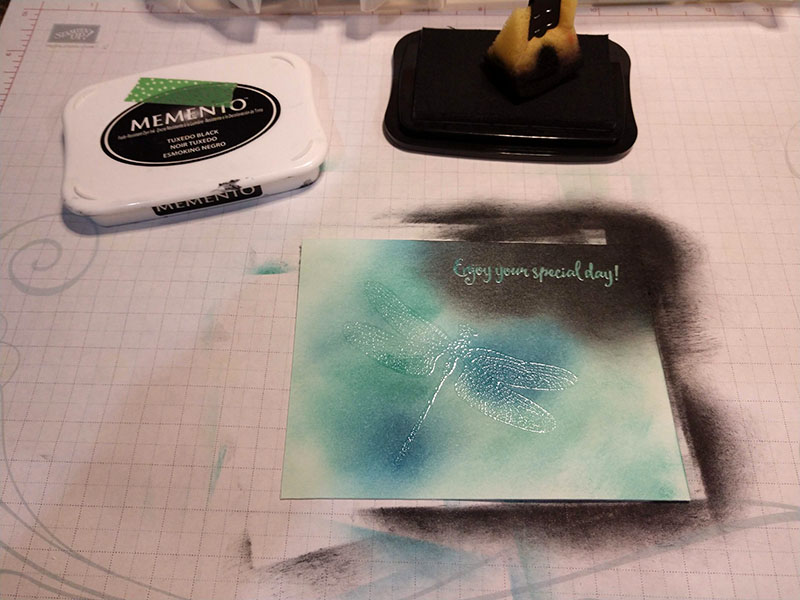
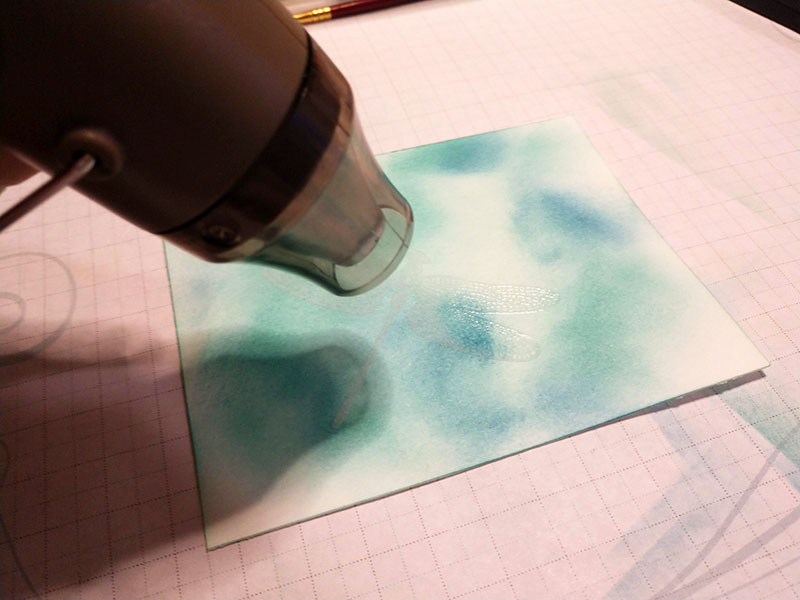
Use black ink – I used MEMENTO – and start sponging it over the entire layer. Yes, I did sneak the sentiment on there. I couldn’t think of how to add it and not detract from the dragonfly… so why not emboss it too!
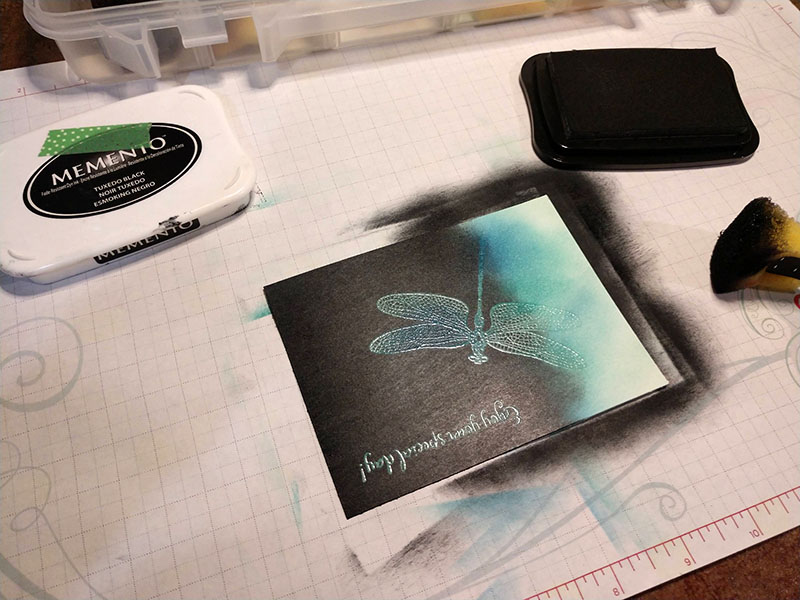
When you can’t really go any further, flip it over and start from the other end. Keep inking until it is all completely covered.
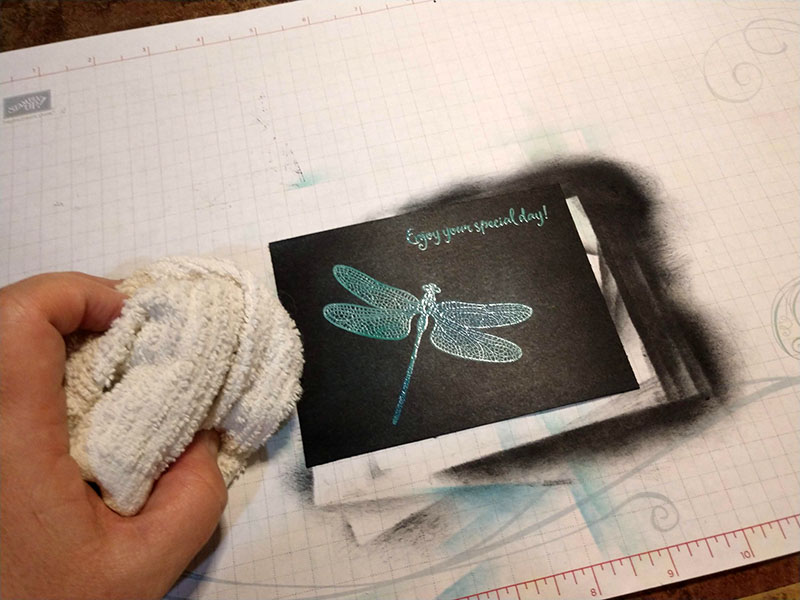
The ink will not cover the embossing but it won’t dry on it either, so you want to be sure to rub a dry cloth or paper towel over those areas to get the ink off of them. You may not think you need to, but you will see a difference once you do… I promise!
You will want to use the heat tool again to dry that black ink. If not, you will get it on your fingers and then on everything you pick up including your phone while you are trying to photograph your project! But, you will get in on whatever layers you will be working with next and that may not be desirable! (Again, lesson learned the hard way!)

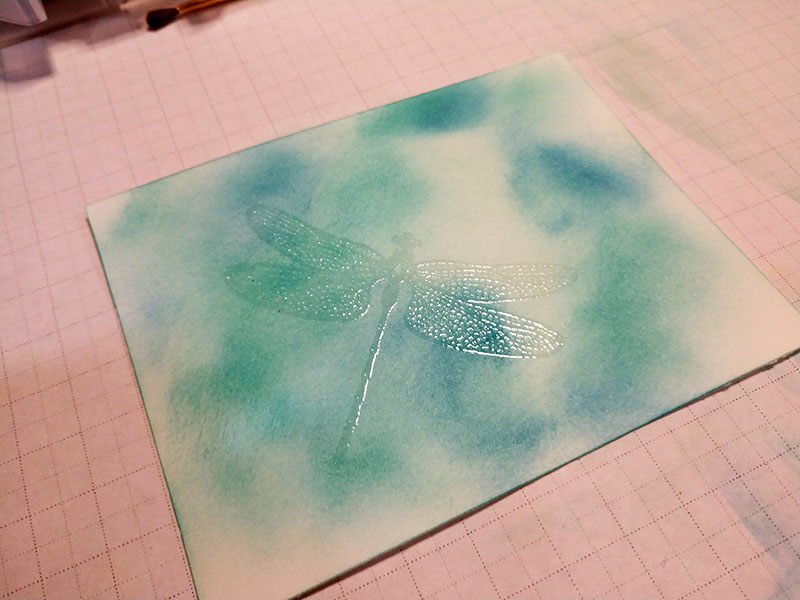
When I say that I learned the hard way about the drying of the underlying layer… here is what I ended with. So, I dried the blue layer a little, stamped my image and embossed it. The powder stuck to most of the layer… so I wiped it off and dried it really good. I thought it would dry that VersaMark well enough that the powder wouldn’t stick to it… Nope… It did. There was no way to wipe it all off those wings. So, I kept going. It really added a bit of movement to it, but in the end, I decided just to try it again – and add the sentiment too!
Here’s the completed card once again. I added a Bermuda Bay Layer and a little Pool Party Shimmer Ribbon.
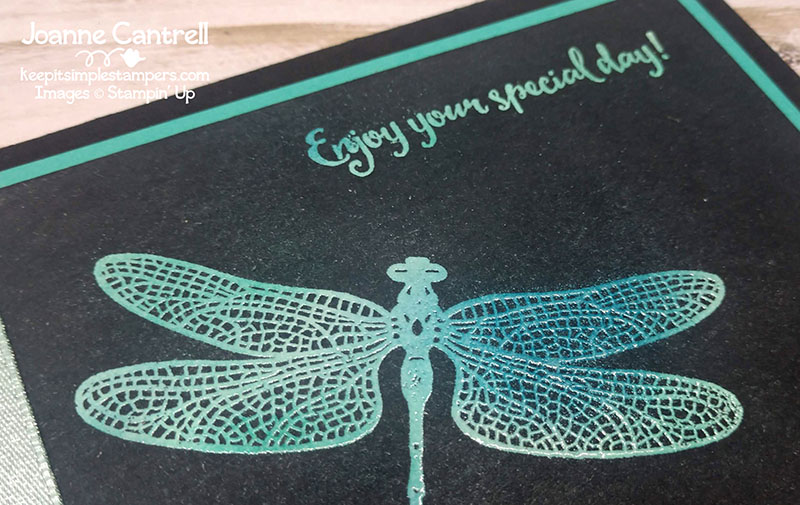
A close up of the finished layer…
But wait – there’s more!
Did you know that you don’t just have to use black ink to cover it up. As long as the top layer of ink is significantly darker, it will cover up all the colors under it. It may not cover them up as well as the black, but it will add a little movement to the layer as the underlying colors will add a little shadowing. Here are two other cards I made using this technique.
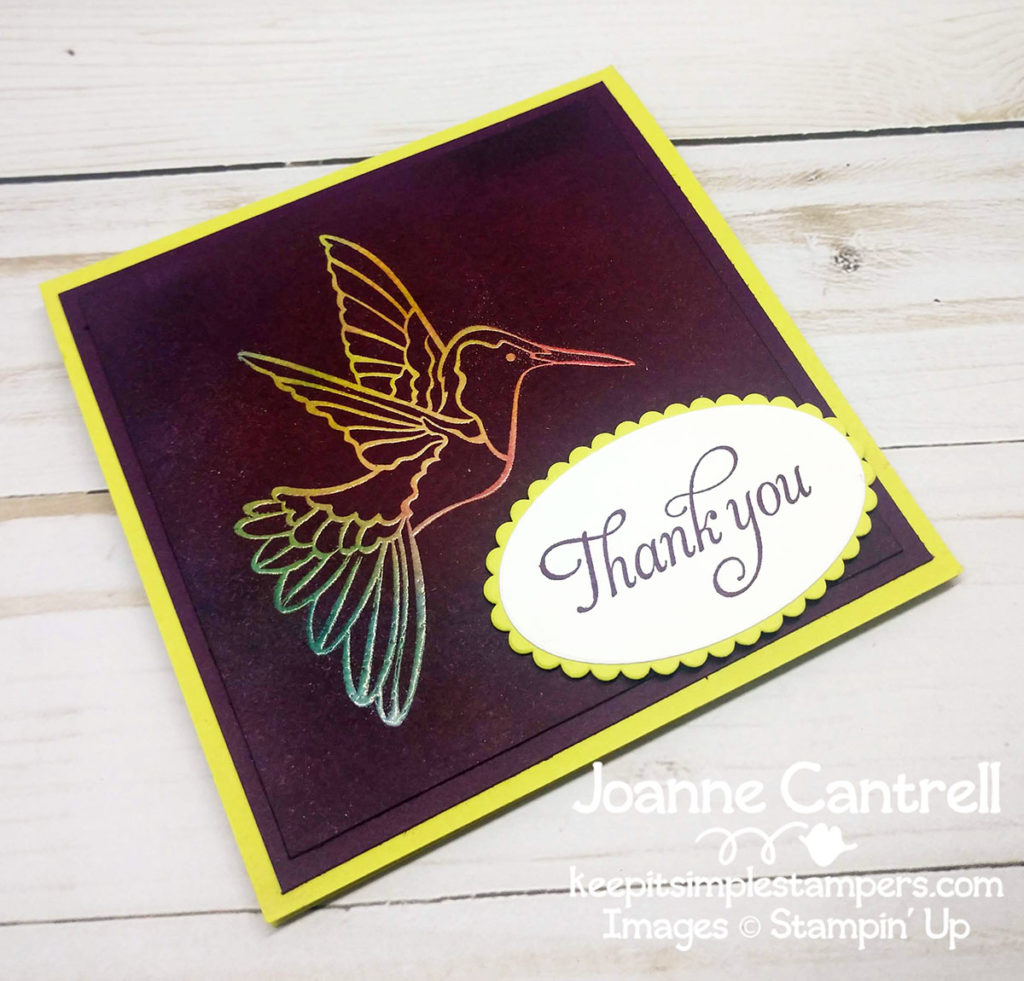
I used a variety of inks for the humming bird. Lemon Lime Twist, Melan Mambo, Crushed Curry, and Bermuda Bay, I think. I used Blackberry Bliss as my top color. Then I added the sentiment.
Here is a close up on the bird. Can you see what I mean about those stray pieces of embossing powder. If you don’t get them all, they will melt and add splattering to the image. But, here is the thing… This is a handmade card. A card made with love. It was never meant to be perfect!
Oh – and I did another one too.
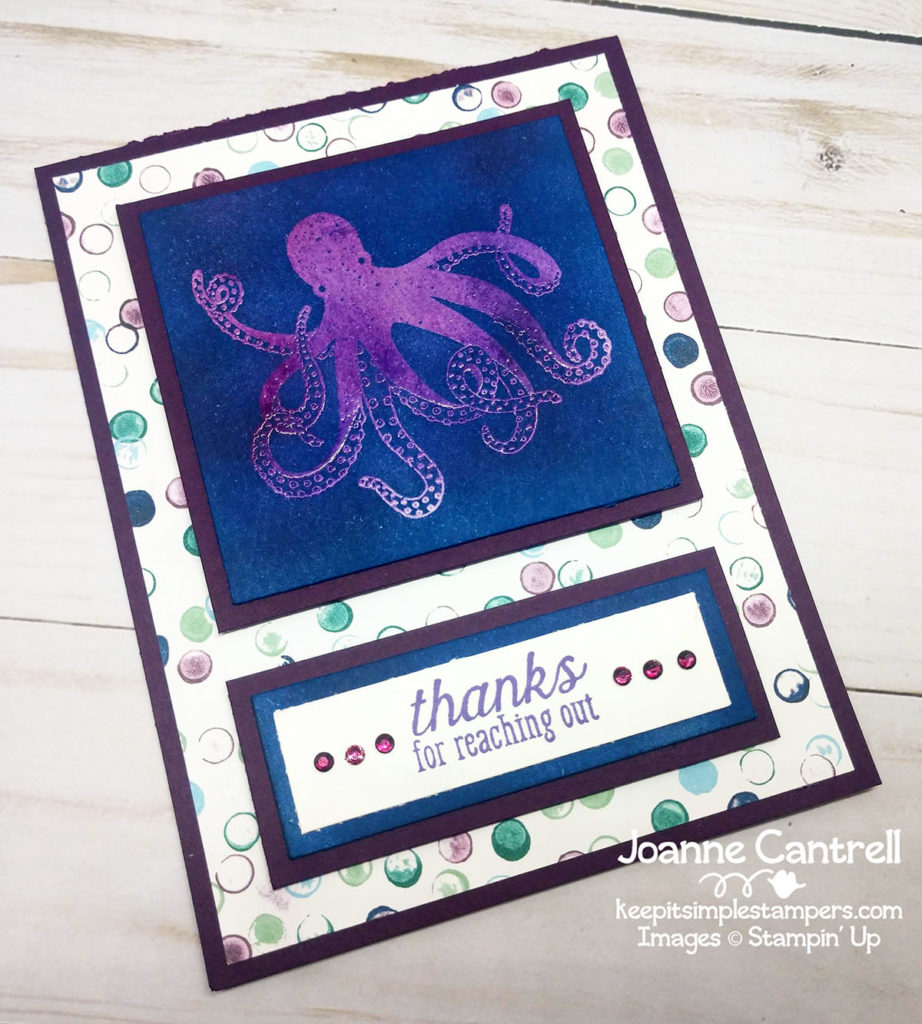
A perfect purple octopus!
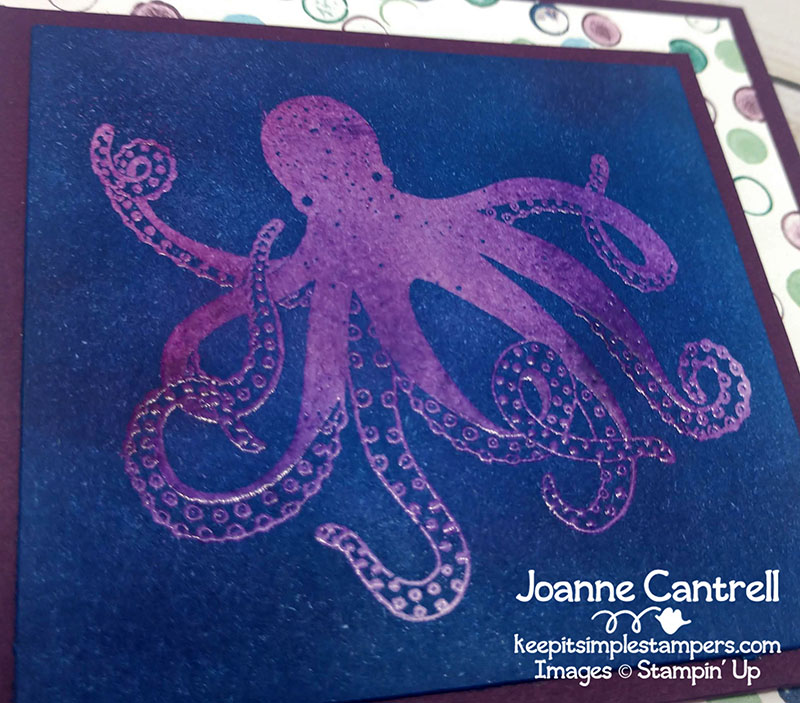
He was created using Highland Heather, Gorgeous Grape and Blackberry Bliss. I used Pacific Point to cover it up but then I realized that the DSP used Night of Navy, so I went over with a layer of that. It didn’t make much of a difference. Behind the sentiment layer is part of the octopus layer that was cut off.
Well, that is my technique for you today. hopefully you will use it for everything! I know it is one I will use a little more often!
Well, hop along now!
Until next time… keep it simple, Stampers!
🙂 Joanne

Gorgeous Examples of the Joseph Coats technique Joanne! Thanks for sharing them with us!
Great technique Joanne, makes a stunning statement x