
Hello and welcome to this month’s installment of the Stamper’s Dozen Blog Hop!
Our theme for this month is Color My World. Our aim is to show you projects using our favorite coloring tools.
Well, my favorite coloring tool lives in a pineapple under the sea… it’s Stampin’ Sponge, Color Tool (said in my best “Sponge Bob, Square Pants chanting voice! )
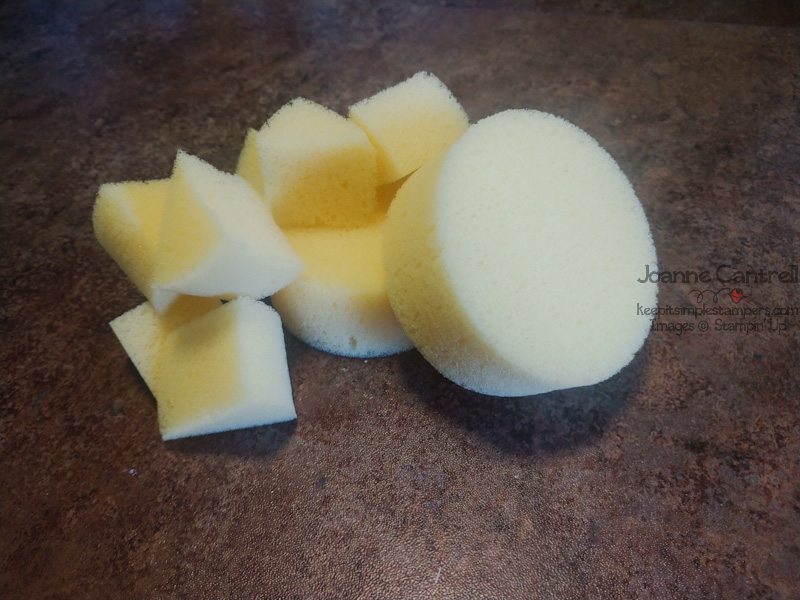
Such humble little creatures they are. They are often overlooked when folks are looking to add splashes of color to their projects. Don’t overlook these most marvelous coloring tools. They are so eager to absorb some ink for you!

This is how I store my sponges. It’s a crafty organizing container I got at Walmart. I liked it because I can make the areas bigger and smaller… And store my daubers with then. To label my sponges, I use return address labels that I printed with all the colors and their color family. I use a small stapler to attach it to the sponges. (I printed an extra sheet of the labels for the daubers.). They are stored by rainbow and not by family so blues don’t get into oranges!
Sponges can be used multiple ways. One of the most used methods is the flicking method. It’s where you hold the card stock in one hand and flick the sponge along the edge to highlight it. I used the method in the first two cards I have to show you.
This card uses the To a Wild Rose stamp set and coordinating dies. I used Melon Mambo ink and paper.
I also used a sponge to apply the color to the inks. This set is a Distinktive photopolymer stamp set. In order to get the photo-like stamped image, you can’t have too much ink on the stamp. Using a sponge allows you to better control how much ink is applied.
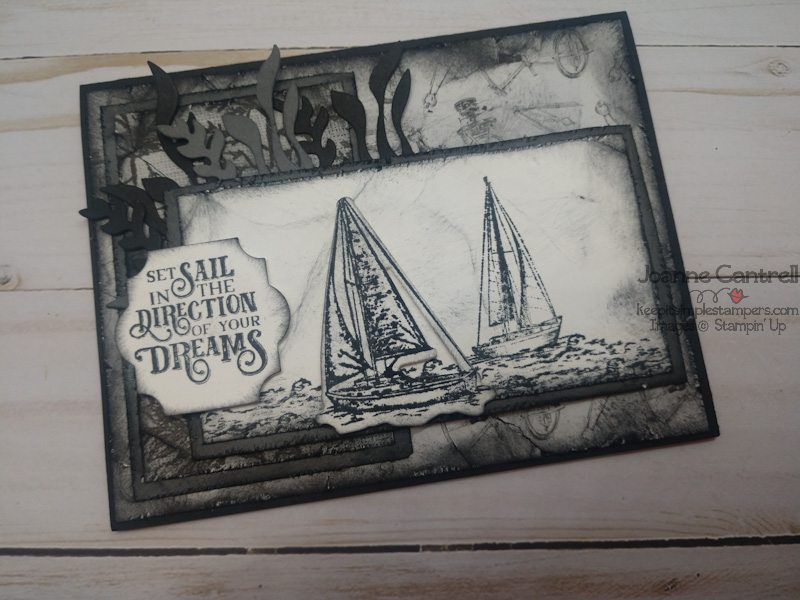
This card uses that same flicking method. But, before I did, I roughed up the paper a bit using the edge of my scissors. I also crumpled it a bit before I inked it.
You will also noticed I used the sponge to apply color (Basic Black) to the front of the paper to, to bring out some of the lines and soften the Whisper White.
I used the Sailing Home stamp set and the coordinating dies. The paper is Basic Black, Basic Gray and Whisper White cardstock as well as the Come Sail Away Designer Series Paper.
This card used both the flicking method and the coloring method that I used above. It just adds a bit of aging to the paper.
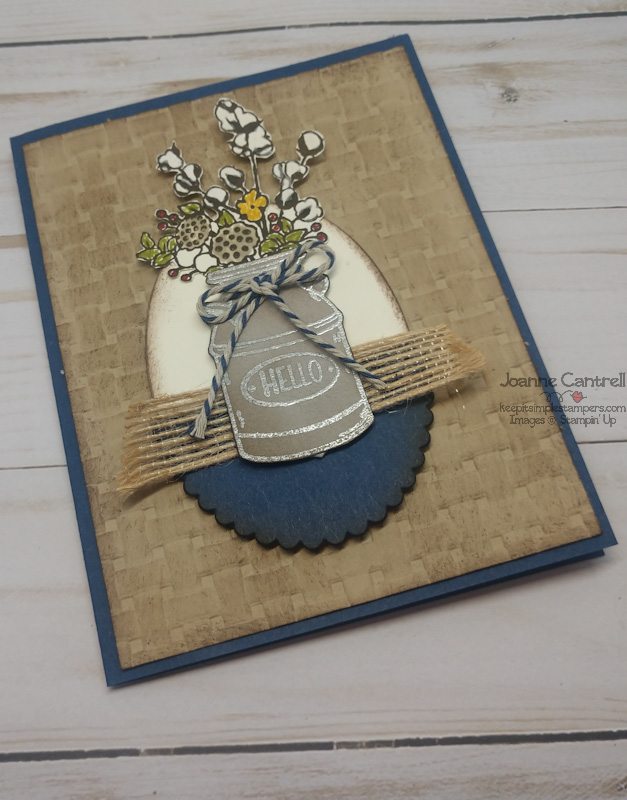
On this card, I used Early Espresso ink, Night of Navy cardstock, Crumb Cake cardstock, and Very Vanilla cardstock. Oh, on the milk can, that is Granite Gray cardstock and silver embossing powder. The stamp set is the Country Home set and I used the Layering Ovals dies. I added a little Crumb and Navy twine and a piece of Burlap ribbon… 🙂
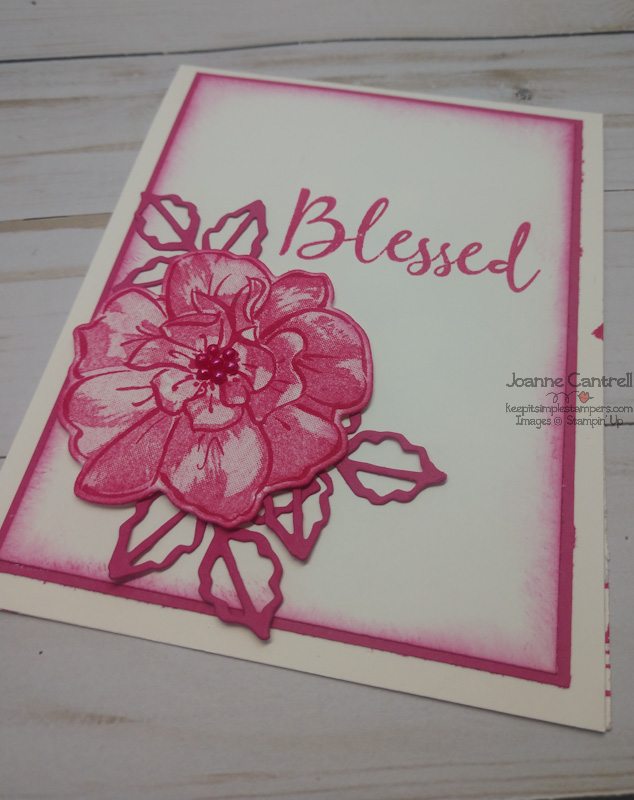
This card used Petal Pink, Flirty Flamingo, and Melon Mambo inks. I did a bit of “masking” by tearing a sheet of scrap cardstock. I applied the Petal Pink first using the sponge. It’s okay if it looks splotchy because it will blend in as you swirl the sponge around adding layers of colors. Now, don’t go over board because you can apply more color but you can’t take it away. Next, I placed one of the pieces of the torn paper over the pink and applied the Flirty Flamingo ink. Then I covered the Flamingo with the other side of the torn cardstock and sponged on the Melon Mambo. When I was done, I used the three colors to blend them together a bit.
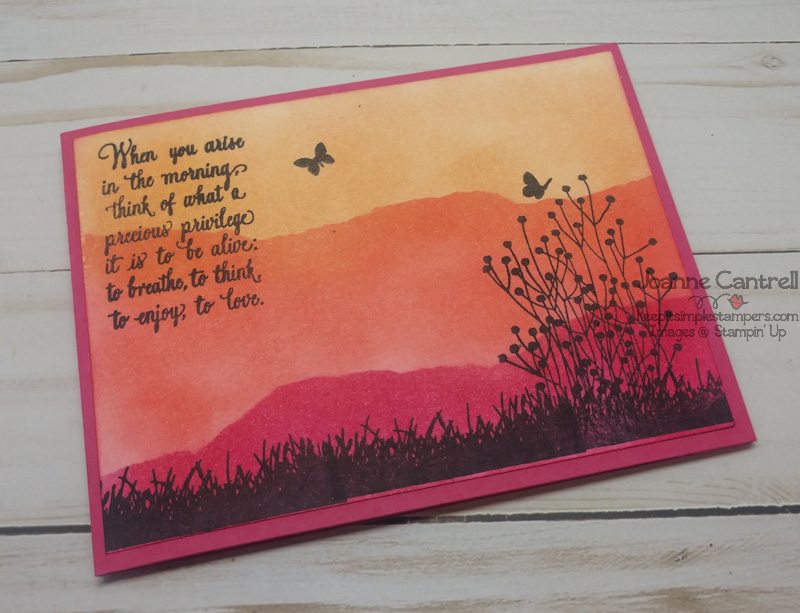
I used the Enjoy Life stamp set and Memento ink. It looks like a sunset in a wild west desert

For this card, I used one of the oval dies to create a mask. I then sponged Balmy Blue ink into the cut out. It leaves a perfect spot of color right in the middle. I used the Enjoy Life stamp set here as well.
For the butterflies, I sponged Pumpkin Pie and Crushed Curry ink on a bit of a scrap piece of Whisper White (Pumpkin on the top and bottom and Curry in the middle). Then, I stamped over the sponging with the butterflies in Memento ink. I used the Butterfly Duet punch to punch out the butterflies. Don’t forget to add the bodies before you punch them out
Oh, please continue to bear with me… There’s just one more card… I know, I got carried away. But, I love sponging and stamping!
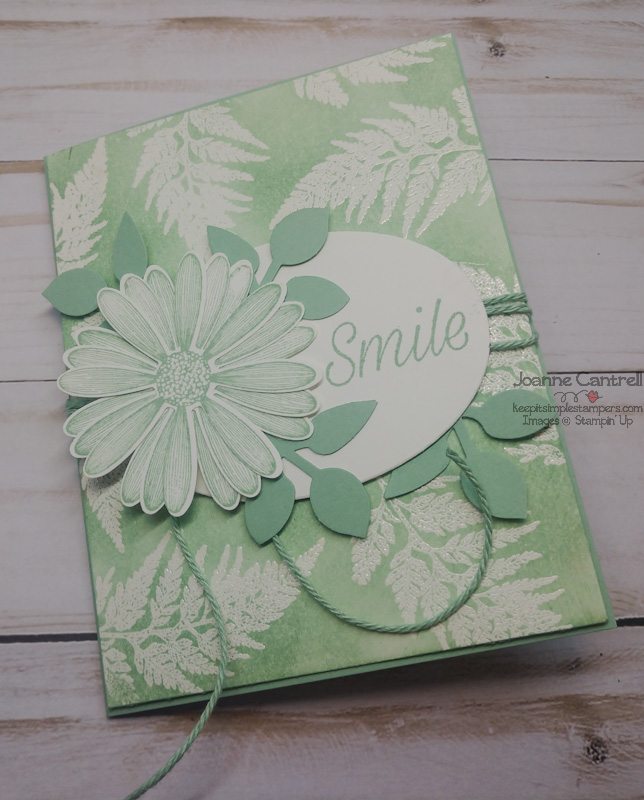
This is an embossed resist card. I used clear embossing powder and VersaMark ink to stamp the fern leaves. Then, I covered them with Mint Macaroni ink. When done, I used a tissue to wipe the extra ink off the embossing.
I used the Daisy Lane stamp set and Daisy Punch. The oval is from the mask I created in the butterfly card.
Well, that’s it from me today. Go hop on over the others now!
Stamper’s Dozen July 2019 Blog Hop
- Patty Chenail – Stamp-Patty’s – Stamping in My Flops
- Judy Garza – Creativity Released
- Sharon Hashimoto Burkert – As the Ink Dries
- Carol Payne – Carol Payne Stamps
- Joanne Cantrell – Keep It Simple, Stampers
- Rachel Yurkanin – Rachel’s Stamping Place
- Debbie Naylor – Unfrogettable Stamping
- Bonnie O’Neill – Bonnie Stamped
- Laura Milligan – I’d Rather BEE Stampin’
- BJ Peters – StampinBJ
Until next time… keep it simple, Stampers!
🙂 Joanne
WOW! So many great cards. Love all the ideas you shared using sponges.
Joanne, thank you for showing us the many ways sponges can be used on cards! Would you show us what the labels on your sponges look like, please?
Thank you, Judy
Great idea, Judy. I just did a short post about my labels and included the label file to download as well. You can find it here…
https://keepitsimplestampers.com/sponges/
🙂 Joanne
Gorgeous cards!!!!!!!