Welcome to this month’s installment of the Stampers Dozen Blog Hop!
This is the happiest saddest month of the Stampin’ Up! year.
It’s just about time for a new catalog to come out which make me happy! The new products are so great!
Yet, in order to make room for all the great new products, we have to say goodbye to some of our old favorites. So… this is the last chance you have to get them. That makes me sad.
For this hop, I have decided to feature a couple products for one last hoorah!
- Picture Perfect Photopolymer Stamp Set
- 2017-2019 In Color Designer Series Paper
- Lemon Lime Twist cardstock, ink, and Ruffled Ribbon
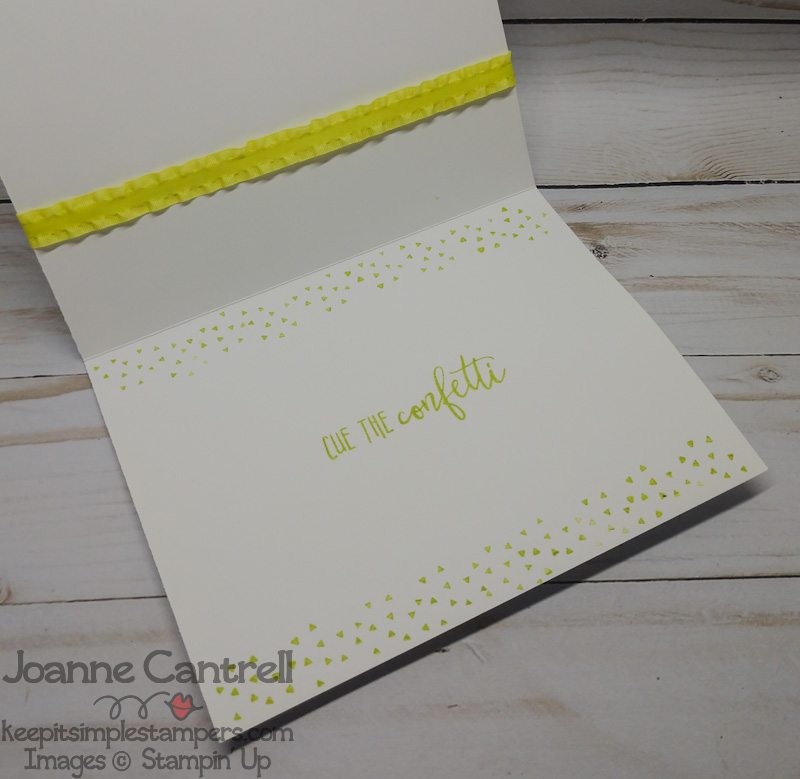
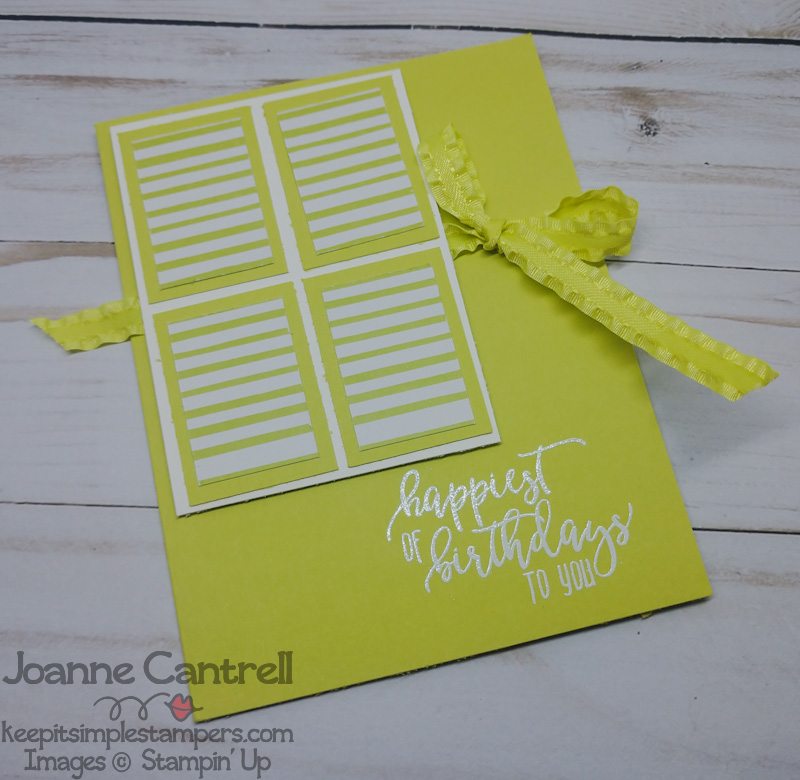
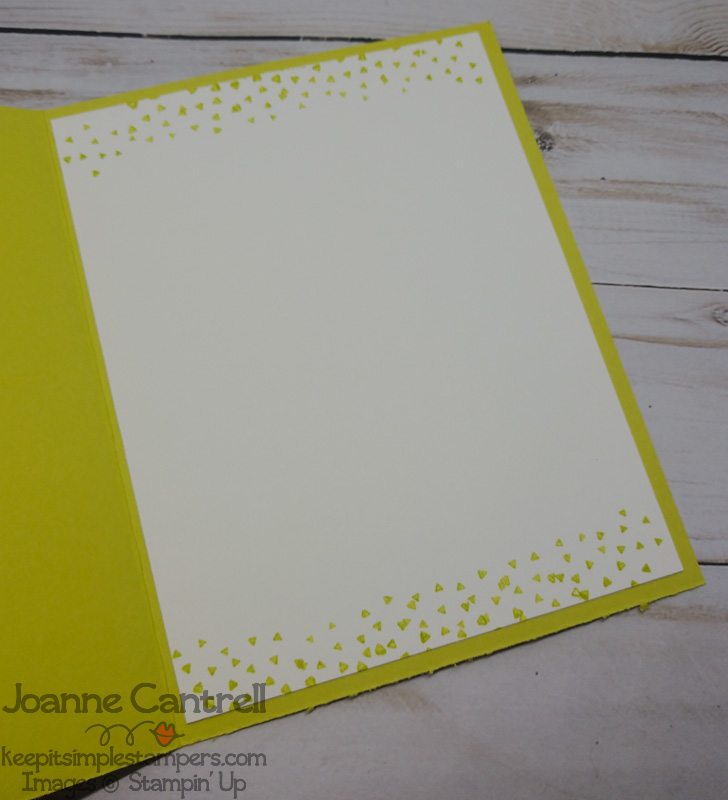
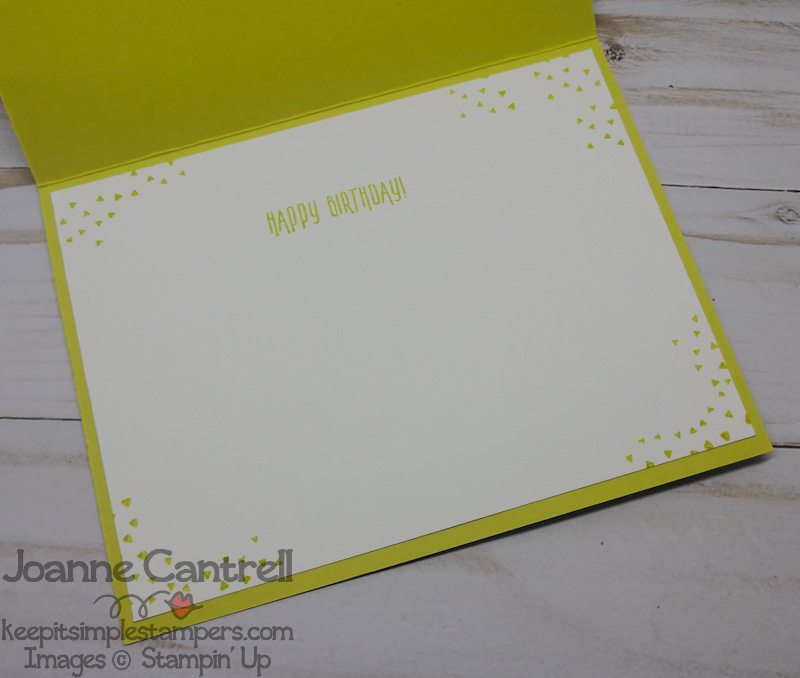
Here is a photo of what I hope to inspire you with today! If you joined my Live and Inkin’ Facebook Live last week, or watched the replay, you saw me create these cards.
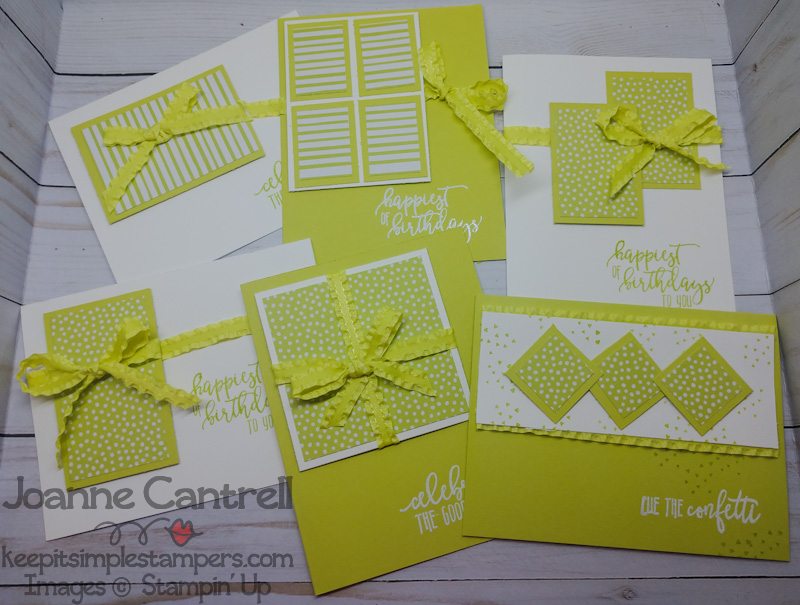
I used a ONE SHEET WONDER template for these cards. It was originally created by Kathy Roney who has inspired several others with it. A one sheet wonder is a great technique to easily create multiple cards in a relatively short amount of time. Plus, it’s a great way to use up any Designer Series Paper (aka DSP). #loveitchopit
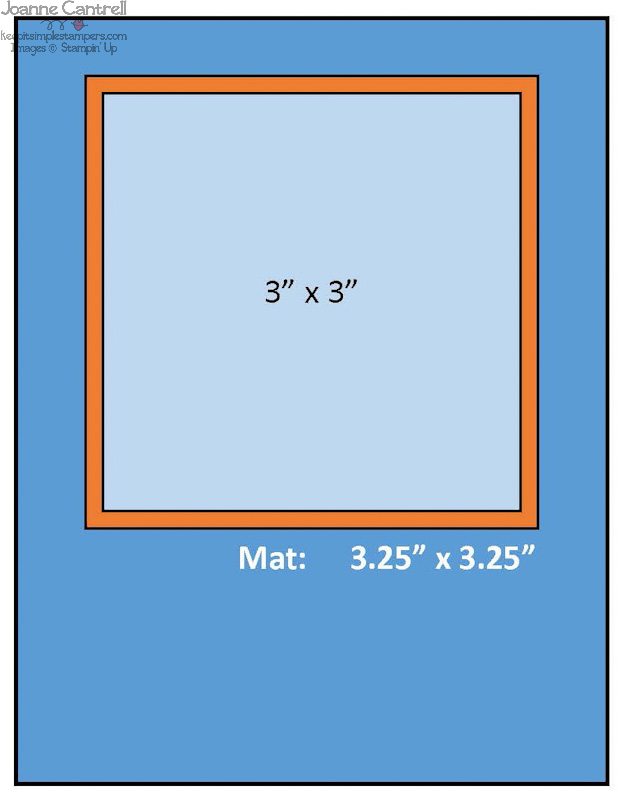
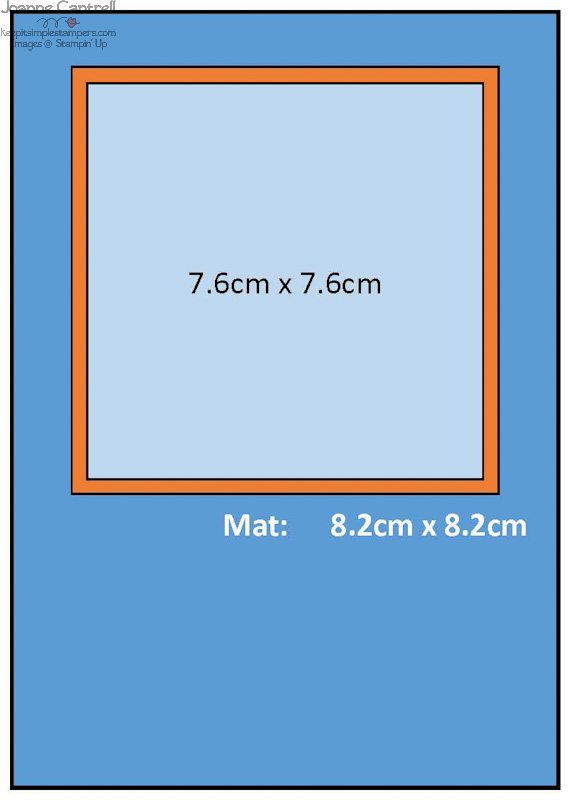
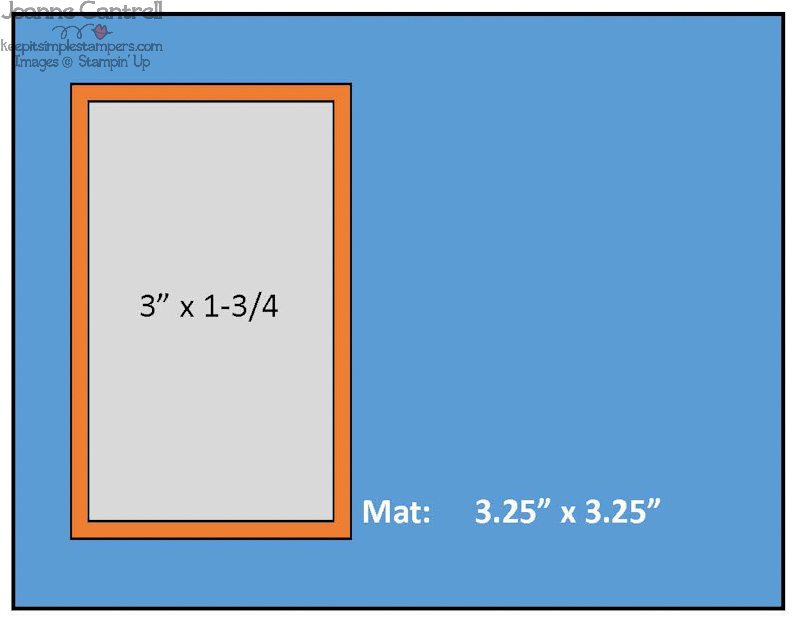
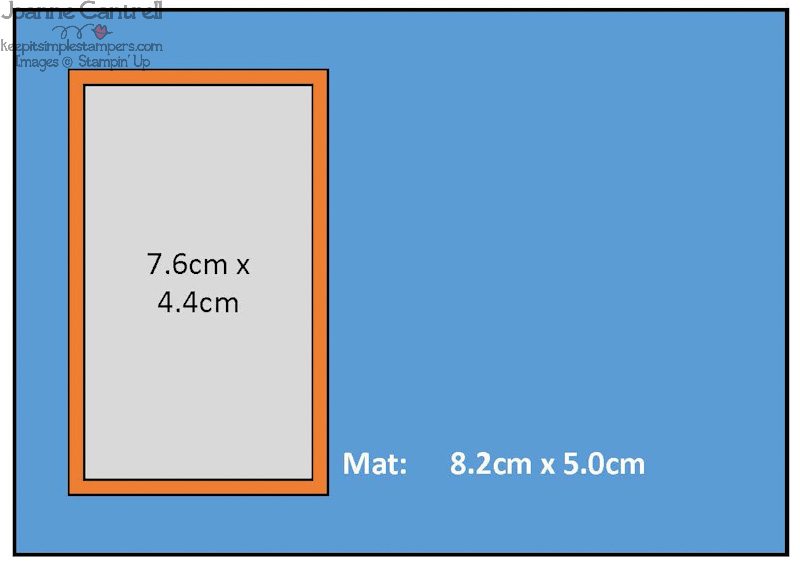
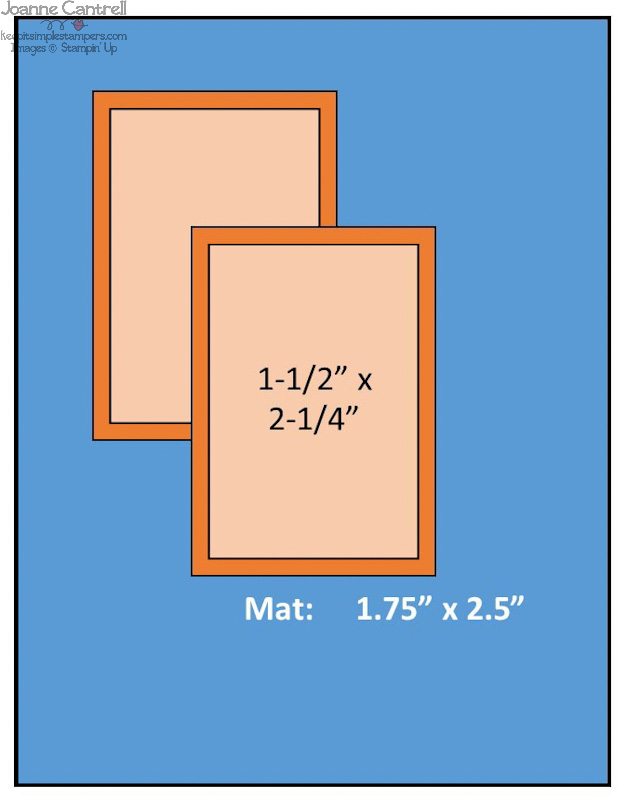
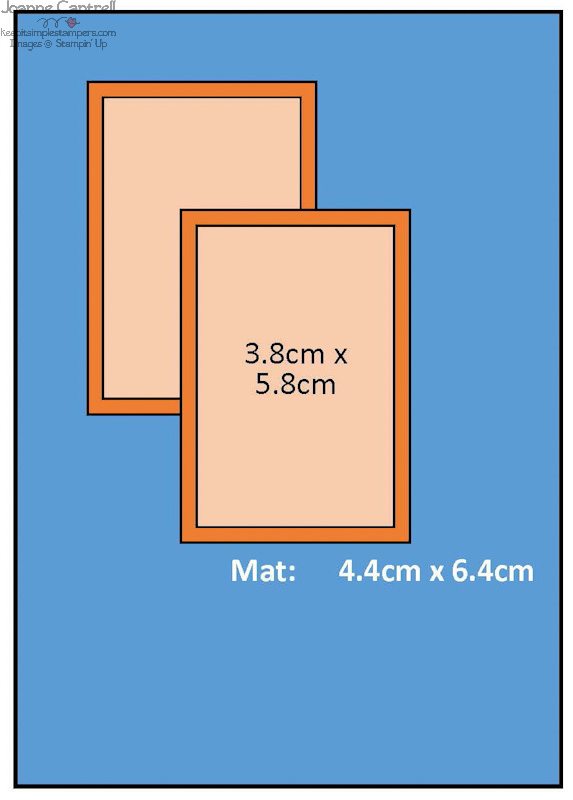
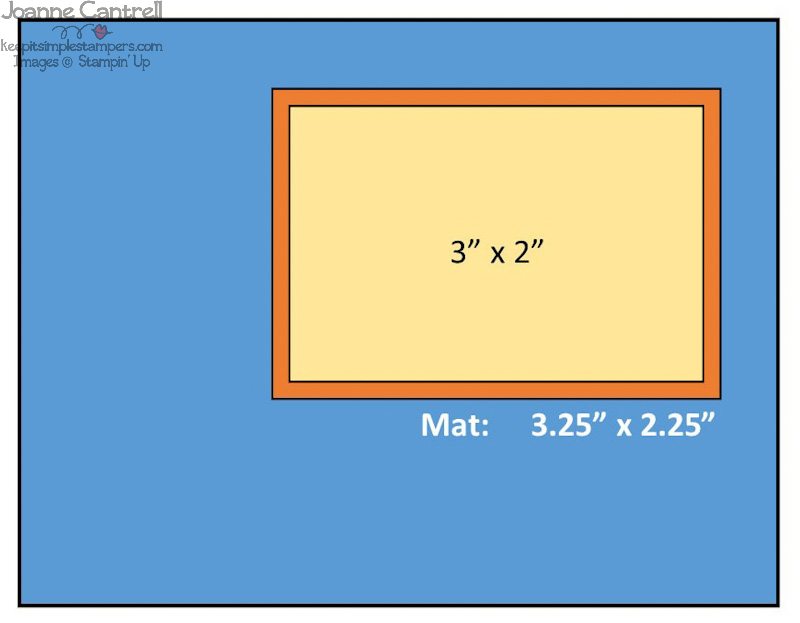
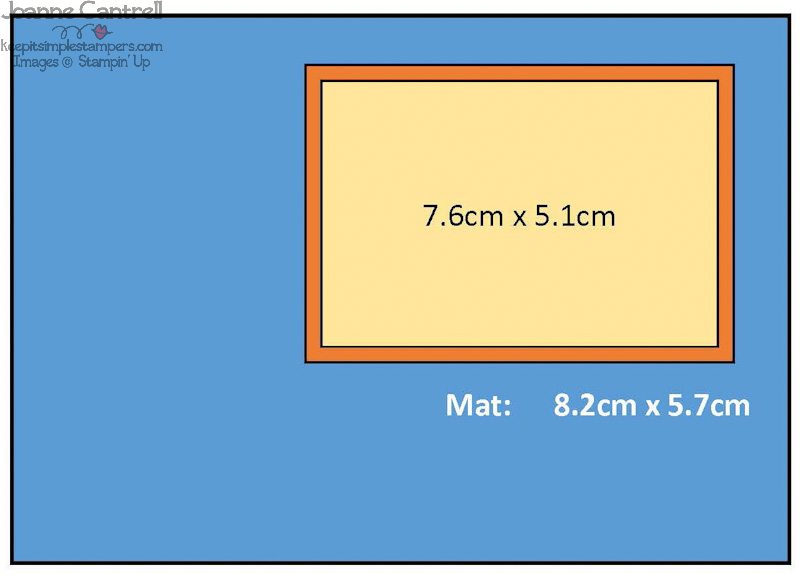
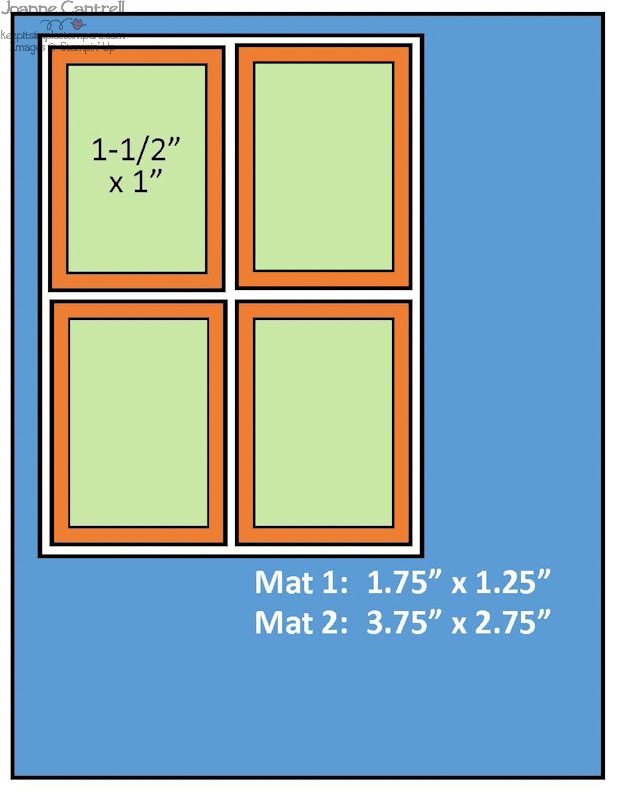
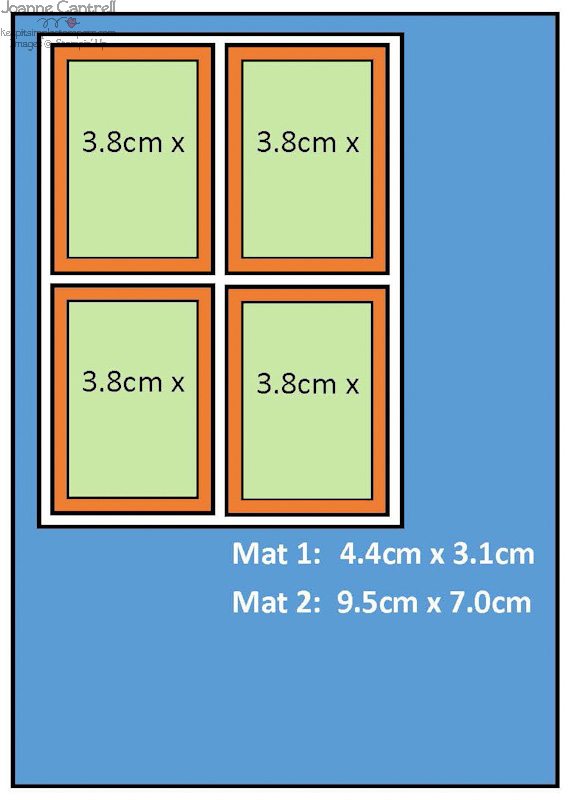
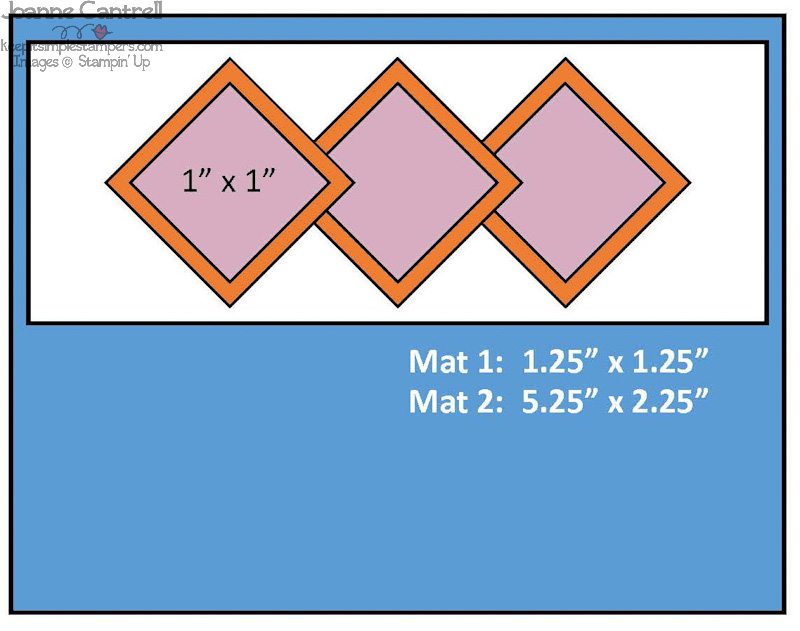
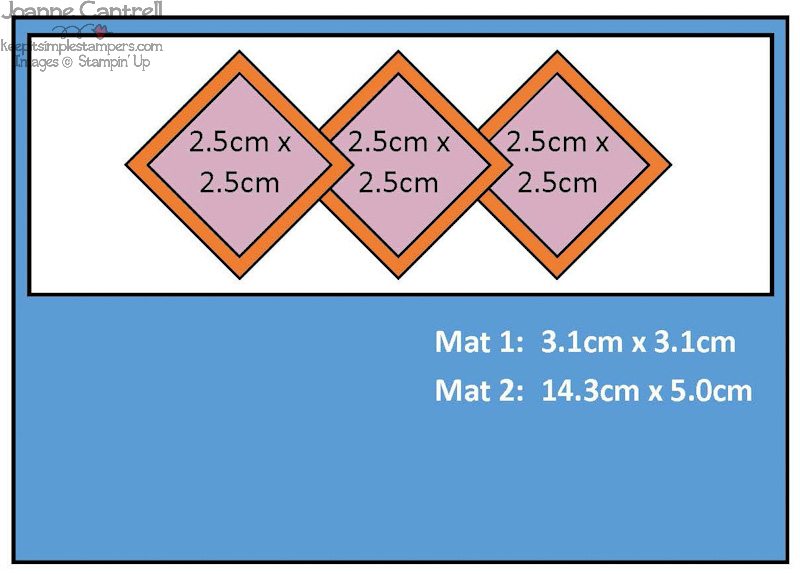
Here is the template. You will notice that I have converted everything to metric as well. Hopefully with will make it easier for y’all that are outside the US.

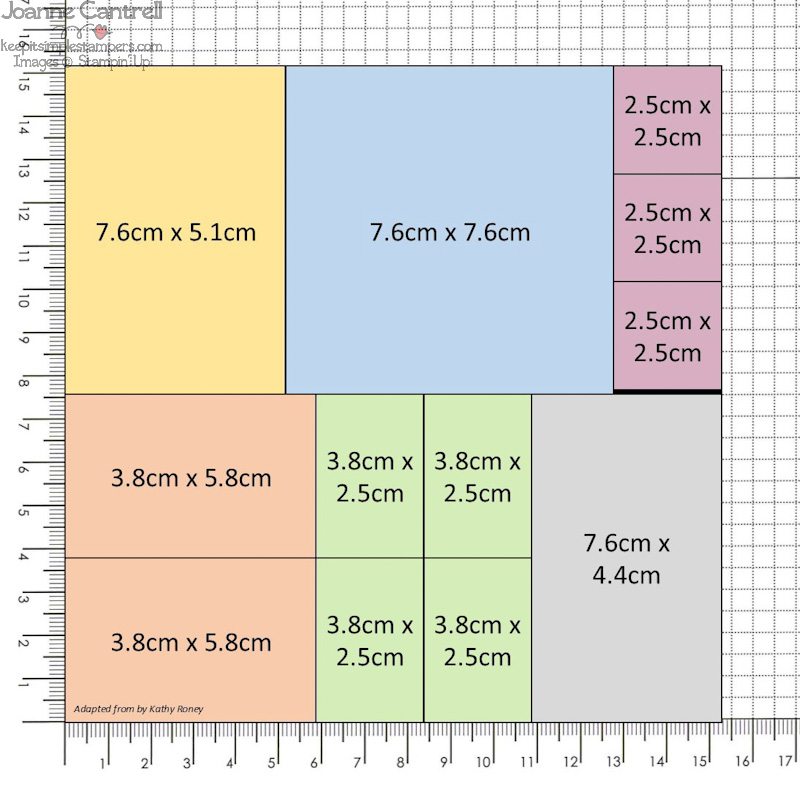
This template makes 6 cards. I have color coded the template as well as the sketches to help match things up. If you are anything like me, you will pay more attention to the colors then to the dimensions given. 😉

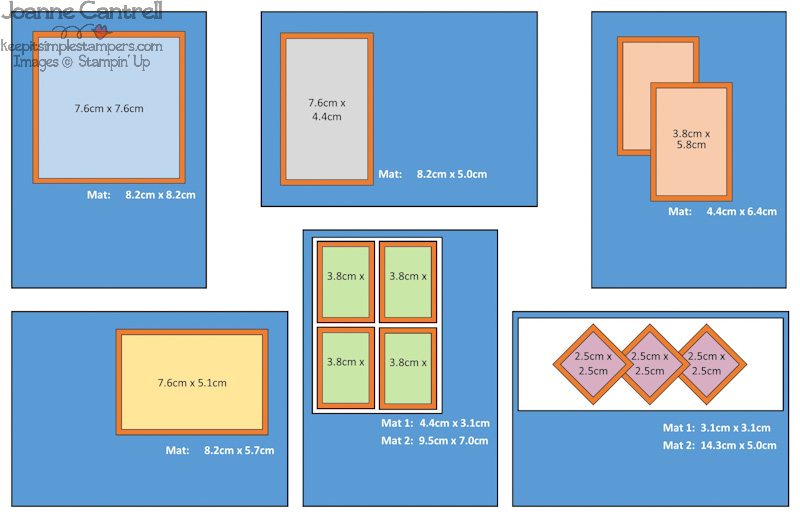
These are all the basic sketches that I used for this set of cards. Most are what Kathy created, a few are what others used.
Now, let’s take a look at each card and it’s sketches up close…
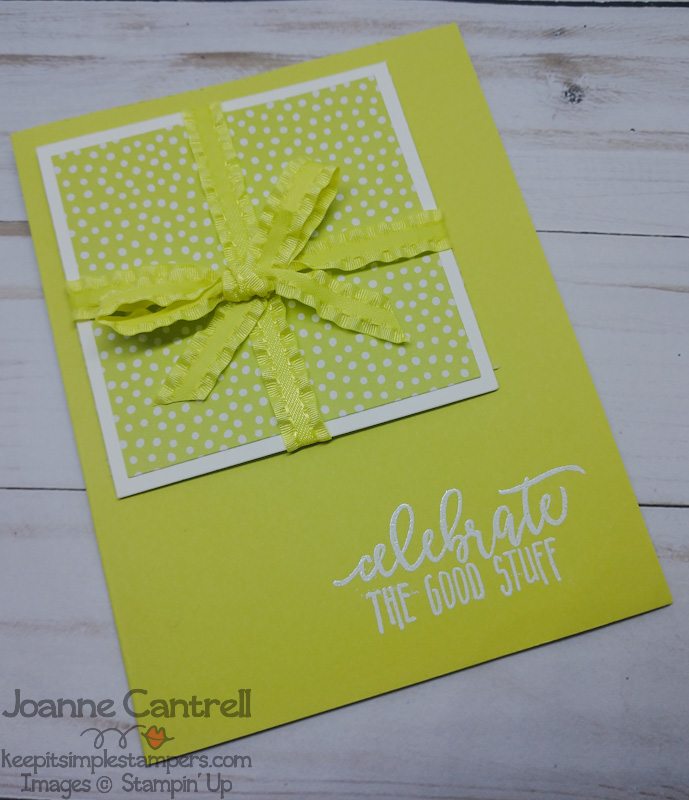
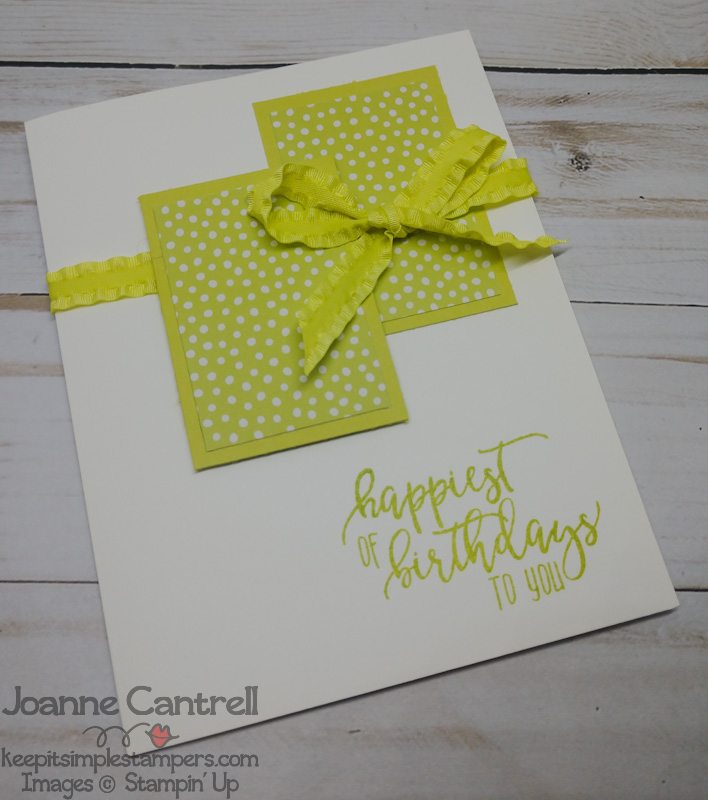
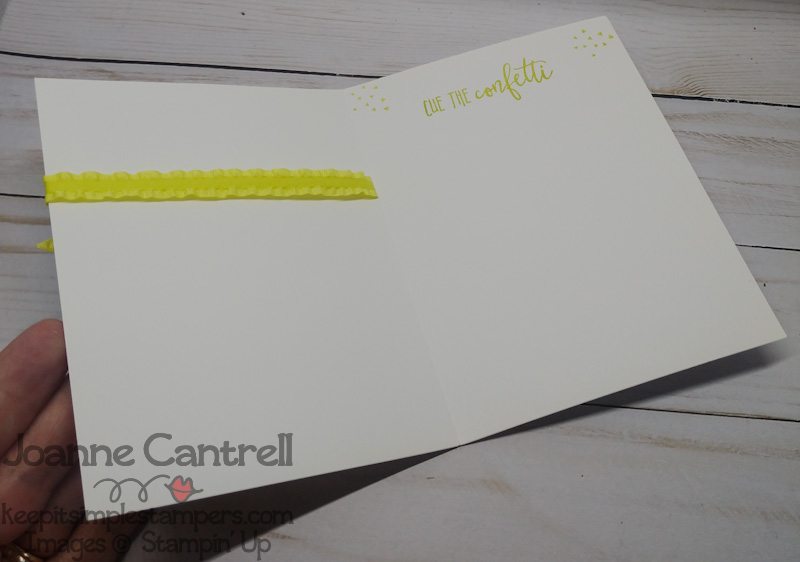
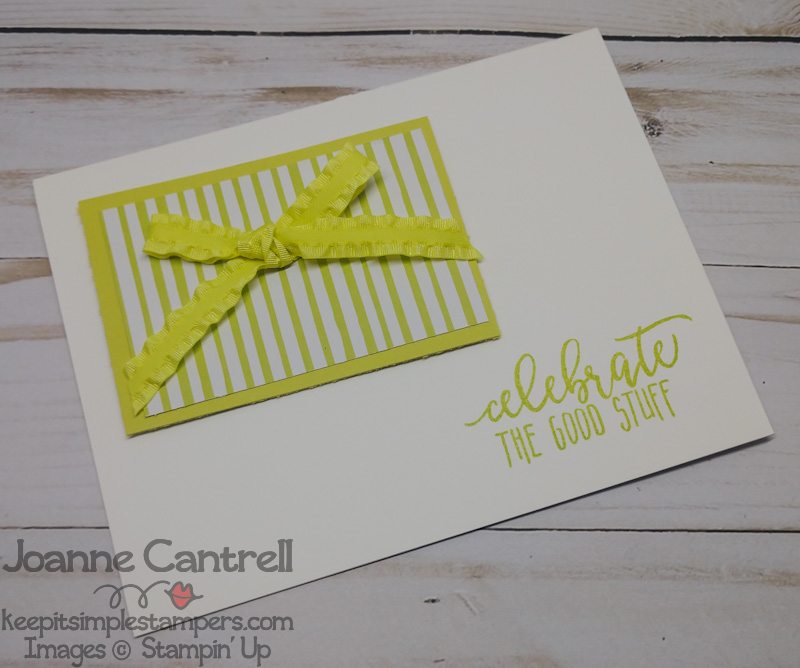
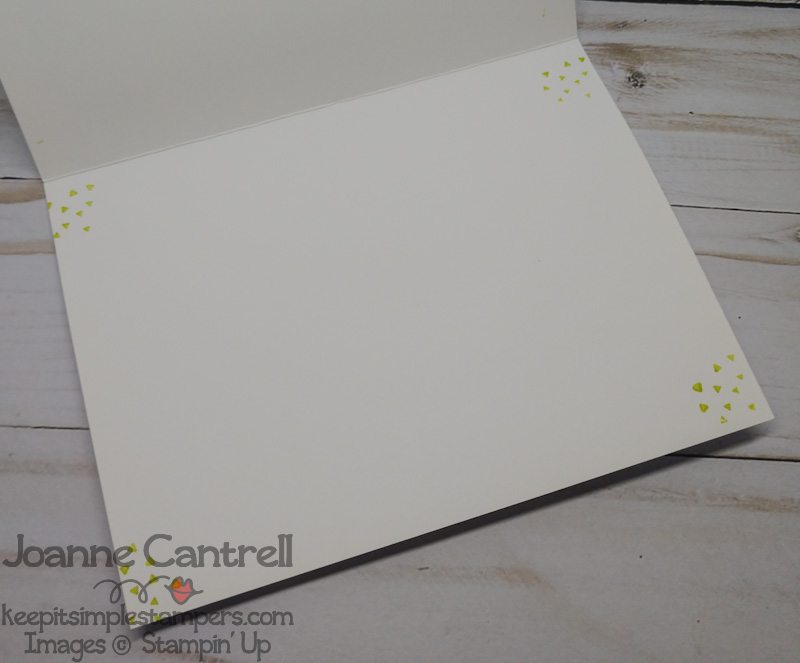
Card #1: I wrapped the ribbon around the layer like a present and tied it in a bow.

Card #2: I wrapped a length of ribbon around the card front and adhered it where it would be hidden by the DSP layer using glue dots. Then, I tied a bow around the layer but did not slide it into position over the other ribbon until AFTER it was attached to the card front using Dimensionals.
Card #3: Yes, I put the layers on the wrong side… Maybe it was in on purpose to show the flexibility of the sketch. Maybe it was really to cover up an inky mistake . You’ll never know (but if you guessed the latter, you are probably not wrong! Lol)
To wrap ribbon around a card front in this direction, VERY CAREFULLY use your (open) Snips to cut a small slice along the fold of the opened card front. The slit should be positioned where you want the ribbon to lay and just long enough to slip the ribbon through. You may need to use your piercing tool or your snips to help carefully push the ribbon through.
Card #4: Nothing too fancy here. Just attached a simple bow to the DSP layer with a glue dot!
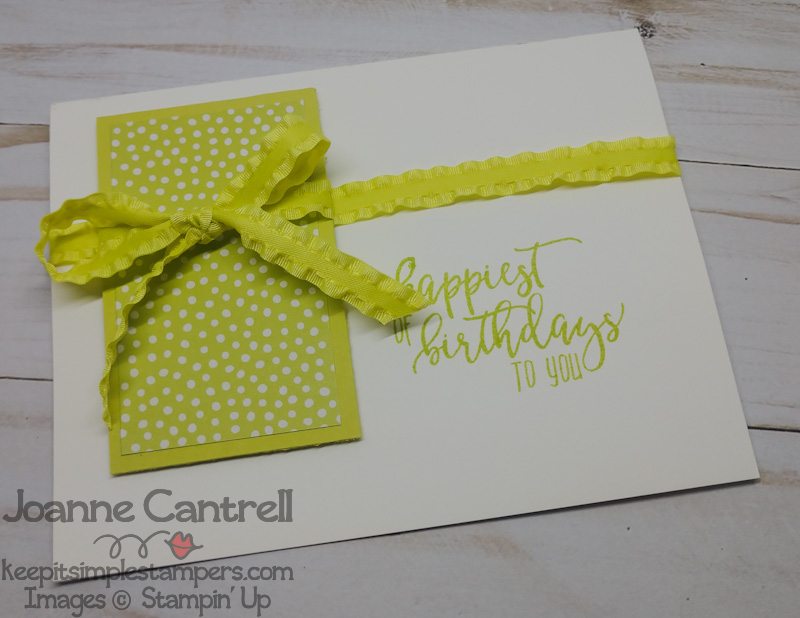
Card #5: Notice the ribbon is not wrapped around anything. I tied a bow with one very long tail. Next, I strategically placed the Dimensionals on the back of the DSP. Then I held the long tail against the DSP layer as I attached it. I used a glue dot to attach the knot of the bow to the card front and one at the edge of the card front to hold the long tail in place.
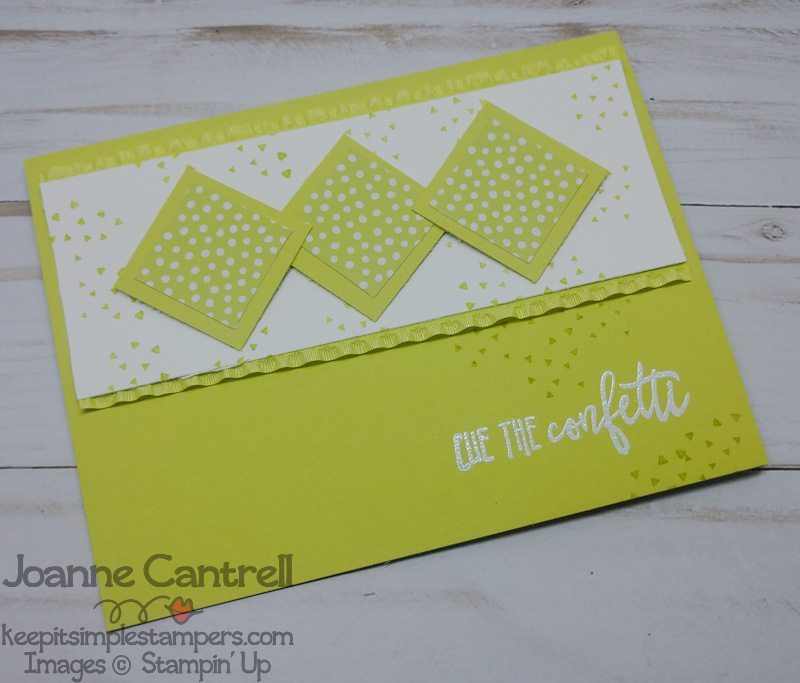
And, Card #6: I ran SNAIL along the back of the too layer and pressed the ribbon on it. I then used Dimensions to pop it up from the card front. As far as placing the diamonds in the right spot… I place the middle one first, even if I don’t adhere it. You will probably want that one in the center!
Just a few more tips and tricks that I used…
First of all, “dry fit” everything. I am a form believer of this! Cut your pieces then lay everything out as it will go on the card BEFORE you stamp anything… and more importantly, before you use any adhesive. I actually printed the graphic of all the sketches on an 11″ x 17″ piece of paper so I could lay them out on it.
Feel free to add more… Feel free to add less. The great thing about this template and my sketches are they are completely customizable. Make these your own – then share in the comments so we can all see your creativity!
Well, that’s all I have for you today! Go on and check it the rest of the Stampers Dozen Blogs!
Stamper’s Dozen May 2019 Blog Hop
- Patty Chenail – Stamp-Patty’s – Stamping In My Flops
- Judy Garza – Creativity Released
- Sharon Hashimoto Burkert – As the Ink Dries
- Kelly Acheson – A Stamp Above
- Carol Payne – Carol Payne Stamps
- Joanne Cantrell – Keep It Simple, Stampers
- Rachel Yurkanin – Rachel’s Stamping Place
- Debbie Naylor – Unfrogettable Stamping
- Bonnie O’Neill – Bonnie Stamped
Until next time… keep it simple, Stampers!
🙂 Joanne
What a fabulous resource this post is!! Love the layouts and cutting instructions. TFS
Love One Sheet Wonders! Thanks for sharing!
I really enjoyed your sketches. I even saved them to Pinterest. What I’m having trouble understanding is the ribbon trick in #5. I’m being densed today, because it hasn’t made sense to me at all! Would you consider explainning it again? I know this can be a pain, but, I just don’t understand? I really like these cards!
Thanks, Gloria. I’m not always the best at explaining things, so maybe this way will make a little more sense…
Use only four Dimensionals, one in each corner. Attach that layer to the card front. Tie the bow with long strings (tails) left having down. Slide one of the tails under the layer (using a piercing tool or small ruler may help push it through) until comes out the other side. Gently pull until your bow is where you want it. Adhere the knot of the bow with a glue dot trim the ends as desired. Use a glue dot to secure the end of the one under the layer and let the other hang free.
Hope that helps! If not, I can do a quick video!