Go for Greece Blog Hop

Welcome to my little corner of the interwebs!  I am glad you hopped by!  My name is JOANNE CANTRELL and I live in a very small town in the middle of the United States.

I am very proud to be part of this amazing group of Stampin’ Up!© demonstrators from around the globe.  We are all in a training group hosted by the dear, sweet Kylie Bertrucci.  We are learning and working our way to Greece.

Each year, Stampin’ Up!© offers all their demonstrators a chance to earn a really great incentive trip.  So, if you would like to travel the world on someone else’s dime… just ask me how!

But, in the meantime, take a gander at what we have to inspire you with!

There was not an official theme for this blog hop, so I decided to do showcase a favorite set of mine that will sadly be going away at the end of May.  And, because I am in such a giving mood today, here is a project sheet!

Proj Sheet – Sympathy Rose

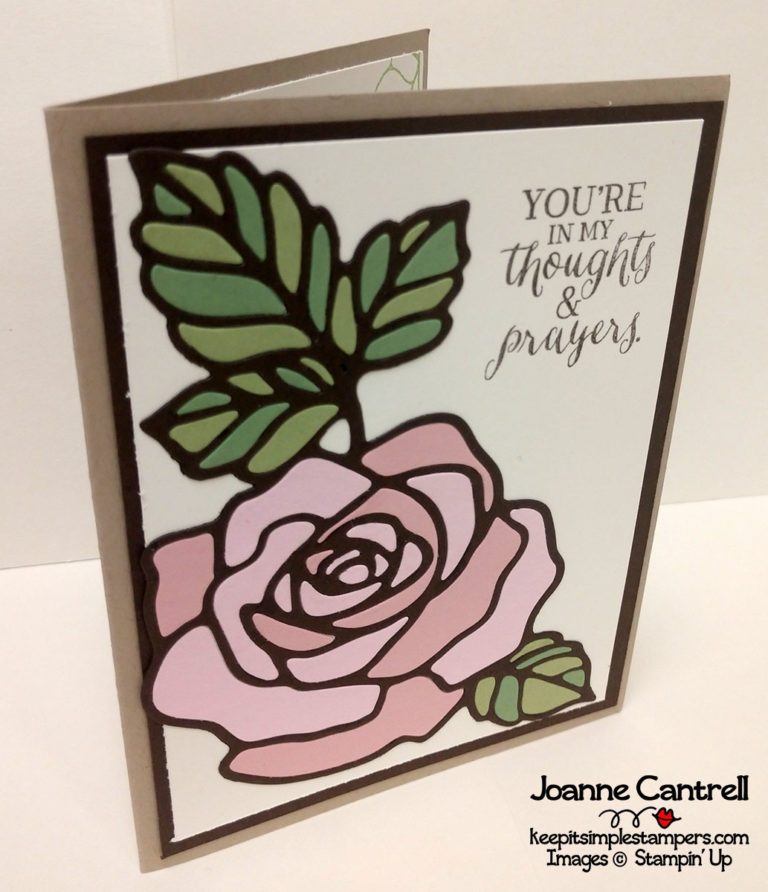
This card was made using the Rose Wonder stamp set and the Rose Garden Thinlits.  I used the Paper-piecing technique on this card.  This bundle always lent itself beautifully to that technique.  Don’t you think?

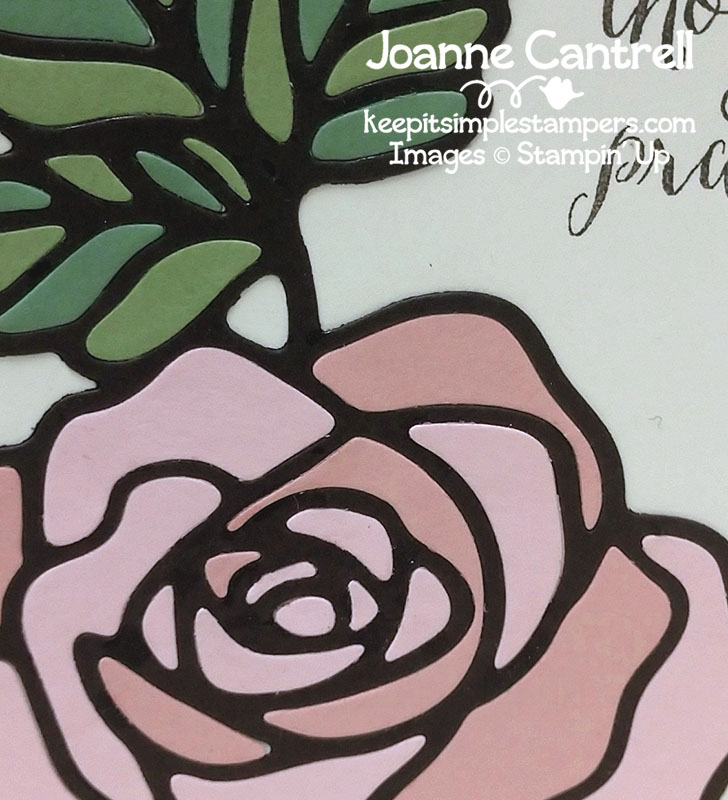
Here’s a little closer look at the piecing.

This is the perfect use for the Multipurpose Adhesive Sheets.  It mess-free and saves a lot of gluing – which in turn saves a lot of time and makes this technique even easier!

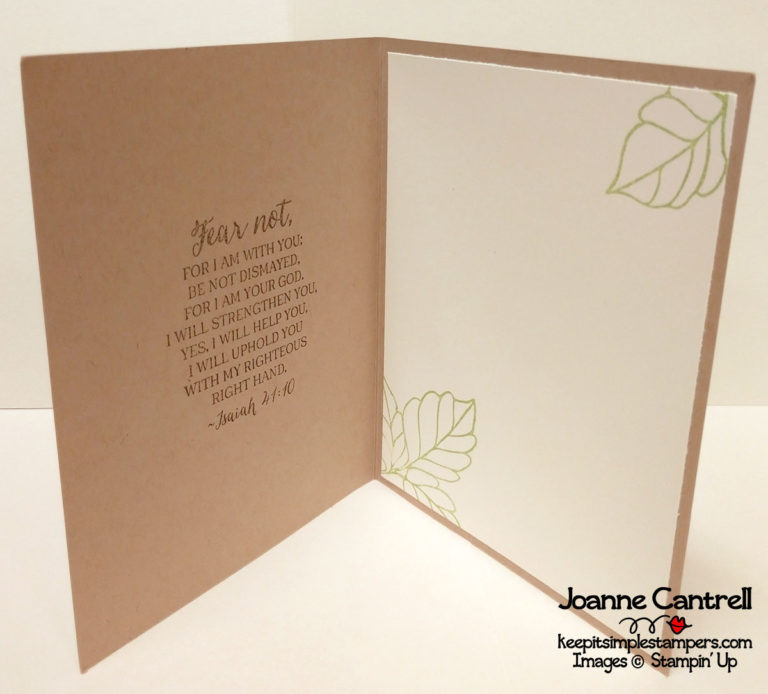
Let’s take a quick look at the inside of the card.

Do you see what I did here?  I put the sentiment on the opposite side.  How often did you buy cards like this (before you were a card-maker, of course).  And, how often do you do this on the cards you make?  I very rarely ever do!  I am not sure why!  It makes perfectly good sense!

Now, I will tell you before I leave you (or you leave me…)  THE ROSE WONDER STAMP SET AND THE ROSE GARDEN THINLITS ARE RETIRING!!!  Get them now while you can.  This is a great set for many occasions.  I suggest you order it today!!!  Like right now!  What are you still doing reading this???  All you have to do is click the links below and you will be taken right to my store to add them to your cart!

Rose Wonder Photopolymer Stamp Set

Rose Garden Thinlits

Well, if you have now ordered it…  you are free to hop along to the next blog in the list. Remember, you are currently visiting JOANNE CANTRELL.

Until next time… keep it simple, Stampers!

🙂  Joanne

PS – here is a supply list

Product List

Links by TheseAreMyStamps.com

Stamper’s Dozen Blog Hop – Think Spring

Welcome to this month’s episode of the Stamper’s Dozen Blog Hop! You are currently visiting Joanne Cantrell. This is one hop that I look forward to each month because the projects are always over-the-top wonderful! I am sure this month will be as well.

Our theme this month is THINK SPRING!  I am sure there are some of you that have been snow-bound all winter and ready for a little warmth.  Or, maybe your are currently enjoying the heat of summer and need a little coolness that spring usually offers.  Right now, I am sitting through yet another rainy day.  It’s days like today that I have to remind myself that it is SPRING and we need the rain to bring us all the beautiful flowers!

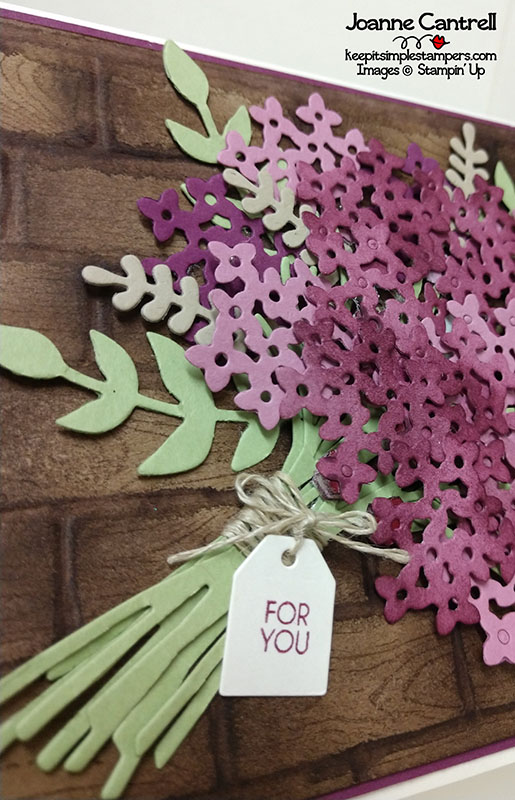
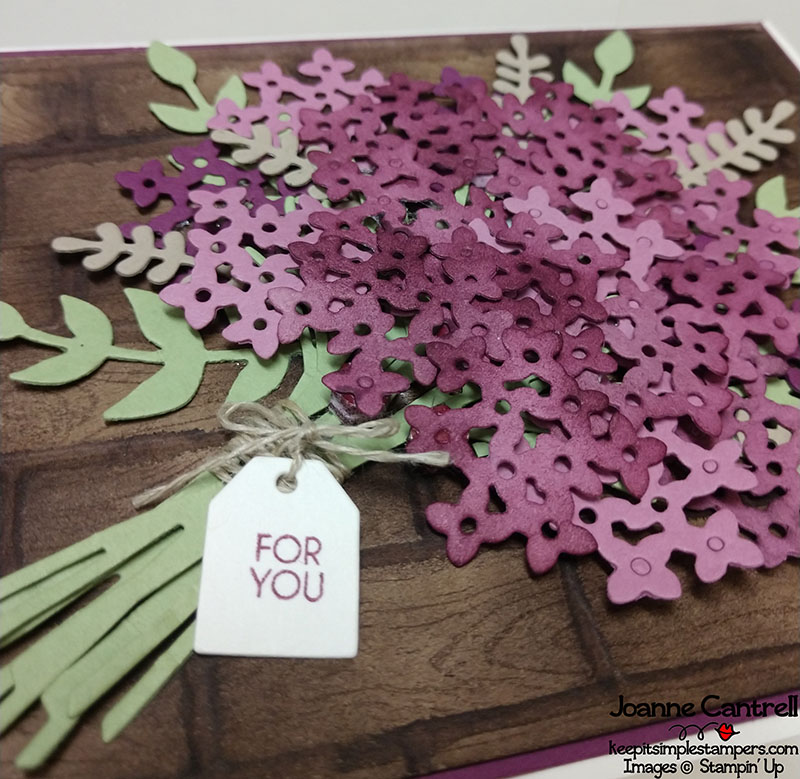
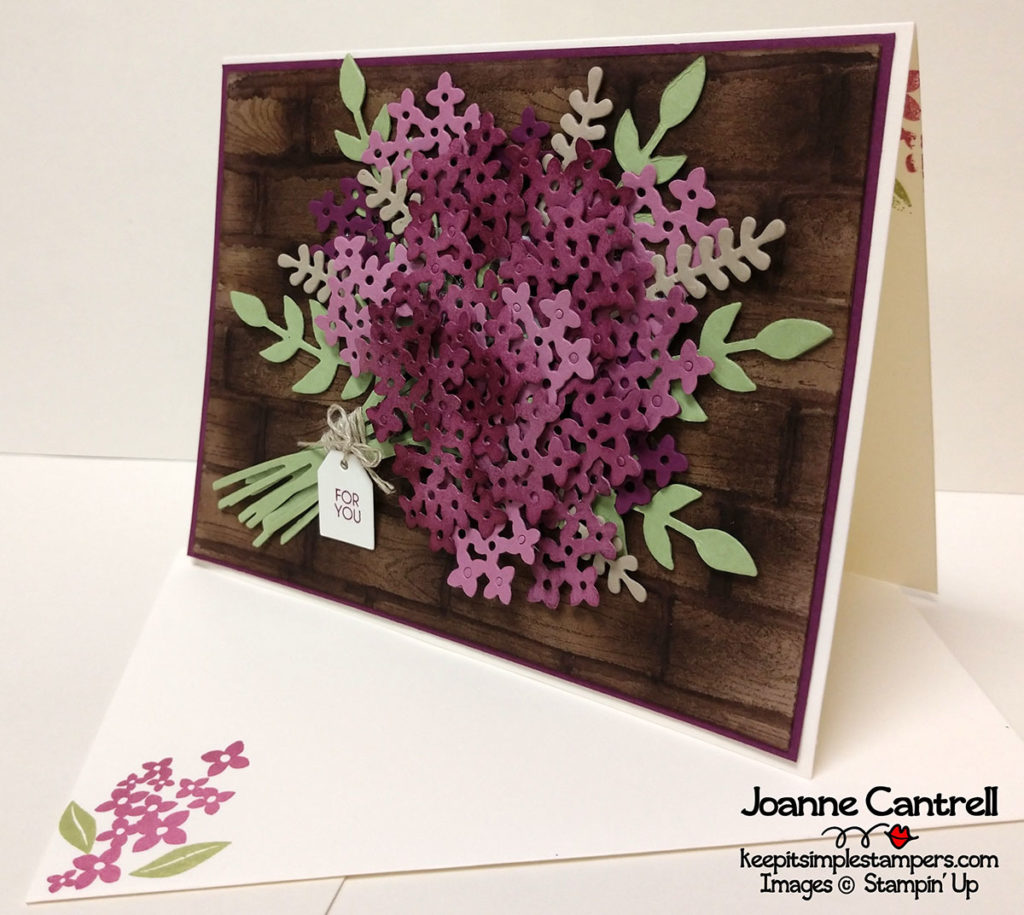
So, with that in mind, I thought SPRING and thought of my favorite flowers growing up.  Who doesn’t love the smell of Lilacs?  I remember we had a huge lilac tree when we lived in Maine.  It would burst forth with the most lovely purple flowers!

So with a little inspiration from Karen Ilsley and Lyssa Griffin Zwolanek, I created this beautiful card for a friend named Spring!  (Yes, truly I have a friend whose name is Spring – technically it’s her middle name, but it’s what we all call her!)

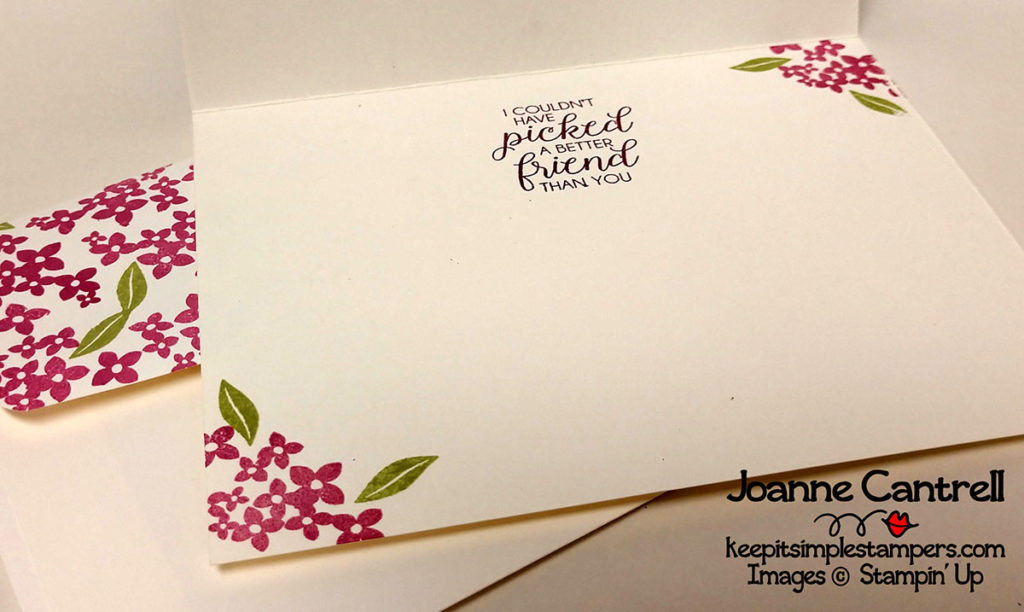
A quick peek at the inside!  And, notice, no naked envelopes!

I used the Beautiful Bouquet Bundle (145297) to create the flowers. While I cut a couple blossoms out of the Rich Razzleberry cardstock, most of them were cut from Sweet Sugarplum.  I sure am going to miss that color!  I used a sponge and some Rich Razzleberry ink to give depth to most of the blossoms. I have a complete supply list at the bottom of this post!

I didn’t really think there was a need to pop out all those little holes.  I think it helps add texture!

The background is a faux basket weaving technique that starts with a piece of Crumb Card cardstock that is embossed with the Brick Wall folder.  I little sponging and aqua-painting as well as a trip to the Hardwood background stamp and Voila!  You have a really cool background!

A little Linen Thread for the tag and you have a perfect card for any girl on your list!

Well, that’s it… Thanks for stopping by… now hop along through the list.


Until next time… keep it simple, Stampers!

🙂 Joanne

(Read the notes below the list for a little secret!)

Product List

Links by TheseAreMyStamps.com

I may surprise you that there is a Blends on the list.  I used this to color in the white dimensionals that showed through the holes in the flowers.  It worked perfectly and dried on the glossy surface.  But, do it before you attach them – at least the top side… then you won’t have a ink ring around the hole!  🙂


Go for Greece Blog Hop

Welcome to my little corner of the interwebs!  I am glad you hopped by!  My name is JOANNE CANTRELL and I live in a very small town in the middle of the United States.

I am very proud to be part of this amazing group of Stampin’ Up!© demonstrators from around the globe.  We are all in a training group hosted by the dear, sweet Kylie Bertrucci.  We are learning and working our way to Greece.

Each year, Stampin’ Up!© offers all their demonstrators a chance to earn a really great incentive trip.  So, if you would like to travel the world on someone else’s dime… just ask me how!

But, in the meantime, take a gander at what we have to inspire you with!

There was not an official theme for this blog hop, so I decided to do a card that I just needed to do then share it with y’all!

If you are a regular follow of my blog, you know how much I hate to mail things.  I have no issue with slapping a stamp on something and dropping it in a mail box – even though there are times that even that is most difficult!  So, I knew I never should have promised my father cookies for Christmas!

But, I did.  I spent hours baking!  I made tons o’ cookies!  All of the family favorites.  Then, I neatly set some aside for him and told the kids they could eat the rest.  But, the kids, I guess, decided I didn’t mail them soon enough and ate them all!  Now no cookies for Dad!

Well, I am going to visit him next week and will hand deliver a new box of cookies and needed a card to go with them… long story short… here is the card!

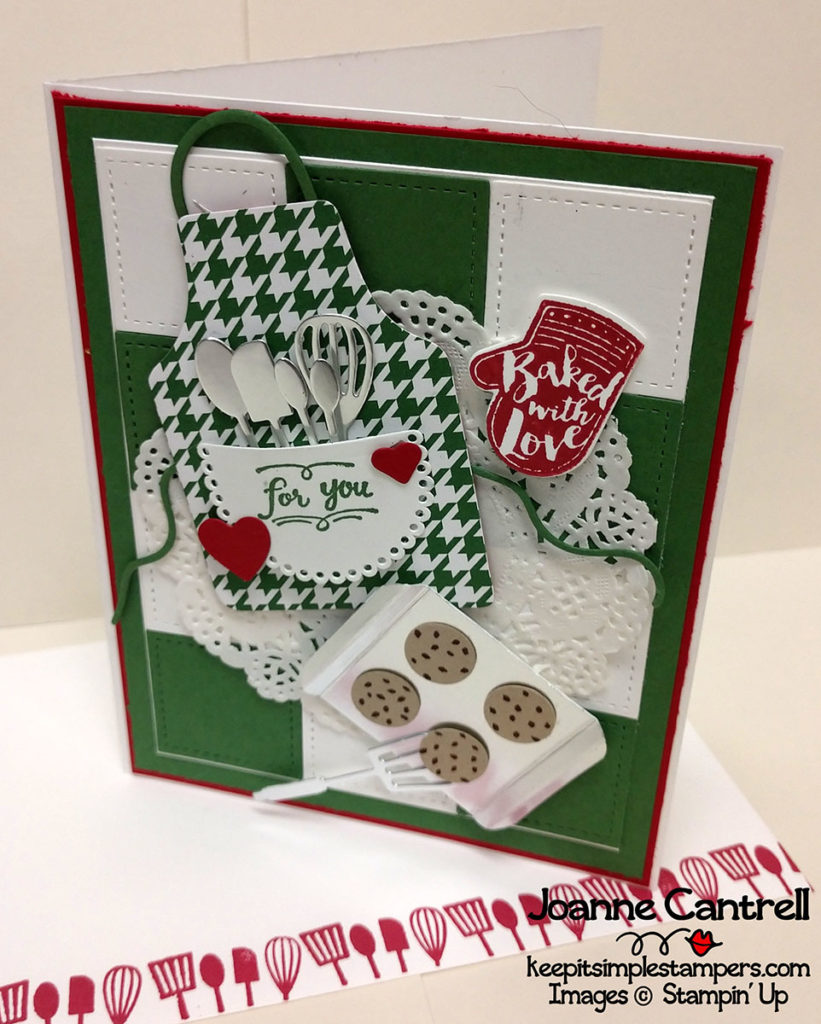
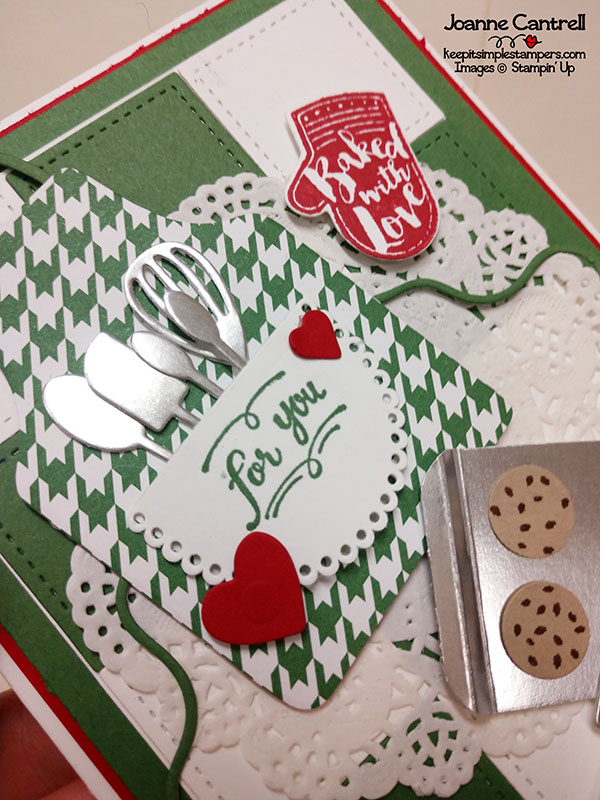
I really tried to make it feel like a hint of Christmas without screaming “I AM A CHRISTMAS CARD!”  I think I may have come close.. what do you think?

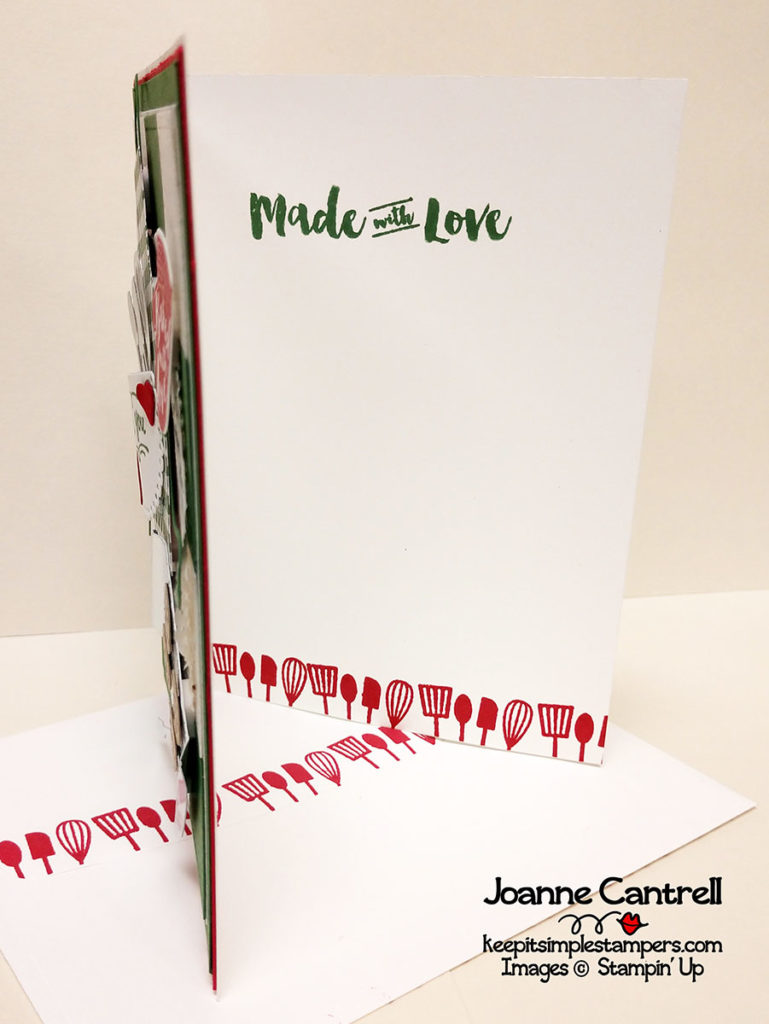
A little sneak of the inside…

Raise you hand if you hope that this Apron of Love Stamp Set and Framelits reappear in the new Annual Catalog.  Can you imagine the goods that you can make at all times of the year.

Let’s take a closer look at the detail.

I used Whisper White, Real Red, and Garden Green as my color scheme.  Added Silver Foil utensils and cookie sheet, which holds 1/2″ circle punched Crumb Cake cookies chipped with an Early Espresso Stampin’ Write Maker.  And, don’t you just love that Apron?  That Designer Series Paper is truly Christmas Paper.  It’s one of the patterns in the Be Merry DSP pack that is in the 2017-2018 Annual Catalog.  I just love the hounds tooth!  (An official list of supplies can be found of the end of this post!)

The background was inspired by a card that Mary Fish made using this same bundle.  The “tiles” are cut using the smallest of the squares from the Stitched Shapes Framelits.

Well, I hope this little non-Christmas card inspires your creativity!  Time to hop along to the next blog in the list.  Remember, you are currently visiting JOANNE CANTRELL.

Until next time…  Keep it simple, Stampers!

🙂  Joanne

Product List

Links by TheseAreMyStamps.com

Blended Away

Have you experienced the greatest thing since the Stampin’ Write Markers?

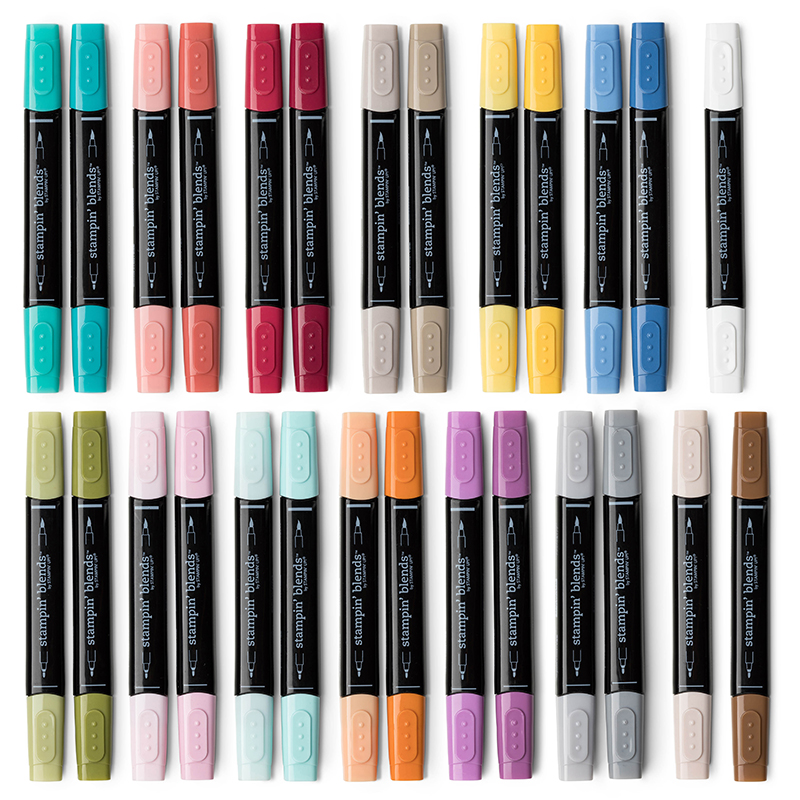
Stampin’ Blends are very high-quality, alcohol-based markers.  They are dual tipped and come in 2 shades each of twelve of Stampin’ Ups most loved colors plus three other colors. colors… a total of 27 markers!

Well, they have been all the rage globally!  And because of this, Stampin’ Up suppliers are unable to keep up with demand.  Due to this issue, the powers-that-be at Stampin’ Up made the difficult decision to temporarily suspend the sale of the 27-marker set (147475) effective March 23, 2018 – 12pm noon MT. This is because many of the most popular colors are already on backorder or low-inventory status.  The puzzle cannot be completed if some of the pieces are missing!

So, hurry and buy your set now!

Thankfully, these markers will be back once supply has been able to catch up with demand.  Stampin’ Up assures us that they will all be available again on May 28, 2018… this aligns very closely to the release of the NEW 2018-2019 Annual Catalog.

So, don’t miss the boat as these are temporarily BLENDED AWAY!

Click here to orders yours today.

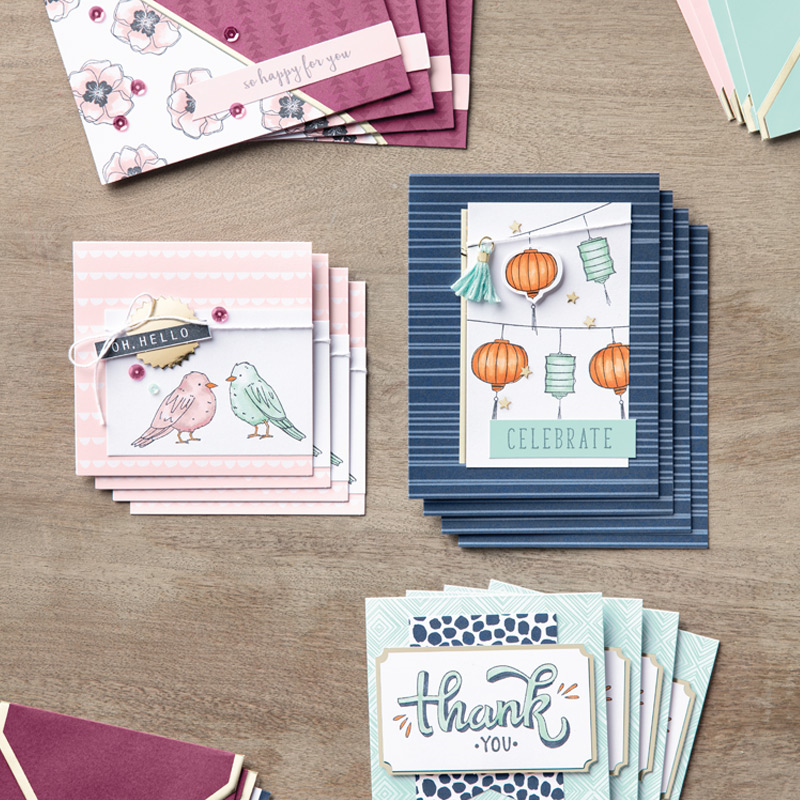
BONUS:  If you add the COLOR ME HAPPY Bundle (148034 – shown above) which includes the Color Me Happy Clear-Mount Stamp Set (144069) and the Color Me Happy Project Kit (144609) with the full set, you qualify for SALE-A-BRATION REWARDS!  You can get 3 Level 1 products for FREE… or 1 Level 1 AND 1 Level 2 product.

Until next time… keep it simple, Stampers!

🙂  Joanne

Ink & Inspiration Blog Hop – Bunnies & Chocolates

Welcome to the Ink & Inspiration Blog Hop. You are currently visiting Joanne Cantrell.  I hail from a tiny town in the middle of the United States.

This month’s theme is Bunnies & Chocolate.

I guess I didn’t read far enough into the theme to see that it really should have been Easter-related.  Oh well – it’s not the first time I have misunderstood and yet they still let me keep hopping with them! Such great gals they are, aren’t they!

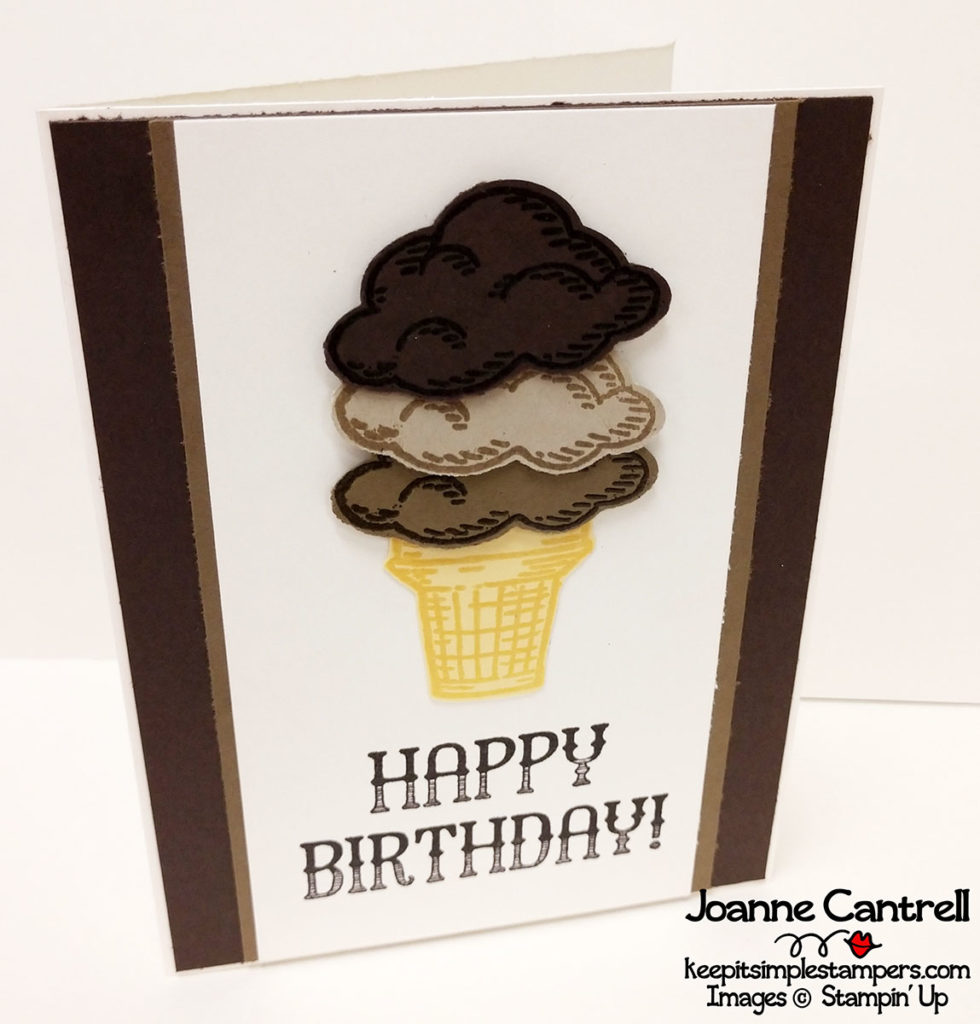
Since I don’t have any bunny stamps, I focused on the chocolate and pulled out a great set, Sprinkles of Life (139971). So, I present to you, three heaping scoops of chocolate ice cream!

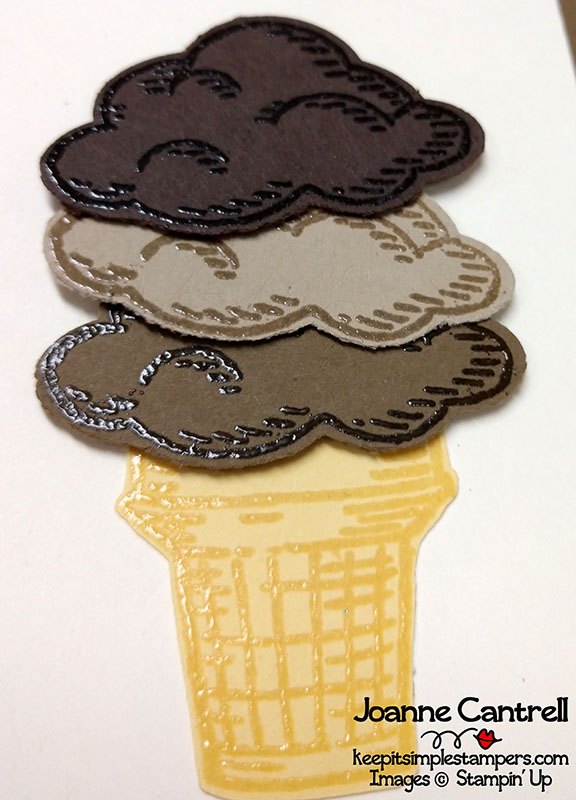
That fudgy chocolate layer on the top is a bit hard to see… so here, but please… don’t lick the screen!

I stamped the image on each cardstock piece (Early Espresso, Crumb Cake, and Soft Suede) using VersaMark then used the Clear Embossing Powder to get that shiny look!   I also did the same thing on the So Saffron cone.  Looks so real, doesn’t it.

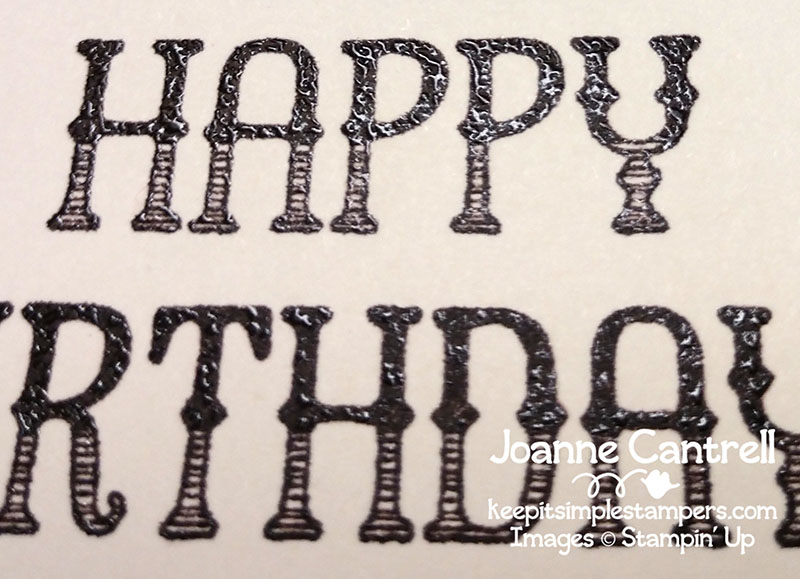
But, that isn’t where the chocolate ends… oh no…  check out the sentiment I used from the Window Shopping Stamp Set (143265 ).

Seriously, does that not look like someone piped chocolate?  To create that look, I stamped the sentiment in Early Espresso then very quickly covered it with the Clear Embossing Powder.  By doing that, I am able to emboss whatever color I want… in this case – chocolate!

Well, that’s it from me today!  I hope the project you’ve saaw here on my blog today has inspired you & brightened your day. You are currently visiting Joanne Cantrell. Please see the list below & hop through all of the people on the list to see all our projects. You don’t want to miss any!”

#IIBH if you’re into hashtags.

Here is the list our other fine bloggers who probably followed directions better than I did! Now hop along!

Until next time… keep it simple, Stampers!

🙂  Joanne


The Remarkable InkBig Blog Hop: Last Call for Sale-a-Bration

Welcome!

You are currently visiting Keep It Simple, Stampers! My name is Joanne Cantrell and I am from a tiny town in the middle of Southernmost Illinois in the middle of the United States.

Today’s theme for the Remarkable Ink Big Blog Hop is Last Call!  And I might add, this is the perfect time to looking at the Sale-a-Bration items before they are gone!

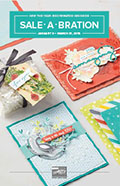
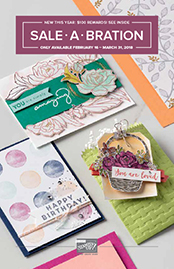
So, with two weeks left in the Sale-a-Bration season, there are tons of FREE Products to choose from.  Click on any of the blow graphics to download the brochure…

Yes.. that is THREE different groups of products you can get for FREE with each $50 or $100 you order.

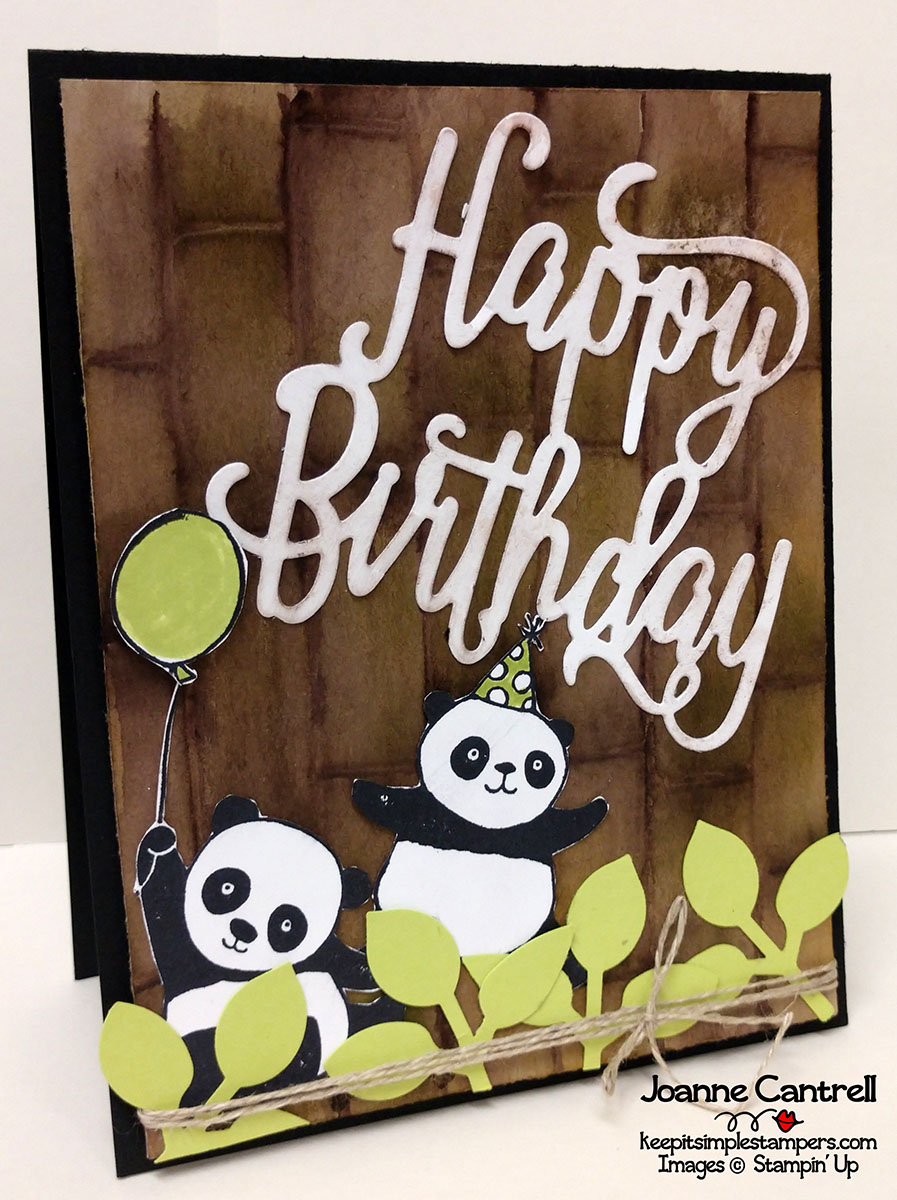
Today, I chose to use the Party Pandas from the first Sale-a-Bration brochure.  As soon as I saw these guys, I just knew I had to have that set.

Look how fun they are!  I created the bamboo-esque background using Lyssa Griffin Zwolanek’s  photo tutorial.  It started with a piece of Crumb Cake and the Brick Wall Textured Impressions Embossing Folder…  a little ink and water later… I had a great background!  Not bad for my first attempt!

I added a few Lemon Lime Twist leaves and some Linen Thread for the Pandas to hide behind since they are very shy creatures!

But… I will be honest with you.  When we first got the Sale-a-Bration brochure in November at OnStage in Salt Lake City…  Which – rabbit trail…  this is one of the best perks of being a Stampin’ Up demonstrator… you get to go to these fun gatherings twice a year where you get to sneak-peek all of the new stuff coming out!  And, you get to order some of it and start playing right away!  But, I digress…  Where was I?

Oh yeah… when I first say these little guys hanging out in the SAB brochure, I leaned over to my dear friend (and upline) Carol Payne and said, “I need to recreate my Hen House card with these pandas!”  And long story short… I finally was able to find the time to do it.

So, in case you need to revisit the Hen House Card…  Check it out here

https://keepitsimplestampers.com/the-hen-house/

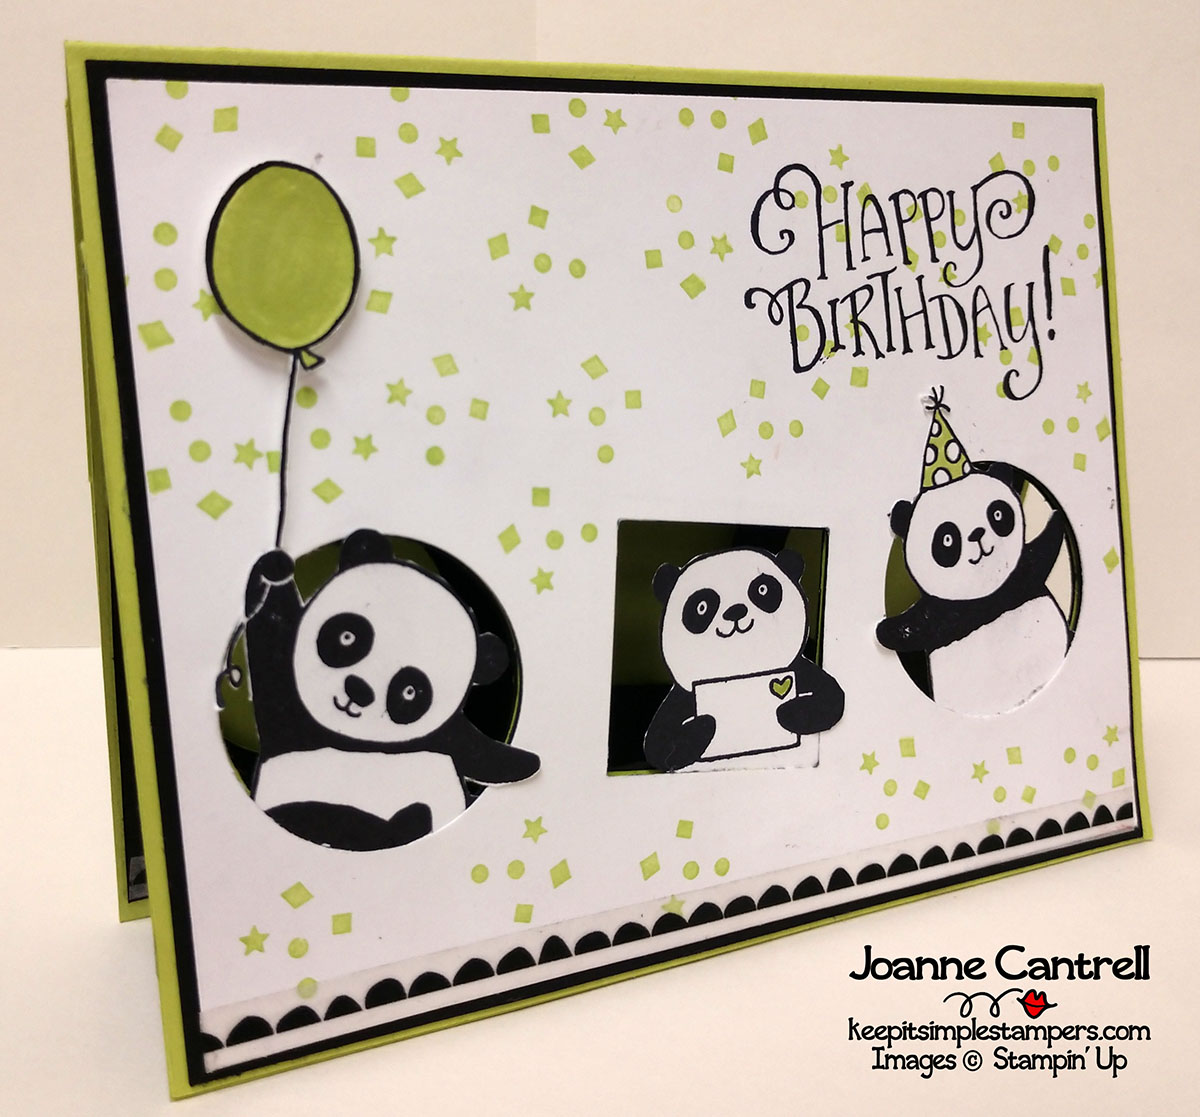
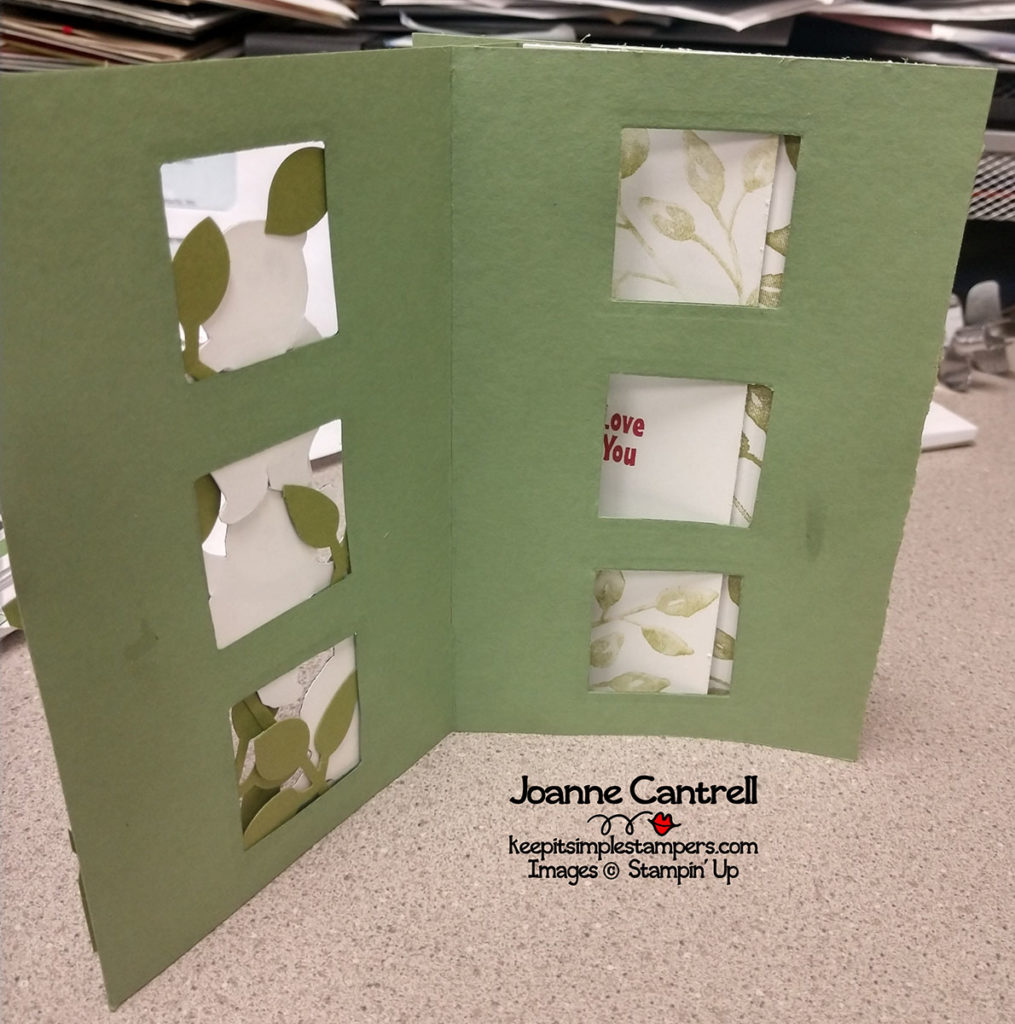
That was my second attempt at a triple peek-a-boo card.  And, I have to say, if it is not a technique you do very often, there is a steep learning curve.  I always have to get out the directions and go step by step (the instructions are in a pdf in the Hen House post!)  Anyway… here is what I created…

I use totally inspired by the color schemes and cards I saw on Pinterest featuring this set.  I love the Lemon Lime Twist with the black and white pandas!  Don’t you?

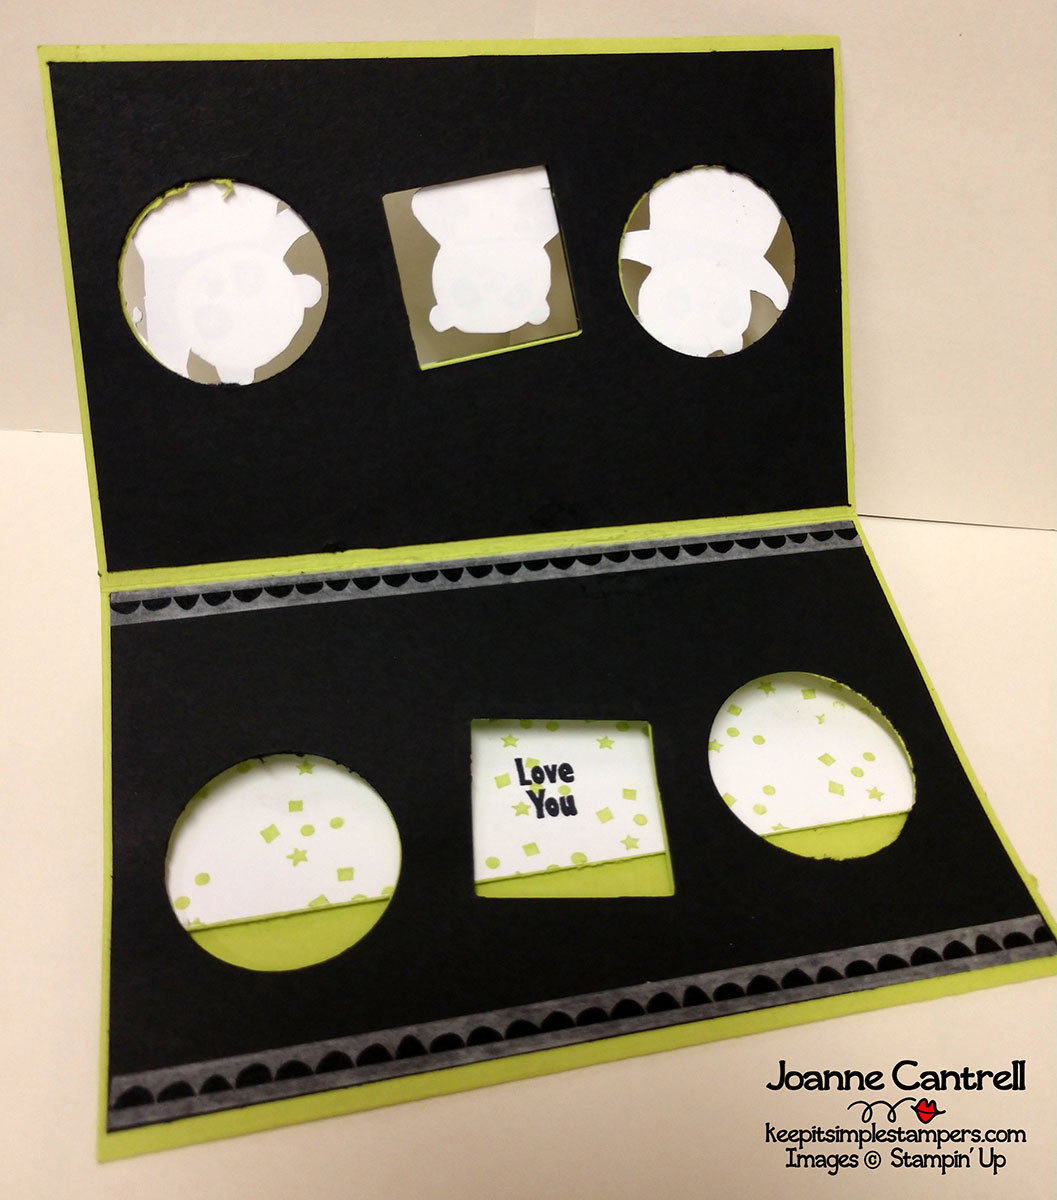
Here is a glimpse at the inside… and while I am being honest, I kinda gave up because I could not get the white layer to lay right, so I didn’t include it.  When I showed my daughter, the first thing she said was “where are people supposed to write?”  I think you can write in the circles or on a post-it.. or figure out the white.  Like I said – this is not an easy card to manipulate.

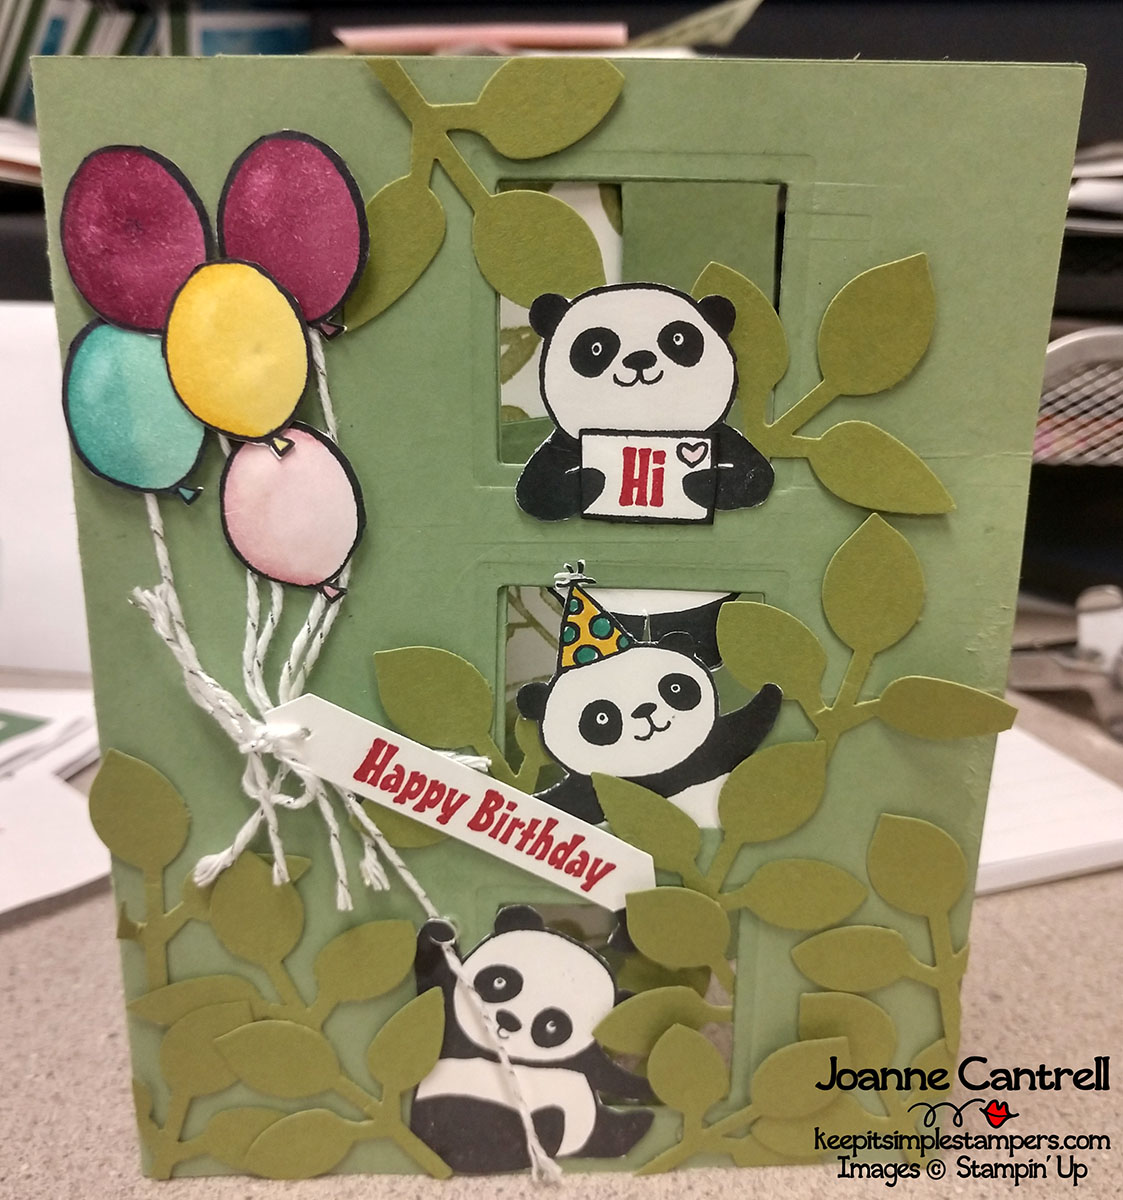
Part of the reason why it took me so long to work out was that I had a failed attempt in December.  I got a picture in my head of these pandas hidden in a bamboo forest.  But, then I lost my leaf punch – by lost I mean misplaced!  So, I used some leaves that I had punched out already but were a color that totally didn’t work.  This proves that even us “experts” get it wrong!  I can’t believe I am even going to show this to you!

Well, that is all I have for you today.  I really think that trying the triple peek-a-boo card is worth the risk… Go ahead and give it a go and let me know how it turns out!  And, if you are able to change it up a little, let me know how!  I am always looking for more inspiration with this!

Hop along now!

Until next time… keep it simple, Stampers!

🙂  Joanne

Stamper’s Dozen Blog Hop: Sale-a-Brate Take 2

Welcome to this month’s episode of the Stamper’s Dozen Blog Hop!  You are currently visiting Joanne Cantrell.  This is one hop that I look forward to each month because the projects are always over-the-top wonderful!  I am sure this month will be as well.

Our assignment for this month is to show off the great products available in the second release Sale-a-Bration brochure.   You can download a copy of this brochure by clicking on it below.

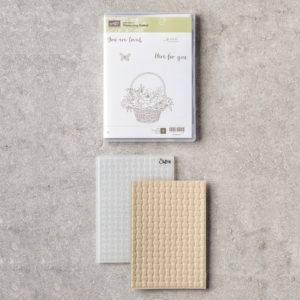
So, I chose to showcase the Blossoming Basket Bundle (147505)!  This bundle is available for FREE with $100 qualifying order.  It includes the Blossoming Basket stamp set in wood or clear-mount PLUS the Basket Weave Dynamic Textured Impressions Embossing Folder!

For my projects, I was inspired by so many different cards out there on Pinterest.  Using these two products in combination are great!  But, I opted to use them separately.

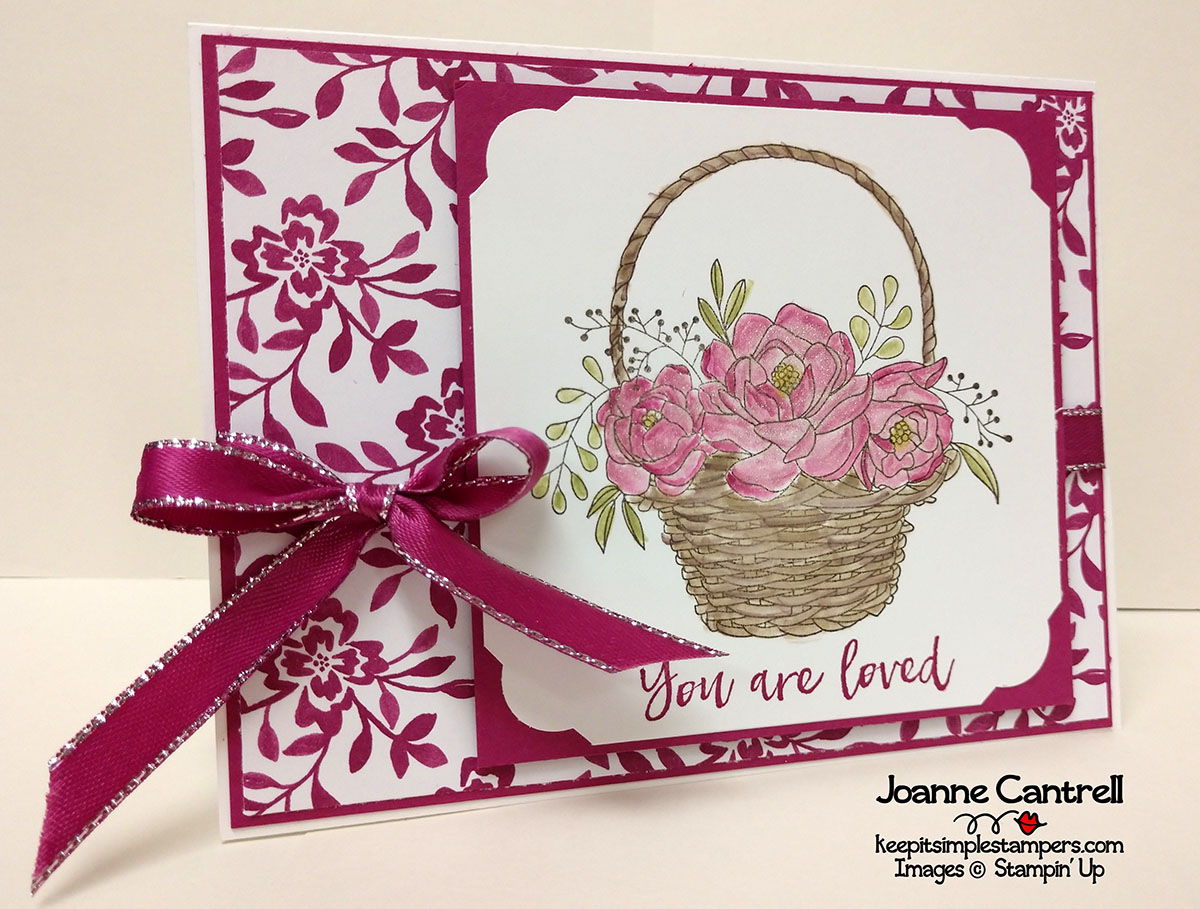
Well, this was really just an excuse to use that gorgeous metallic trimmed Berry Burst Ribbon.  I used a Blender Pen to color in the basket using Crumb Cake and Early Espresso, the flowers using Berry Burst and Crushed Curry, and the leaves are Old Olive.

But, I didn’t stop there…  That sparkley ribbon needed a friend… and what better friend to have than Wink of Stella!!!

Stella always come through for that special touch.

The next card was inspired by Erica Cerwin.  While I am not sure if she was the first to do this, but I can confidently say that she will not be the last!

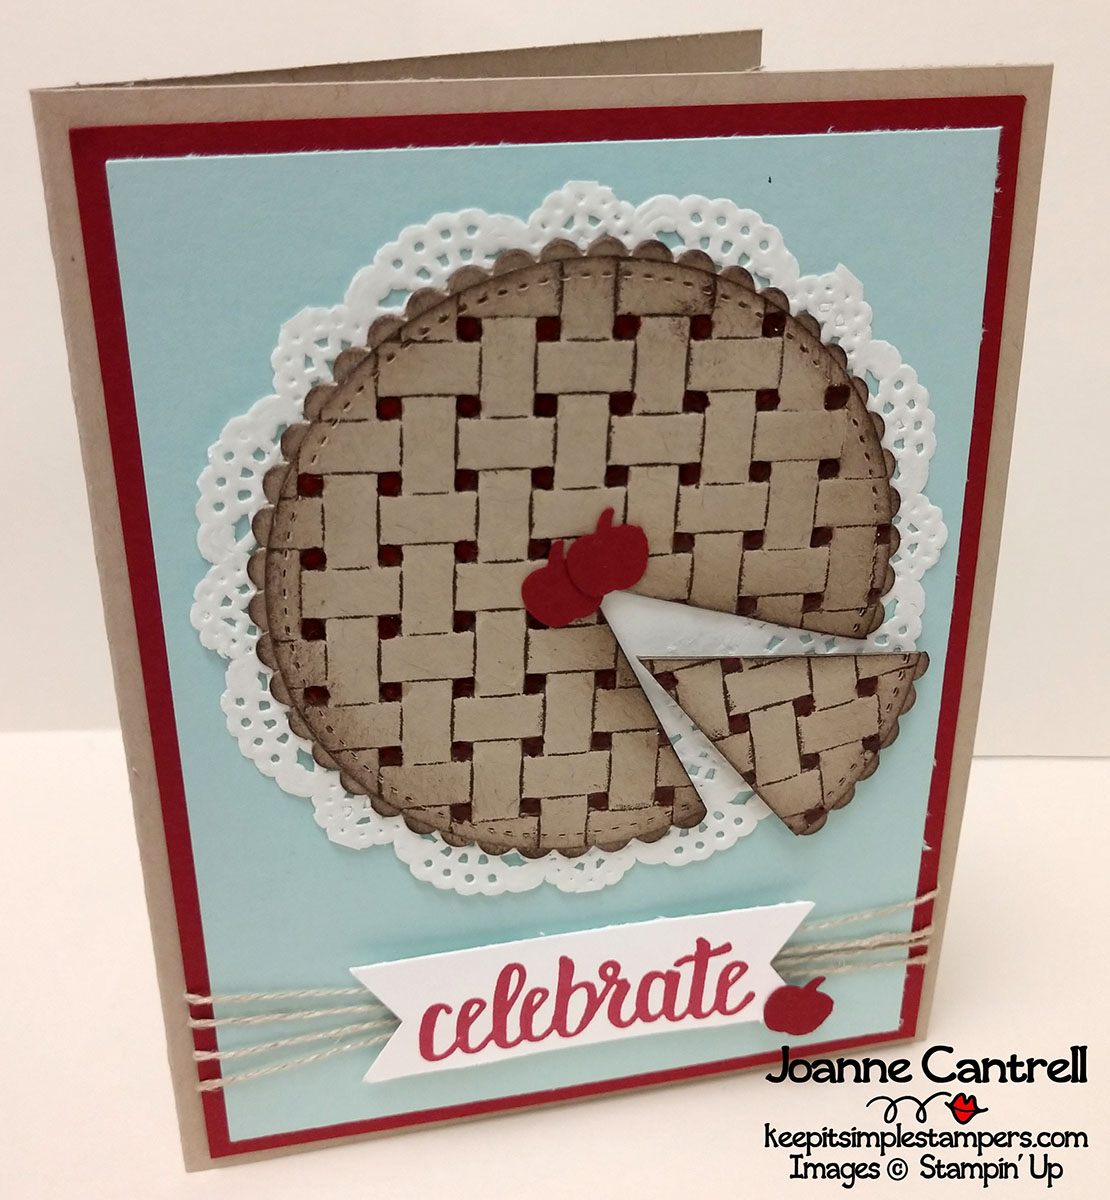
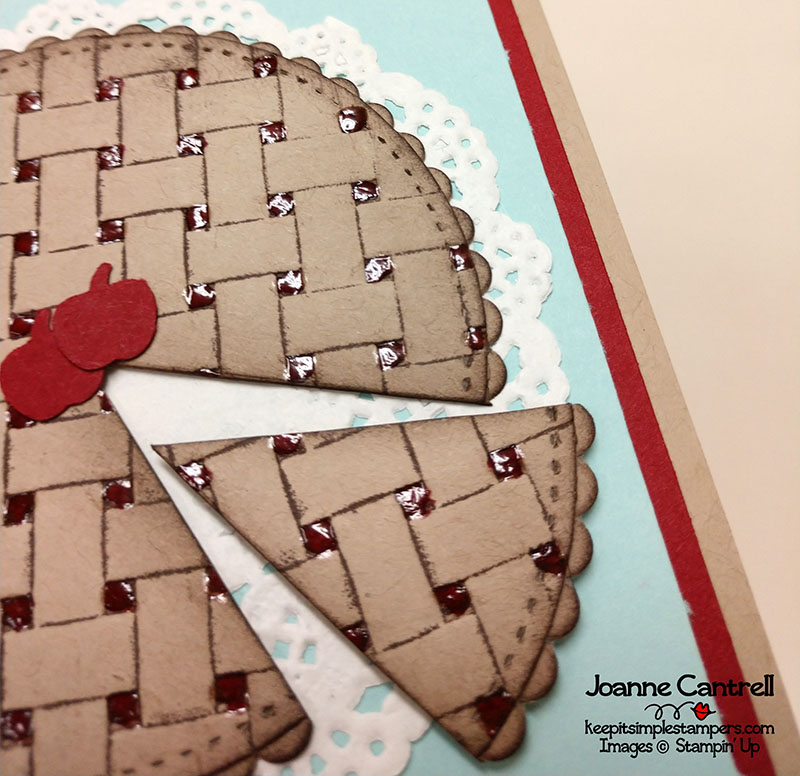
Yes folks, I created a cherry pie out of that cute little basket weave folder!  What do you think?  Good enough to eat, I think!  After all, today is Pi Day (3.14) and what better way to celebrate than with a card!

Here are a couple tips for creating your own pie…

  • Cut the circle using the Stitched Shapes circle BEFORE embossing.
  • Rub your folder with Early Espresso ink to highlight the weaving.
  • Don’t forget to include a fluted crust by using a scalloped Layering Circle die.
  • Flick Early Espresso around the edges of both the circle and the scalloped circle (and the piece) to create more dimension.
  • Drawing lines on the back made it easier for my OCD-ness to create the piece of pie.

And, my final tip:

To create the juice cherry filling, I colored each square with the Cherry Cobbler Stampin’ Write Marker then dropped a tiny drop of the Fine-Tip Glue into each square.  Since the ink is water-based and the glue is wet, the glue grabs the color a bit and, when the glue dries… it is shiny!!!  I have heard tale of people that use reinkers to color their glue… that is another option but one I haven’t done yet.

So, that’s what I have for you today!

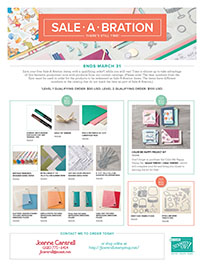
Oh wait… before you go…  One more little surprise.  Stampin’ Up has added a few more things to end out Sale-a-Bration with a BANG!!!  They are adding the items below to the Sale-a-Bration starting MARCH 15th (that’s tomorrow!) Click on the graphic below to download the flyer!

Ok – that’s it… Thanks for stopping by… now hop along to Kelly Acheson

or if you are traveling the other direction today…  hop over to Debbie Naylor.

Until next time… keep it simple, Stampers!

🙂  Joanne

Techniques Class

So, this week, was our second T-T-T class for the year.  It happens generally on the first Tuesday of each month.  for those that missed it, this month’s technique was RESIST EMBOSSING.

I love this technique.  Basically, you emboss an image, then you color over it.  This causes the color of the embossing powder (or the color of the cardstock if you used Clear embossing powder) to show through the ink.  It is a really fun technique.  I will hopefully be able to explain it fairly well!  If not, just google it and there are a million and one tutorials.

So.. the first card we did was fairly simple.
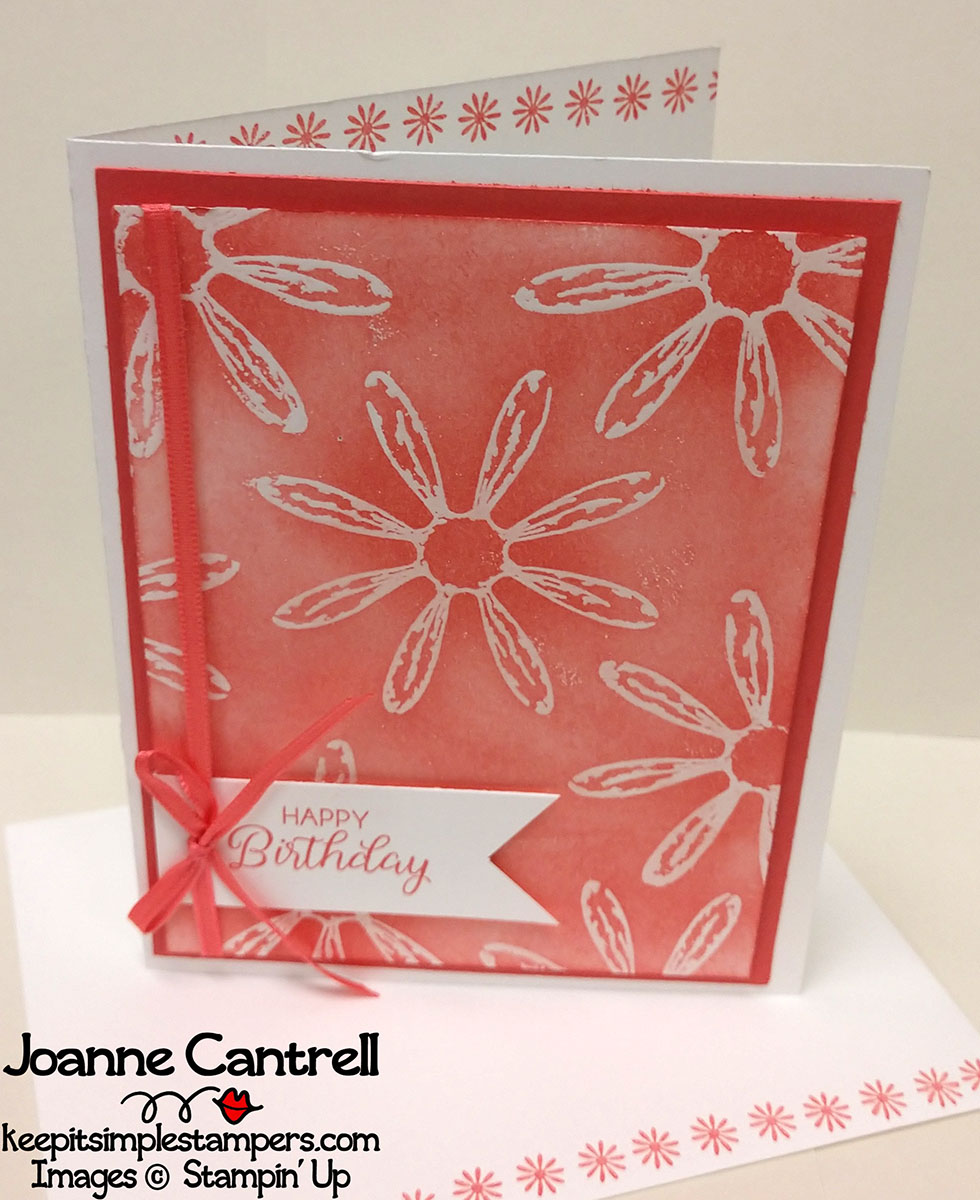
I cased this card from Donna Kish but changed it up a little.  I used CLEAR embossing powder on Whisper White paper.  Then, I used a sponge to color over the entire layer.  I did the flowers a bit darker…  Just wipe with a Kleenex or paper towel to remove any ink from the embossing… and there you go!  This card uses Calypso Coral.

I will tell you what I think the hardest thing about this technique is not stamping over images you have already stamped.  I had to get my face right down into the card.. it was such a sight, I’m sure!
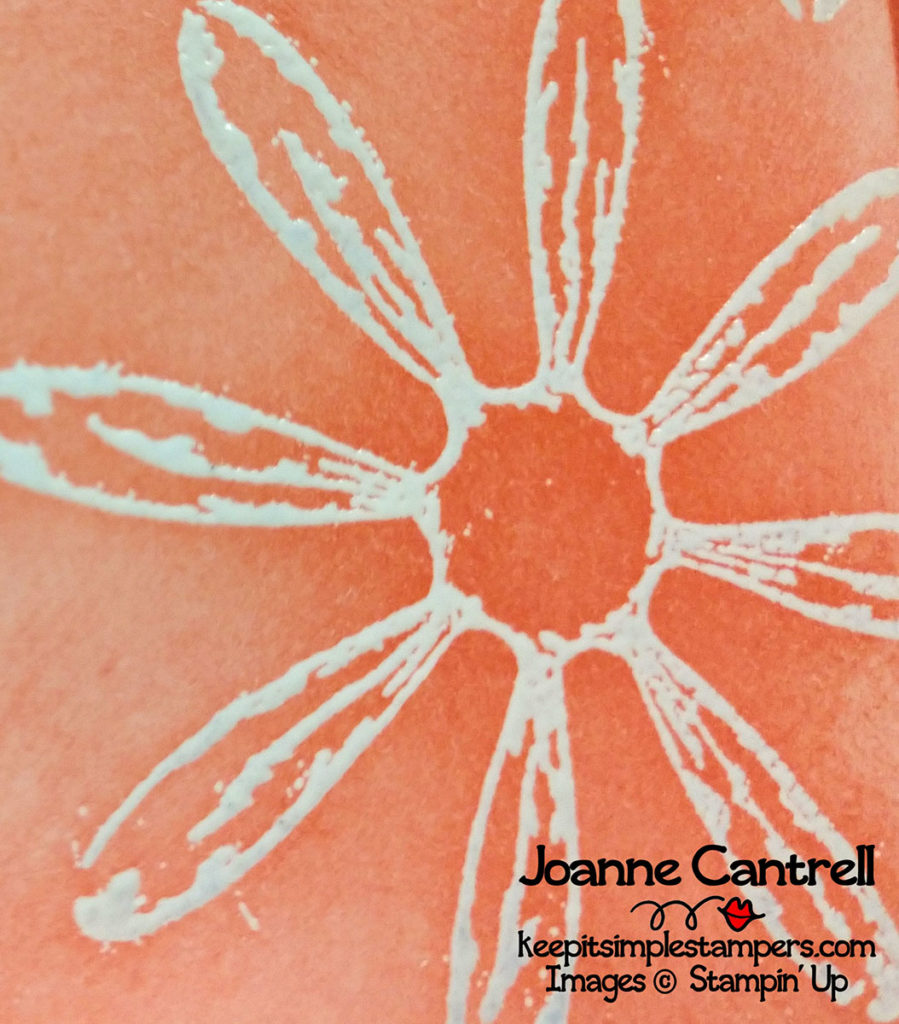
Tip:  Use an Embossing Buddy when doing this technique.  You may not think you need it, but with the little splatters I have on all my cards, I should have.  Live and learn…

Another tip… when you are heating the clear embossing powder, you may have to turn it in the light so you can tell when the powder has done it’s thing.  If you under-heat the powder, it will rub off when you touch it much less rub a sponge over it!

We stepped up the technique a bit on the next card.

This card was cased from Staccie Donaldson.    We used GOLD embossing powder then sponge daubers to color in the images.  The great thing about this card is that it doesn’t have to be perfect coloring in the lines.  (And please ignore the bad sentiment embossing… that goes back to that Embossing Buddy tip!)

Colors used on this card were Very Vanilla, Elegant Eggplant, Tempting Turquoise, Old Olive and Daffodil Delight.  And that beautiful Gold Metallic Edge ribbon will be sticking around in the new catalog!!!  Woohoo!!!  (Just a hint of stuff that you know about early if you are a demonstrator!  Interested… just email me… we can talk!)

In this close up, you can see the benefit of EMBOSS RESIST-ing.  It really looks like you laid down the color, then you embossed over it.  Of course, we know the truth!

And, the last card may be my favorite!  It used a technique that I have never used before but watch out.. it will be showing up a bunch!
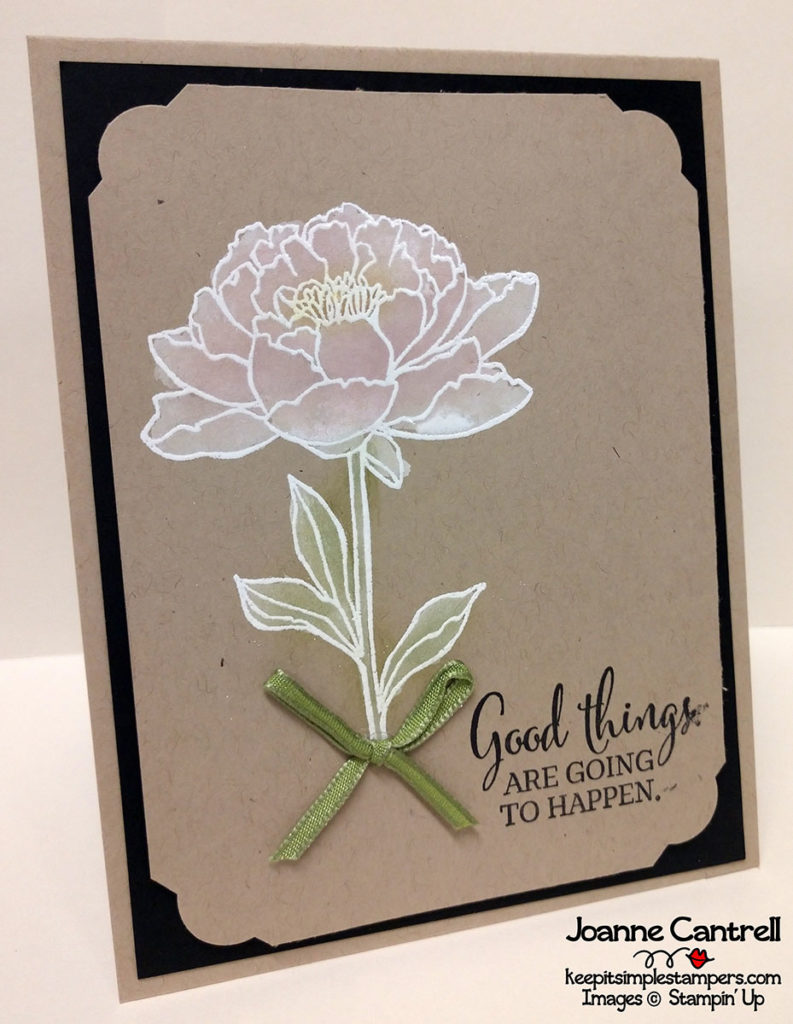
I cased the idea from Melanie Muenchinger.  This card uses WHITE embossing powder and the sponge daubers.  But, it also includes the whitewash technique which I had never done before!

And, this is the one card I used the embossing buddy on after I had a lot of white powder all over it.  Thankfully there are two sides to the cardstock!  No one will ever know what is on the back!  And, I have may or may not have used my sweatshirt sleeve to wipe the powder off the messed up side!  I’ll never tell!

So, whitewashing…  Here’s how I did it.  I squeezed a little bit of the white craft ink refill onto a clear block.  Then I used my aqua painter to pick it up and color in the image.  A couple of tips here…  have a paper towel handy to keep the aqua painter from getting too wet.  There is a fine line between too much water and not enough.  You will figure it out once you practice.  Use your heat tool on the low setting to help dry the white ink.  But, then let it set for a couple seconds so the embossing hardens back up.

After I did the whitewashing, I used the sponge daubers to color in the stems and petals.  I didn’t put anymore ink on the Old Olive one after I used it on the last card because it still had plenty of ink in it.  I used Blushing Bride on the petals and Daffodil Delight in the center.

Someone asked me why whitewash before putting on the ink?
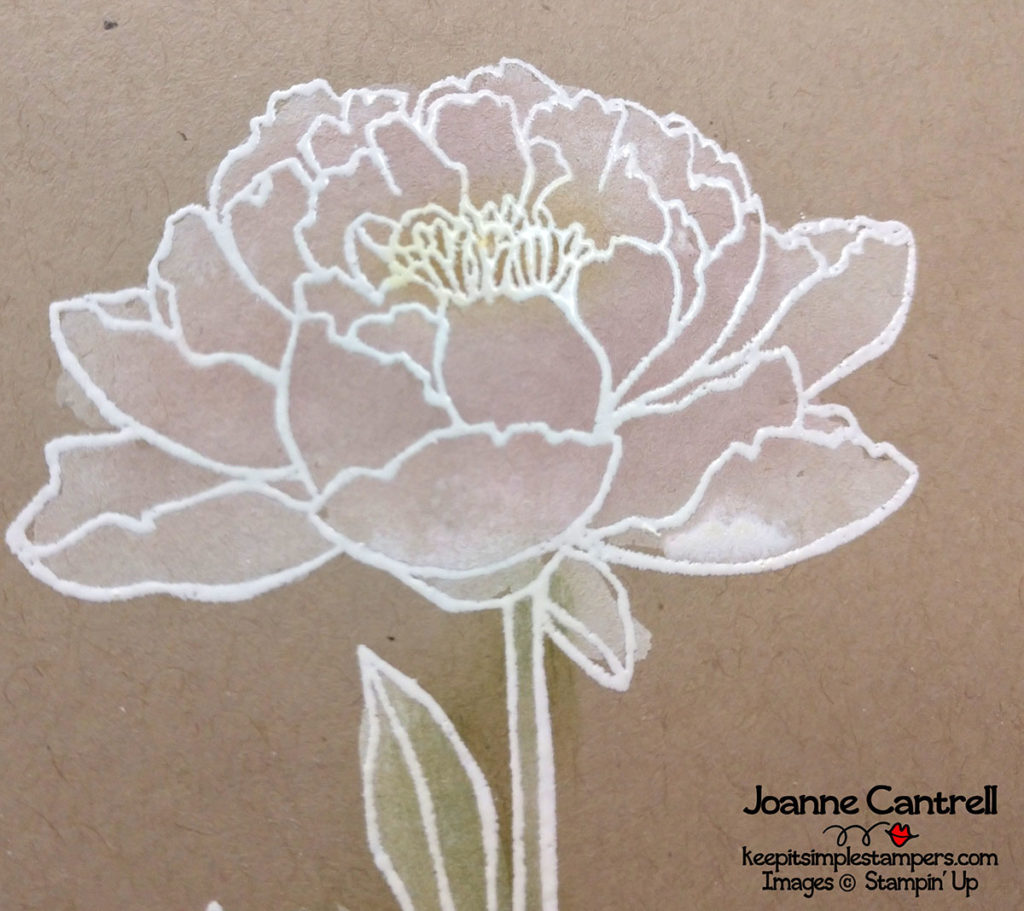
If you look closely at the stem, you can see where I did not stay in the lines.  Not a worry on this card.  But, you can barely see the color.  Can you imagine how much daubing it would take if you did not apply that lighter color under it.  By doing the whitewashing, you give just a hint of color.  It makes it look softer… almost lacey.  Of course, you could just used the Blends or Stampin’ Write Markers… but your end effect would be totally different.

Well, that is all I have to show you today.  Next month’s Tips, Tricks, and Techniques will be REFLECTION!  Come out and join us in person on April 10th or check here after that day to see what we did!

Until then… keep it simple, Stampers!

🙂  Joanne
Happy Birthday!

It’s Paper Pumpkin’s 5th Birthday.  Where on earth did all those years go???

Stampin’ Up is celebrating Paper Pumpkin’s 5th birthday by giving YOU the gifts!!!

The March 2018 kit will include a fantastic, FREE gift and a specially designed, one-of-a-kind box! This kit will be gorgeous, collectible, and is almost sure to go down in Paper Pumpkin history as an all-time customer favorite!

You don’t want to miss out on this great kit…  Sign up and become a Paper Pumpkin subscriber by March 10th and the birthday celebration kit will be on it’s way soon!

SUBSCRIBE TODAY!

What is Paper Pumpkin?

Watch the video below to see some of the great projects that are delivered ready-to-be-made to your mailbox each month.

Paper Pumpkin is  a great gift idea for those hard-to-buy-for crafters on your list.  You can buy 1-, 3-, 6, or 12-month gift subscriptions here.

Until next time… keep it simple, Stampers!

🙂  Joanne

Ink & Inspiration Blog Hop – Taking Inspiration

Welcome to the Ink & Inspiration Blog Hop. You are currently visiting Joanne Cantrell  from middle of the United States. I hope you enjoy my Take Inspiration project I made just for you.
Yes, this month’s projects have all been inspired by our beautiful Ink & Inspiration logo.  Some may be inspired by the colors, others by the geometric patterns, the watecoloring, or the black-on-pastel look.  As for me, I think I was inspired by all of the above!

Simplicity at it’s finest right there! And, full disclosure…  I whipped it out in under ten minutes.  It really is that simple of a card.  But, WOW!!!  People would think you took hours on it.

First, I trimmed a piece of watercolor paper to 5-1/4″ x 4″.  I found a lovely open flower in the Cake Soiree stamp set and used VersaMark and set white embossing powder to create the white patterns.

Then, using an Aquapainter, I covered the paper with water and applied bits of color from the ink pad covers.  I used Flirty Flamingo, Peekaboo Peach, Crushed Curry, Marina Mist, and Emerald Envy. And presto… I have the background.

The foreground was even easier!  All I did was cut the sentiment out of Basic Black Cardstock. And added a Flirty Flamingo Enamel Shape for interest.

Add a little Basic Black Shimmer Ribbon, and a black card base and you have a truly simple card inspired by our IIBH logo!

What do you think?

I hope the projects you’ve seen today have inspired you & brightened your day. You are currently visiting Joanne Cantrell. Please see the list below & hop through all of the people on the list to see all our projects. You don’t want to miss any!”
#IIBH if you’re into hashtags.

Here is the list our other fin bloggers… Now hop along!


Until next time… keep it simple, Stampers!

🙂  Joanne