Merry Little Christmas

Hope you all enjoyed the 2017 Holiday Catalog Product Spotlights that I blogged about last week.  That was great fun.  All the gals came up with unique takes on each of the products.

And, I’ll let you in on a little secret…

I bought the Detailed Gate just for that blog hop and now I absolutely love it!  So, watch for a whole week of projects featuring that die!

Today, I wanted to show you how a simple piece of Designer Series Paper is really all it takes to create an easy yet spectacular card!

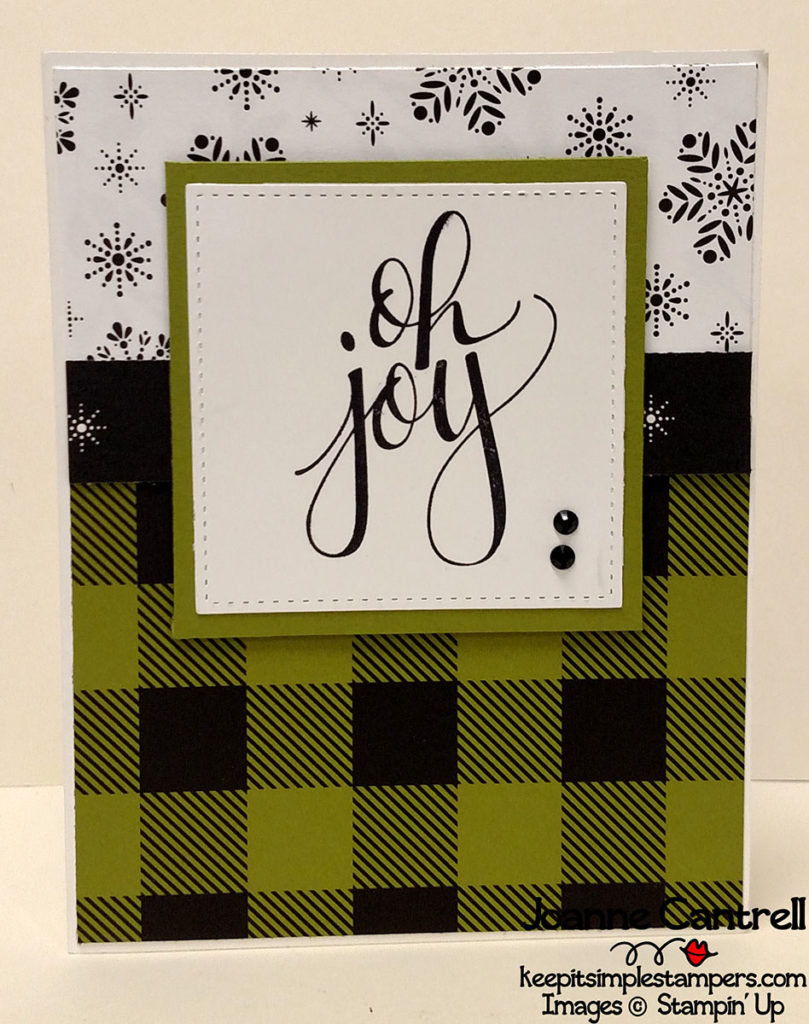
When I first glanced through the catalog, I fell in love with the Merry Little Christmas Designer Series Paper (DSP to those in the know!).


These first two designs were inspired by the work of Lori Pinto.

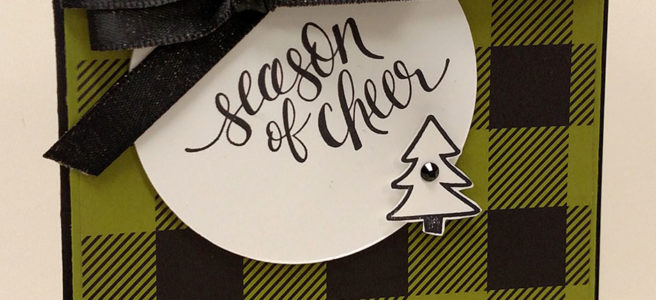
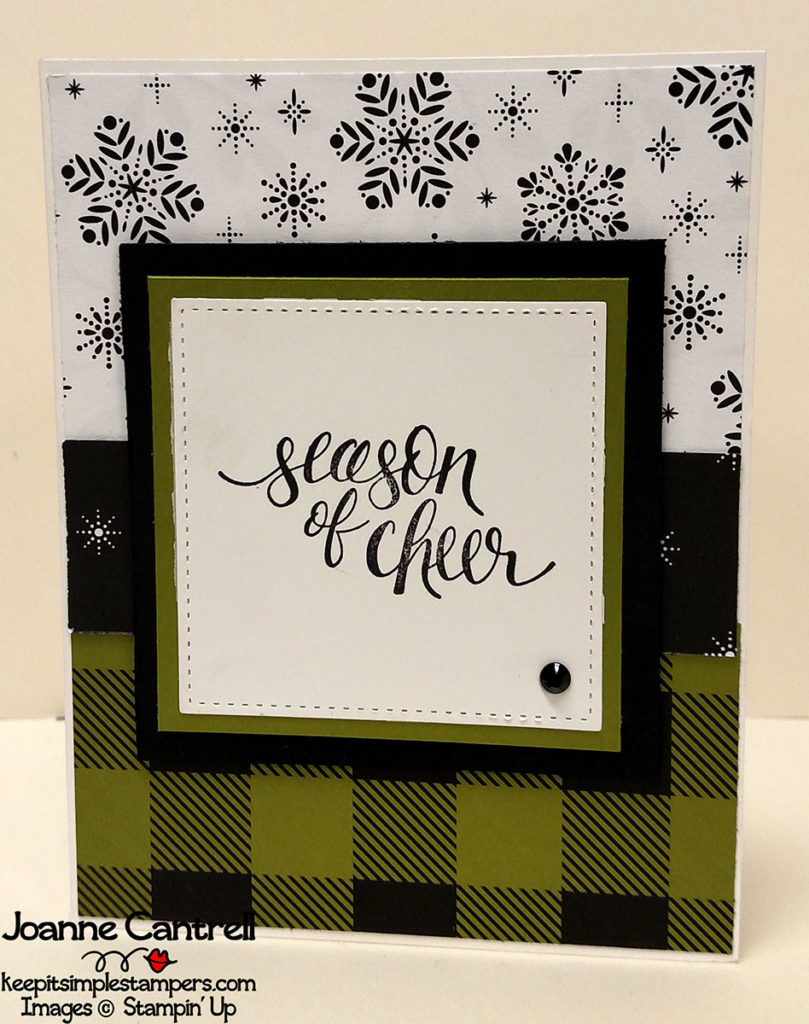
This card  shows three different designs of the paper.  I just love that plaid.  I had to have this paper just because of that plaid!  I created the layers based on the largest square stitched shape.  I then added the sentiment and a little Black Rhinestone for some bling.

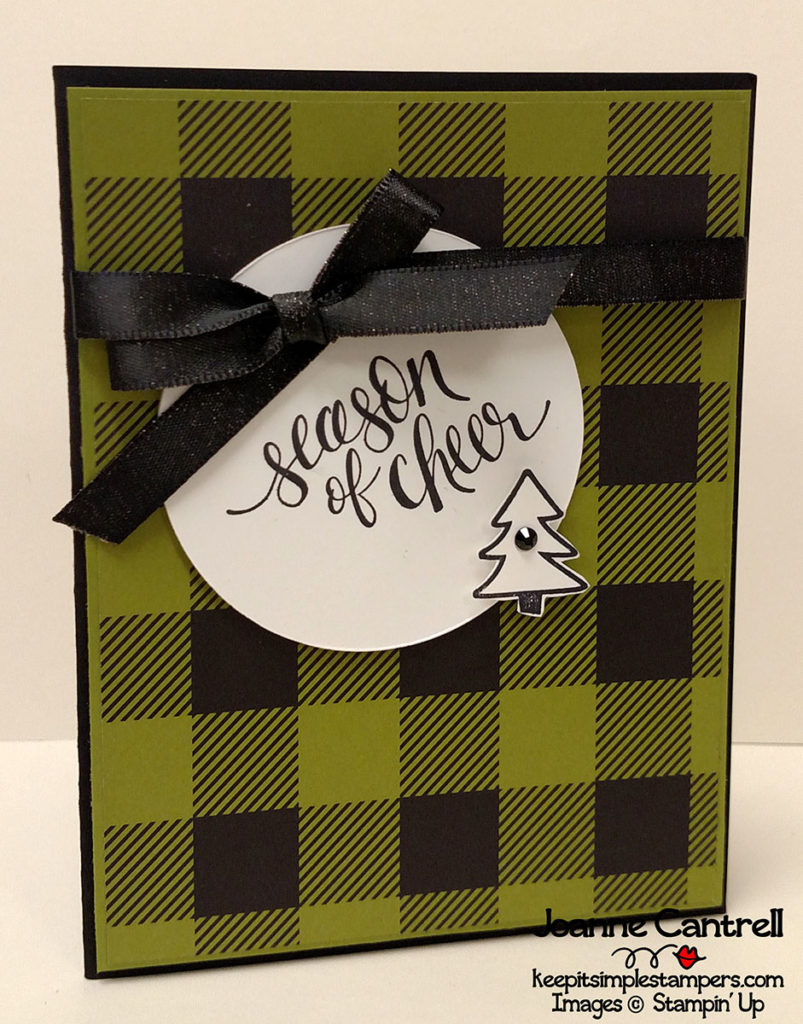
This card is basically the same as the card above.. but so very different.  This is a prime example of “same but different,”  wouldn’t you say!

And, here is the last one for the day…

This design was CASE’d from Mary Fish.  She did a treat bag that looked like this.  And, since it’s been awhile, I have done a project sheet for this one 🙂

Proj Sheet – Season of Cheer

You’re welcome!  LOL  Here is a glance at the items used to create this simple card!


Product List


What projects are you thinking of with this Designer Series Paper?  Post them on my facebook page…  the link is on the right hand side —>

Until next time… keep it simple, Stampers!

🙂  Joanne
 

Stamper’s Dozen Blog Hop – Color Challenge

Welcome to the September installment of the Stamper’s Dozen Blog Hop.  This month, was a color challenge.  That means had to use certain colors in our projects.  The colors were…

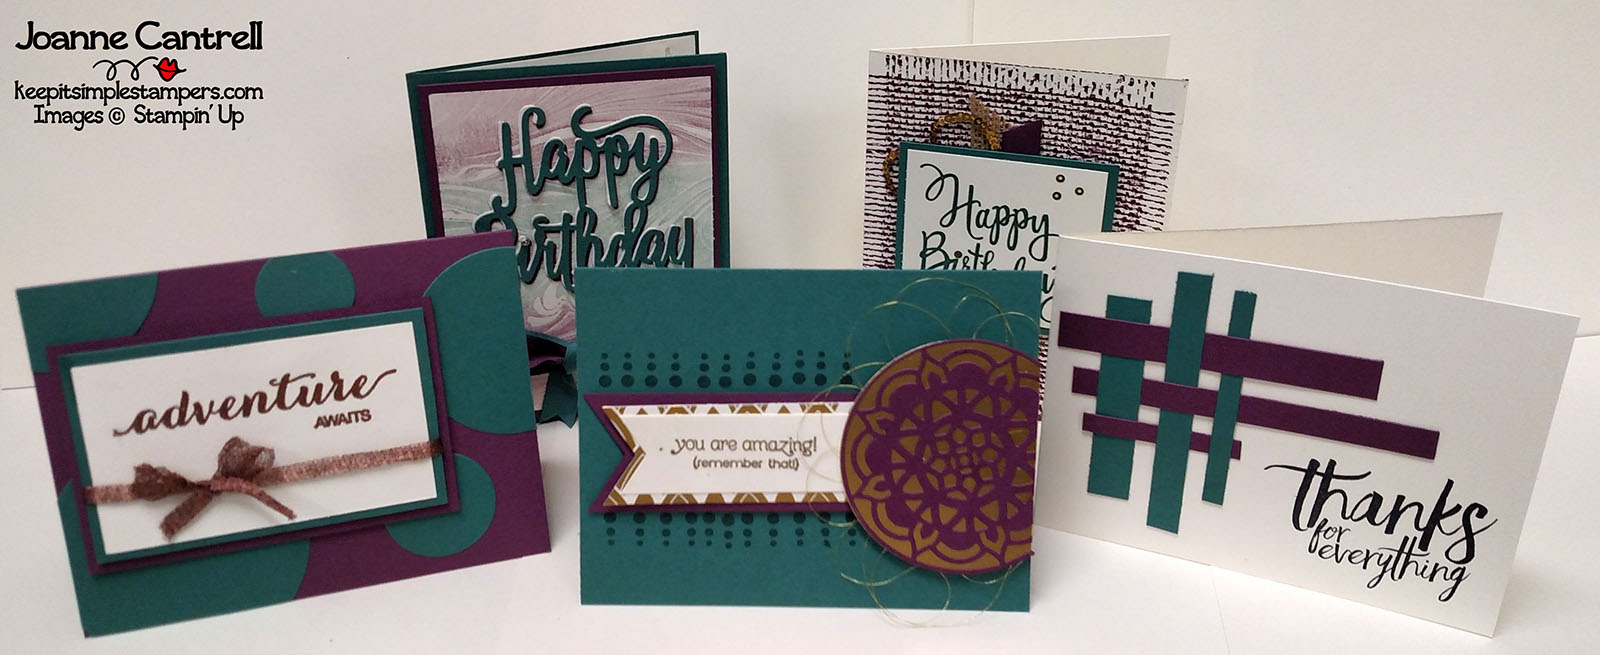
So, here is what I came up with!

Now for a close up of each…

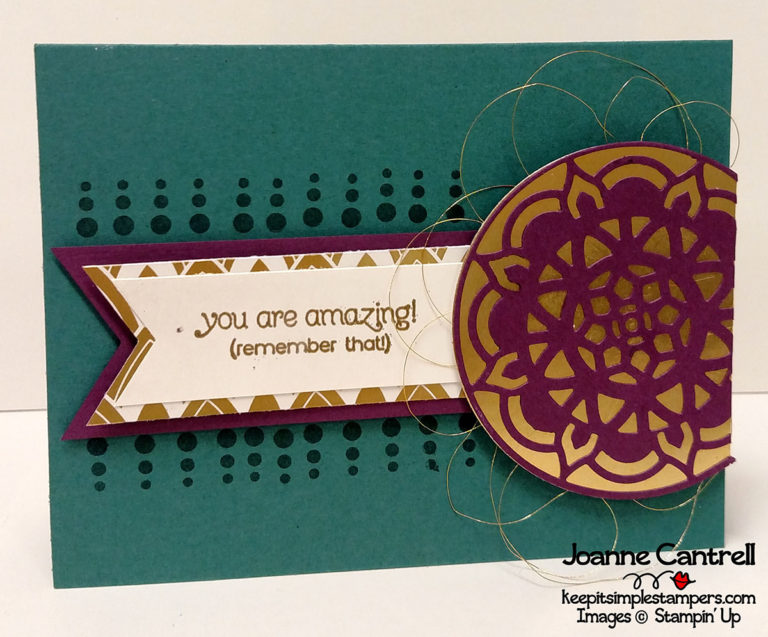
This first card was inspired by the Easter Palace Suite.  I combined a couple of the framelits from the Eastern Medallions Thinlits (143725) to create the medallion and layered it atop a Gold Foil (132622) circle.  I added a touch more gold with a piece of the Easter Palace Specialty Designer Series Paper (144147) as well as some Gold Metallic Thread (138401).  The sentiment comes from the Feathery Friends HOSTESS set (144032/144037).

I used a bit of gold on this next card too!

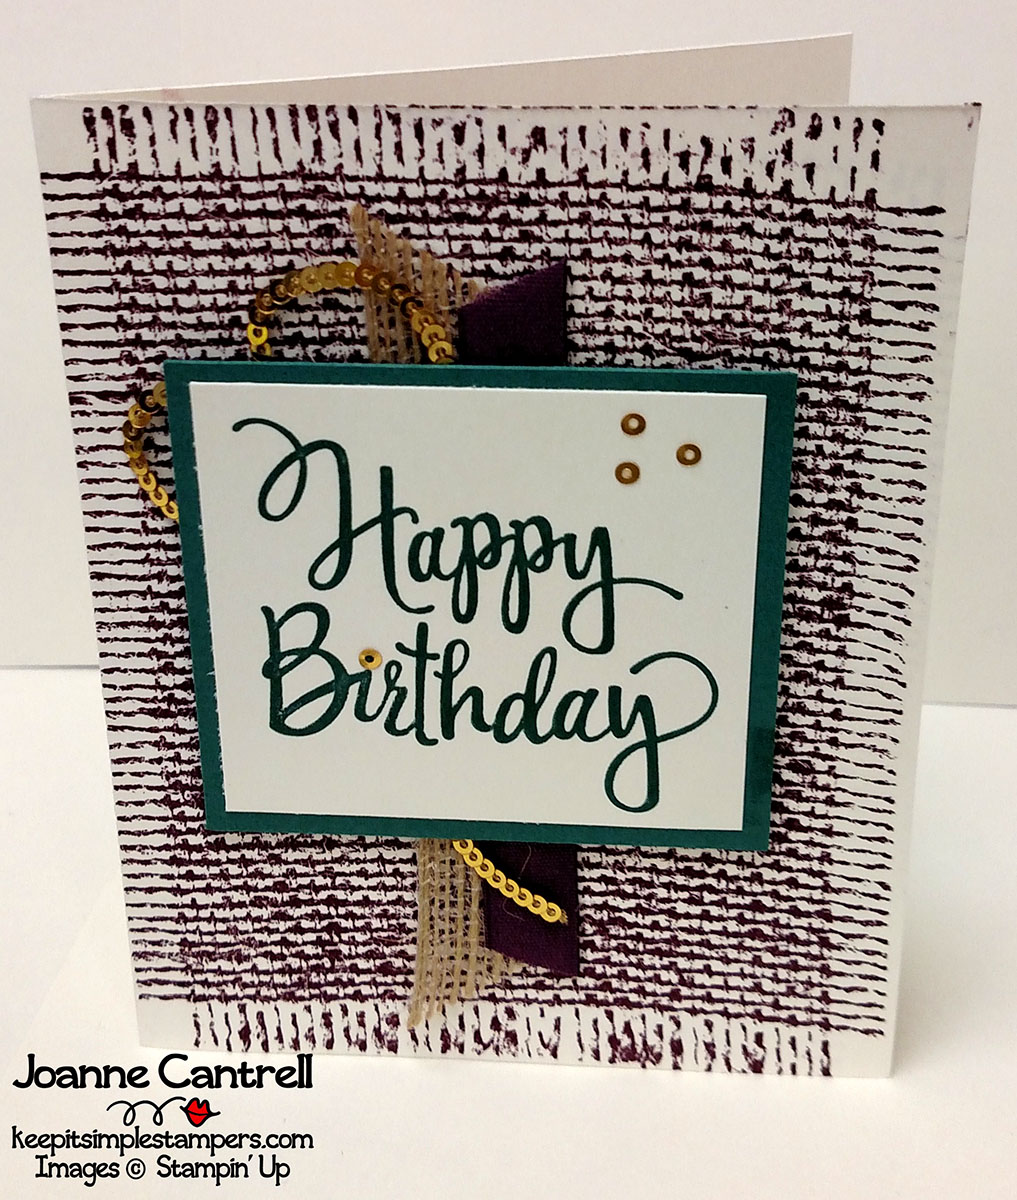
I used the Burlap stamp (143979/143982) to create the background in Fresh Fig.  I added a bit of Burlap Ribbon (141487), Fresh Fig Finely Woven Ribbon (144132) and Gold Mini Sequin Trim (144128) to add a bit of interest.  The sentiment is the Stylized Birthday stamp (141828).

But, don’t worry… It doesn’t take much at all to create a fabulous card with these colors!

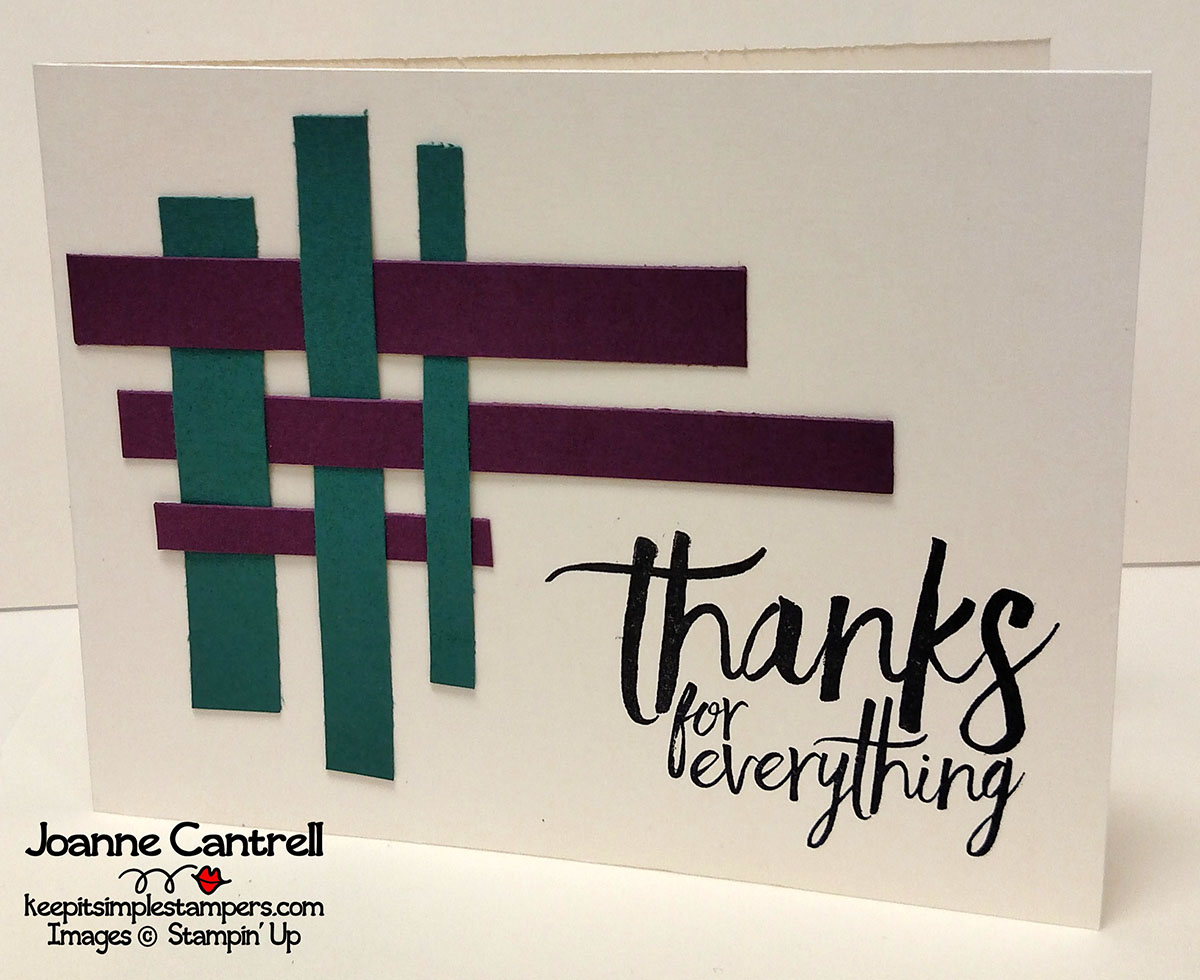
I used some scraps left over from other projects on the card above.  I simply wove them together a bit.  The sentiment here came from the All Things Thanks set (143089/143097).  This is the perfect set for all sorts of thank yous!

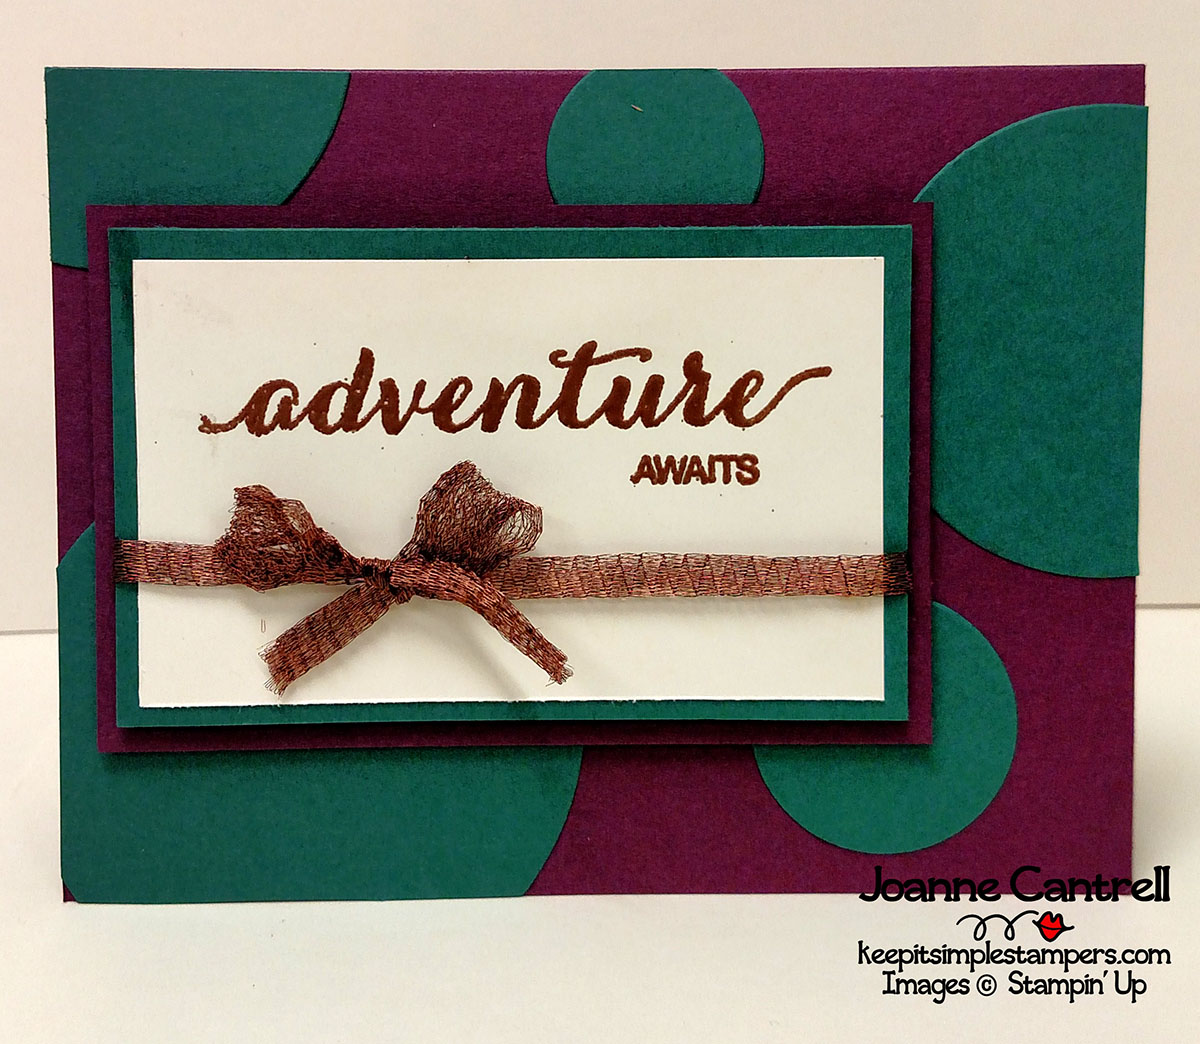
Gold isn’t the only metallic that goes well with this color scheme.  Copper is also a great choice!  On the card above, I just cut a few circles in Tranquil Tide and layered on top of a Fresh Fig card base.  The sentiment is from the Dare to Dream Hostess set (143769) and has been embossed in copper and a bit of Copper Trim (144179) was used to make a pretty little bow!

And, finally…

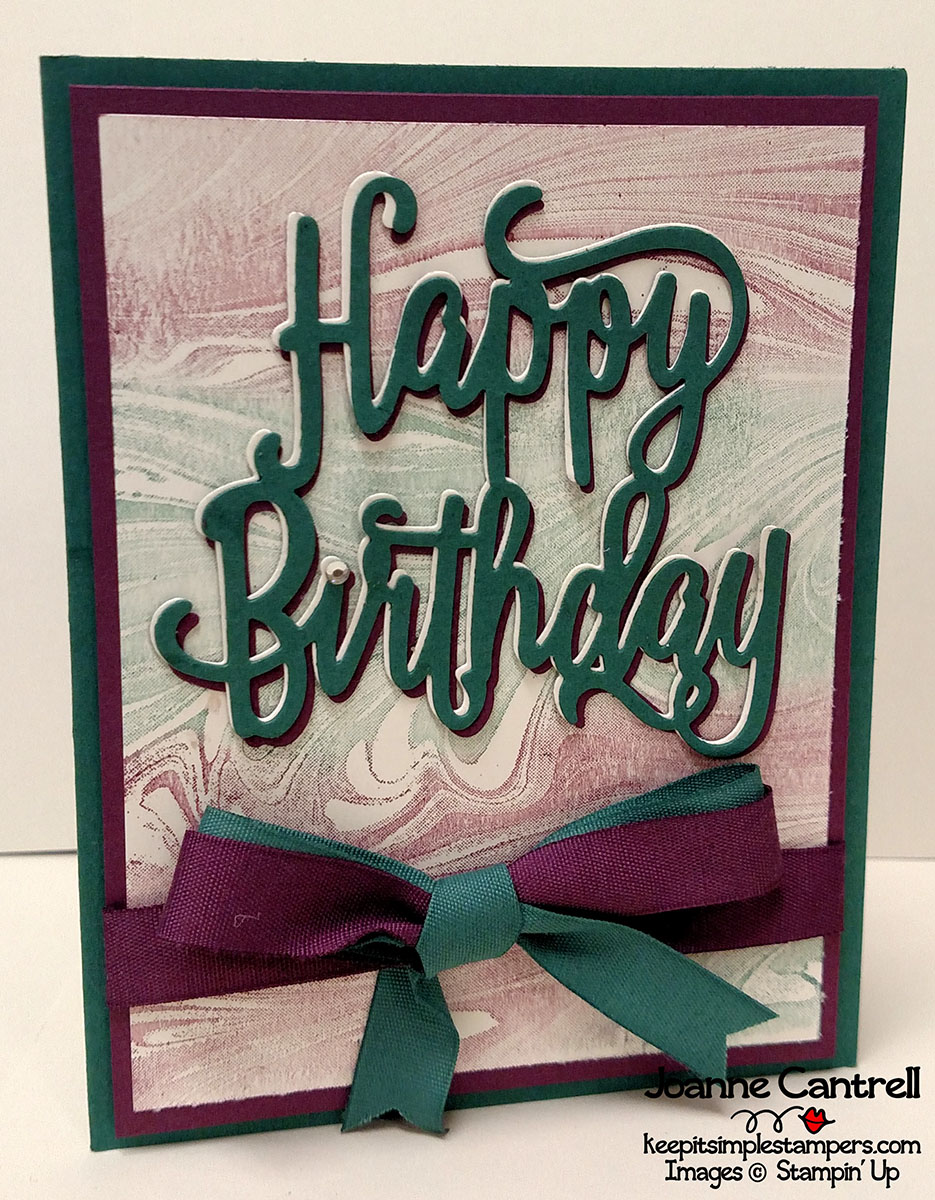
On this last card, I used by sponge daubers to apply Fresh Fig and Tranquil Tide to the Marbled (143755/144772) background stamp then stamped it ont to Very Vanilla.  I added layers of the Happy Birthday Thinlits (143700) for the sentiment and used a bit of the Finely Woven Ribbon in Fredh Fig and Tranquil Tide to add a bit of interest.  And, of course, I always dot the “i” from the thinlit with a Rhinstone!

So,

I hope you enjoyed what you saw here.  Now, hop along to see what Patty Chenail has created!

or take a hop back to check out Debbie Naylor’s creations!

Until next time… keep it simple, Stampers!

🙂  Joanne
It’s a Process

In my many years here on earth, I have learned how I like to do things.  If you have ever watched me work, you will notice that I do things in order.

Here’s an example…

When a shipment of boxes comes into the candle store where I work part-time (to earn Stampin’ money), three things have to happen.  Product needs marked off the list, boxes need opened, stuff need to go on shelves.  There are two schools of thought as to how this should happen.

  • School 1 grabs a box, opens it up, marks off the contents, then puts product on shelves.
  • School 2 marks off all contents, opens all boxes, puts all the stuff away.

I am a fan of the second.  Sure, I have to move boxes a few times…  to line them up so I can see all the items numbers. Most of the candles come in a box with a number on the outside while smaller stuff comes in boxes with a packing label – these are handled a bit differently and last.  So, I can get through 100 boxes in about 3 hours.  After I mark them off, I open them all and take the candles out then I collapse boxes, then I stock the shelves.   Then I check off multi-item boxes with contents vs. packing list… put items away then check them off the list.

(Please note that everyone knows my way is better and is the reason I am called in to work to help with big shipments… they just stay out of my way and let me go…  🙂 )

An order to life…  do the first step of everything then do the second step.  That is my process of doing most things.  I can see why Henry Ford thought of the Assembly line.  He must have thought the same way.

I approach my mass card making the same way… and I did the same thing for the scrapbooks I did for a friend for Christmas.

  1. Design cards and jot down measurements
  2. Cut as many pieces for the cards that I can (I am a cut-then-stamp kind of girl – especially with photopolymer stamps!)
  3. Stamp everything
  4. Do any left over punching and cutting.
  5. Assemble!

So, I took yesterday day off to help my oldest boy with his taxes and budgeting but he was never home.  I ended up spending all day in the craftroom cutting down cardstock and DSP for about 20 different card designs.  Add this to the almost 20 I did the other…  and I am on track for the craft fair.  I have about 30 more designs to cut before I can start stampin’!  I’ll be sure to take a picture of my progress!

But, just so that you can start your process, here is a card sketch!cs-004

I envision it using Blushing Bride Glimmer paper and a black-based DSP.  But… there are new colors of Glimmer Paper!  Have you seen them yet?

sab-glimmer-paper.png

This 6″ x 6″ Glimmer Paper Assortment Pack comes with 12 sheets; 4 each of 3 colors (Bermuda Bay, Mint Macaron, Sweet Sugarplum) and is available only for a limited time and are FREE with a $50 purchase.

Imagine the possibilities!!!

Let me see what you come up with!

Until next time… keep it simple, Stampers!

🙂  Joanne
 

Card Sketch #3

Truth be told, I did get a start on the cards I am making for the craft fair coming up in less than two weeks.  I cut out everything I need for about 20 cards.  I had planned on doing a lot more yesterday, but got side tracked by life.. and bread… again!

This time, I taught my daughter how to make it.  She made loaves and I made rolls.  They were perfect.  The one loaf Kate made was so pretty, I hate to cut into it.  But, with three kids left along in the house today with tempting homemade bread, I am thinking it will be cut and gone by the time I get home tonight!

2017-02-19 15.58.32.jpg

So, I guess what I am saying is that I don’t have cards to show you.  I am just dying not actually making any cards for so long….  I may not have the energy to climb the stairs to the craft room.  Just kidding!  I can spring up those babies anytime I get the chance!

And, since I don’t have my card making materials here in my office (I think it’s probably because I am supposed to be actually working.. shhhhh!), I have done another card sketch.  I think I am liking to do these as much as I like to make the actual cards.  I am guessing that is because I love to work on the computer.  I am the one that many people call when they need flyers and whatnot for upcoming fundraisers!  Just one of my many talents!  (You just got to toot your own horn from time to time!)

So, here is the sketch…

cs-003

The colors used in the sketch are Daffodil Delight, Melon Mambo, Tempting Turquoise, and Whisper White.

I would love to see what color combinations you come up with as well your beautiful adaptions of this sketch.

Until next time…keep it simple, Stampers!

🙂  Joanne


It Started with a Spark

I was having a conversation with my son the other day via text.  I had said something about him being a “Honeymoon baby.”  He went into the typical teenager response of “Eewwww… I didn’t need to know that…”

And it kinda hit me.  He is here because Wendell and I meet and fell in love.  I remember this as we celebrated our 20th Valentine’s Day together yesterday. None of the children I have would be here if not for that one moment in time that God brought two people together and created a spark.

That spark just grows and grows with each passing year.  And, with my son and most people around the world.. ok, that may be stretching it a bit… the anniversary of a birth is celebrated with fire.

See what I did there… what a great segue.  But, it really is the truth… the spark between your parents is celebrated in the tiny fire on top of your birthday cake.  I know… so profound, right!?!

So, with that thought in mind, this card was created…

2016-07-20-08-10a

Don’t you just love that bright color scheme.  I sure do!

Here is the inside 🙂

2016-07-20-08-10b

And, here is the list of supplies needed to re-create this card.

Product List

Oh, and don’t let me forget.. here are the instructions 🙂

proj-sheet-tiny-fire

May I add that this card comes entirely fromt eh 2016-2017 Annual Catalog.  In these days of Occasions and Sale-a-Bration, please don’t forget about the Annual Catalog.  It is chocked full of great stuff!  There are many things in both of the mini catalogs that pair perfectly with items from it.  Check them all out by clicking the covers on teh right!

Until next time…  keep it simple, Stampers!

Card Sketch #02

So, here I am making good on my promise to post at least one card sketch every week.  I think I will post them on Thursdays, just so that you know when to come back…

Wait, on second thought, I won’t tell you when I am going to post them.  Then you have to come back every day.  Which you already do.. .right!?!

Anywho…

Here is the sketch…  CS 002.jpg

In my mind, I can see using a DSP in the background (5-1/2″ x 4-1/4″)

Or, maybe as the Long Layer 2…  then you could put the sentiment on a banner and put over the bottom of the Small Layer.

Or…  what about… on the landscape card… adding some ribbon with a bow.  You could then hang the sentiment from that.

The possibilities are endless.. but just some tips:

  • Always include some type of sentiment on the outside.  In a very rare instance, will I ever not put some type of wording on the outside.  It may be small, but it is almost always there.  You need all sides of your card to speak.  Just a word, maybe a whole thought… but it needs to speak.
  • Graphic is a must – but there is a catch.  The graphic could be designer series paper.  The graphic could be a stamped image.  The graphic could be words stamped multiple times.  And, to add fun, sometimes a graphic in an unexpected place is great!  Think about a little head peeking over the top of the long layers…  or from behind the small layer.  Yes, I do have that crazy-haired chick in my mind right now!
  • To embellish or not to embellish… that is always an important question.  It should come as no surprise that I tend to lean toward the no embellish side.  I think some of the prettiest cards are the most simple.  Two colors.  Bold sentiment.  Small ribbon.  Maybe a strategically placed Rhinestone.  It doe not take a lot to dress up a card without over doing it. We’ve all seen those cards that are just too much…  well, too much something.  Knowing when to stop and having an eye for editing is very important!

So, what are you going to do with this sketch?  I can’t wait to see all the great projects!

Until next time… keep it simple, stampers!

🙂  Joanne


Not All Hearts

Last year, around this time… Pinterest and Facebook were blowing up with so many wonderful creations using the delicate Bloomin’ Love thinlit.

140621.jpg

Surely, you’ve seen by now.  It cuts out the most beautiful flowery hearts.

I used this to make one of the cards I showed y’all a couple days ago.  It’s perfect for Valentine’s Day cards.  It would work even on Mother’s Day cards or other cards for a woman.

Well, I used it recently, but in a different way…  The background of a balloon!

Whaaat?

Yep, that’s right.  Here is the card… but don’t stop reading because I have a very important tip below…

2016-07-20 08.06a.png

and the inside 🙂

2016-07-20 08.06b.png

Okay… so you see that I used the Blusing Bride Glimmer Paper.  That is a sparkley, glittery thick cardstock.  It doesn’t so much like being fed through the Big Shot.  Especially on pieces so intricate.  So, here’s the secret…

You can gently peel the paper off the backing.  Just cut the right size and flick the corner a bit to start to peel.  Sometimes it comes off in one piece, other times it may take a few tries.  But, I have never not had it come off.

Now that I have your attention… can you imagine what this would look like with the new bright glimmer paper coming soon and available only for a limited time!?!  What.. you haven’t seen it yet.. just you wait!

Until next time… keep it simple, Stampers!


It’s coming…

It’s nearly here!

That time of the year that every man dreads.  And to be honest, I dread it too.

It’s almost Valentine’s Day.

Sure, it’s a great time to celebrate the one that you love.  But, I don’t know about you, but I surely don’t need some flowers bought out of an assumed obligation that will die in three days or candy that will ruin my diet…

Don’t get me wrong, I love it when my husband buys me such things.  But, I, like most of you all… would love it even more if he did it on a plain ol’ Tuesday and just for the heck of it.

I think the best thing he could give me for Valentine’s Day would be money to buy more stampin’ stuff.  Can I get an AMEN!

But, I will breakdown and make him a card.  I always do.  He is the sweetest man I know.  He does so much for me and our children.  He is always there for me!  Sure, he can be grumpy, especially when he is tired.  But, can’t we all be?  He really is the love of my life.  So, if he wants to buy me flowers and treat me nice.. so be it!

In the mean time, here is a little note set that we did at our recent team meeting.

2017-02-07-08-26-29wm

It uses the Love Notes stamp set in the 2017 Occasions catalog.

The little bag was something that our team member Martha Swift showed us how to do back in the summer time.  It used two pieces of Designer Series paper.  No punch board was used… just some scoring, folding and snipping!  I will find my directions and post them (if I remember to!).

These would be perfect to put in lunches or to leave in a car or by the bathroom sink.  They are double sided… just jot a quick note on the back.  Perfect for all loved ones!

So, what do you do for Valentine’s Day?

Until next time…  keep it simple, Stampers!

🙂  Joanne
Gone but not Forgotten!

So, I did some playing over the weekend, blending old and new sets.  I mean.. I have old retired sets and what I am supposed to do with them?  Forget they ever existed?  No… I may be a Stampin’ Up Demonstrator… but I am am even more so, a Stampin’ Up fanatic.  I use my old sets and dies!

So, I blew some of the dust off, CASE’d a couple of cards, and went to work!  A couple hours later… this is what I came up with…

One of my husband’s co-workers buys his wife’s cards from me, so I was playing around with come Valentine’s designs.  Then, I started playing with a limited release bundle that was available last summer.  Hopefully it will be in the new catalog coming in June because I just love the set soooooo much!

Did you get it?  The Thoughtful Branches set and dies?

I didn’t much use it when it came out.  In fact, I had only used one of the sentiments up until this weekend.  But… oh my!  It is so versatile.  If you have this set.. get it out right now and create!

I also needed to a make a send a card to my Sailor son who had recently received some not so great news from back at home.  This set had some of the right sentiments, but just didn’t say it all.  Then, I looked up and saw the perfect saying in the Designer Tee stamp set in the current SALE-A-BRATION catalog.

Here’s what I did with it…  what do you think.

2017-02-06-09-30-45wm

and the inside…

2017-02-06-09-31-24wm

Sometimes, a boy just needs a hug from his mom and since I am 900 miles away, a card will suffice.  Plus, I think he saves them all!  He’s really sweet… just won’t ever admit it!

What is your favorite set from years gone by?

Until next time…  keep it simple, Stampers!

🙂  Joanne

So Much to Do!

So little desire to do it!

Have you ever been there.  I am there.  It’s not that I am lazy or tired (well, I am that!), or overwhelmed.  I just have other things that I want to do.

A little overview of my day…

  • 6:20am    Wake up and take a shower
  • 7am           Make breakfast while helping daughter with homework
  • 7:30am     Leave for school and work
  • 8-3pm      Work, work, work… and then work more
  • 3pm           Go home and start cooking dinner
  • 3:30pm     Cook dinner / clean up
  • 5pm           Run kiddos to various locations and run various
  • 9pm           Start helping son with homework

Why is it that we are always so busy.  Is it wrong that on Tuesday morning, I am already looking forward to sleeping in on Saturday morning?

I just would absolutely like to be doing nothing but hanging out in my craft room, organizing, making cards, even sweeping and dusting!  But, when I do get a chance to go up there… I never want to come down.  So, unless I have all night to do nothing but stamp, I don’t dare enter the black hole of creativity!

When I am upstairs, I lose all track of time.  I get lost in watching sappy chick-flicks while trying out new techniques or cutting pieces for new cards.

I mean, really… When I am at work, I am thinking about what cards I could be making.  I think, “Oh… I’ll just check real quick on Pinterest!”  I am not sure about you… but “real quick” and “Pinterest” should never be in the same sentence.  Next thing I know, It’s been an hour and I just want to go home and play with my stamps and paper!

So, here is what I did the one day I did take off a little bit early – shhh… don’t tell my boss!

I made a shaker card using one of the Hostess Sets from the 2016-2017 Annual catalog.  I am still working on shaker cards… trying different things to make them shake right.

Great, now I want to go home and try something new…

But, before I go… here are the directions on how I made that card!

proj-sheet-picture-perfect-shaker

Until next time… keep it simple, Stampers!

🙂  Joanne