Hello and welcome to this month’s edition of the Stamper’s Dozen Blog Hop!
Did you know that you can do more with paper, ink, and stamps than make cards… I know, that’s unbelievable, right!
Well, this month’s hop is all about Home Décor. I am so excited to see all the great things the ladies produce this month… aren’t you?
So, without further ado…
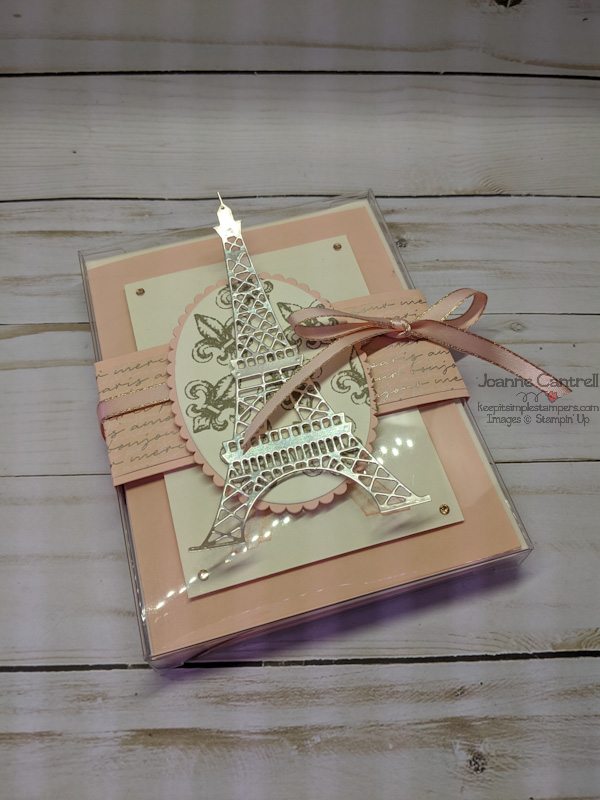
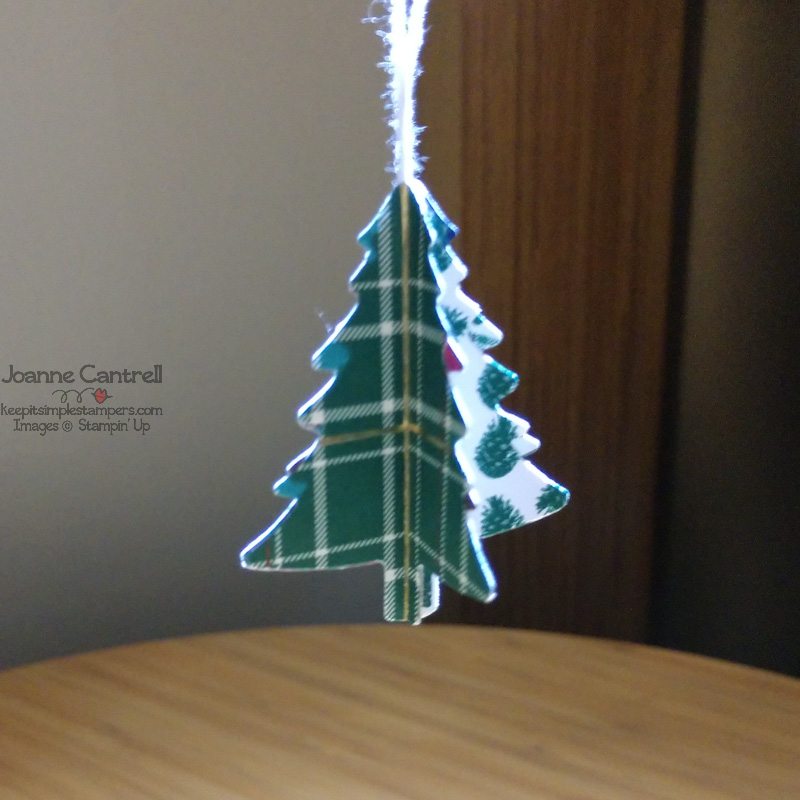
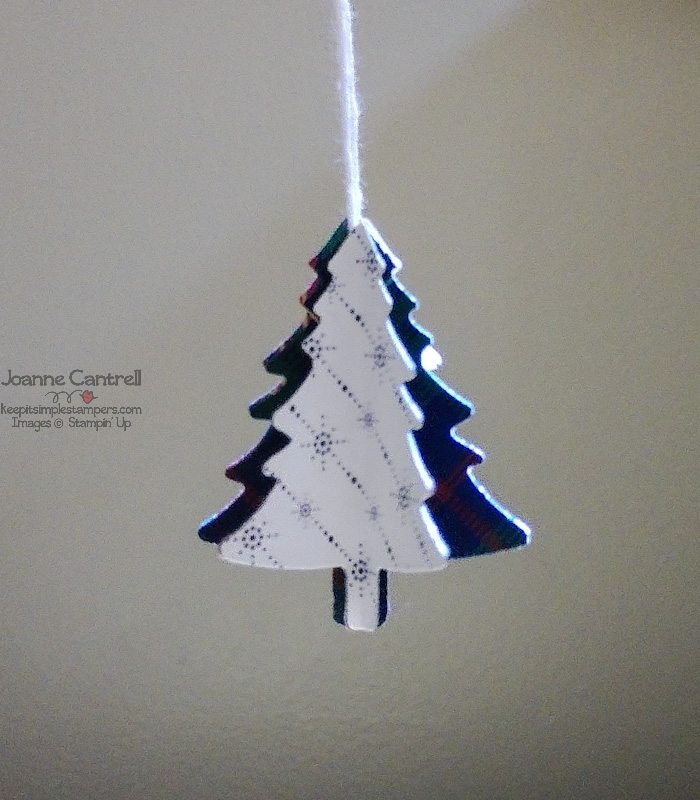
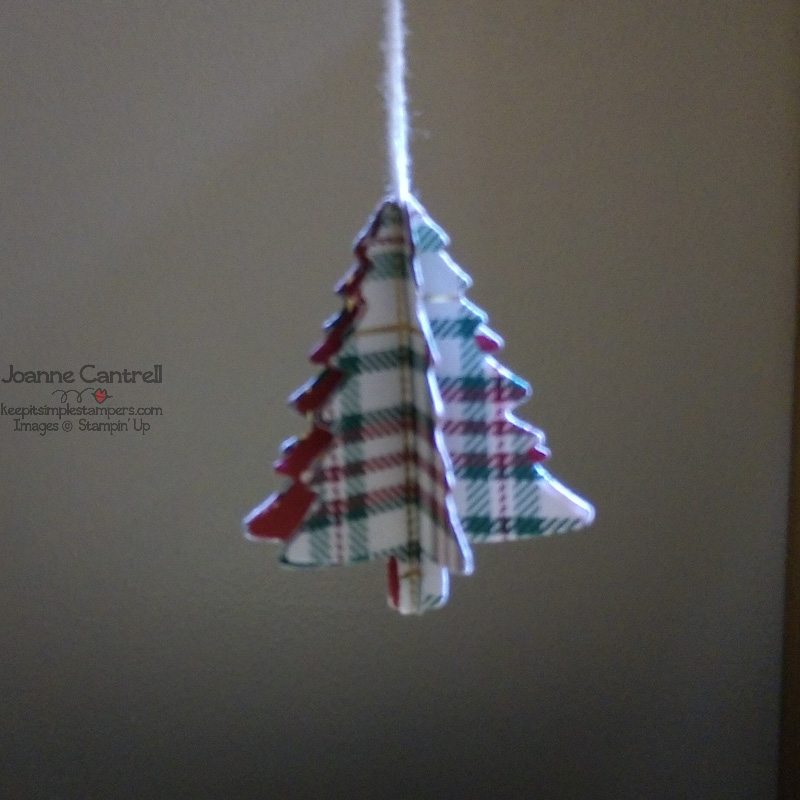
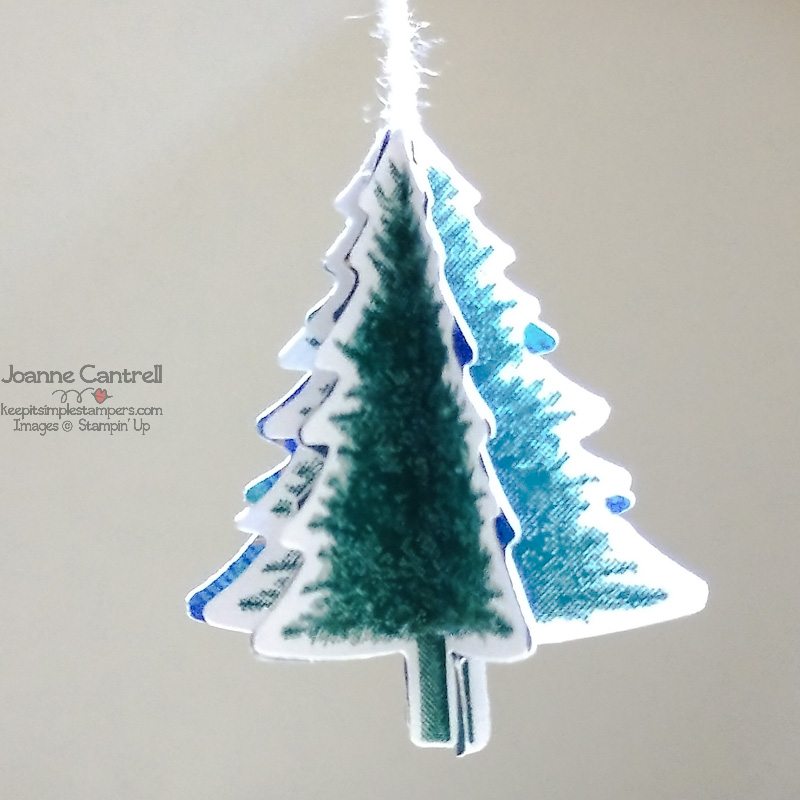
I present to you a cute yet simple Christmas tree ornament.
All that is needed is the Christmas Tree Punch, Perfectly Plaid Designer Series Paper, and adhesive. I used Tombow Multi-purpose liquid glue (sparingly) and glue dots to hold the string.
You can punch out as many trees as you’d like, but probably at least three. I love the look with six trees.
And it doesn’t matter that the tree is not symmetric. It still looks wonderful. To get the sides to line up perfectly, you have to punch some from the opposite side of the paper. Does that make sense?
Well, that’s all I have for you today… Hop along now little grasshopper!
Welcome to the October edition of the Ink & Inspiration Blog Hop. You are currently visiting Joanne Cantrell from a very tiny town smack dab in the middle of the United States.
I have been absent for the past couple months battling a mild illness. But, I have decided it’s time for a comeback and what better time to do that than during the Holidays?
I can’t wait for Christmas! Can you? Luckily we don’t have that long to wait…
9 WEEKS UNTIL CHRISTMAS!!!
OMG… there is still so much to do. Plus, there is Halloween and Thanksgiving to survive first! EEEEEEKKKKK!
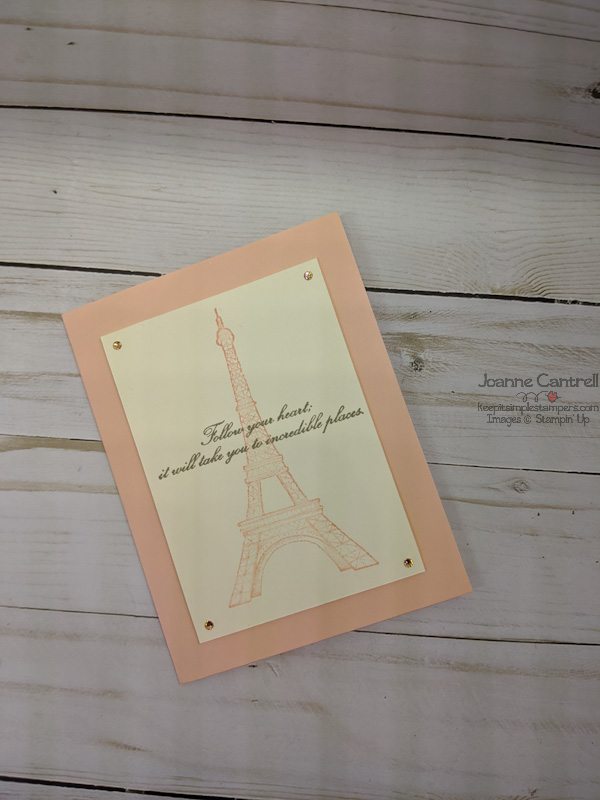
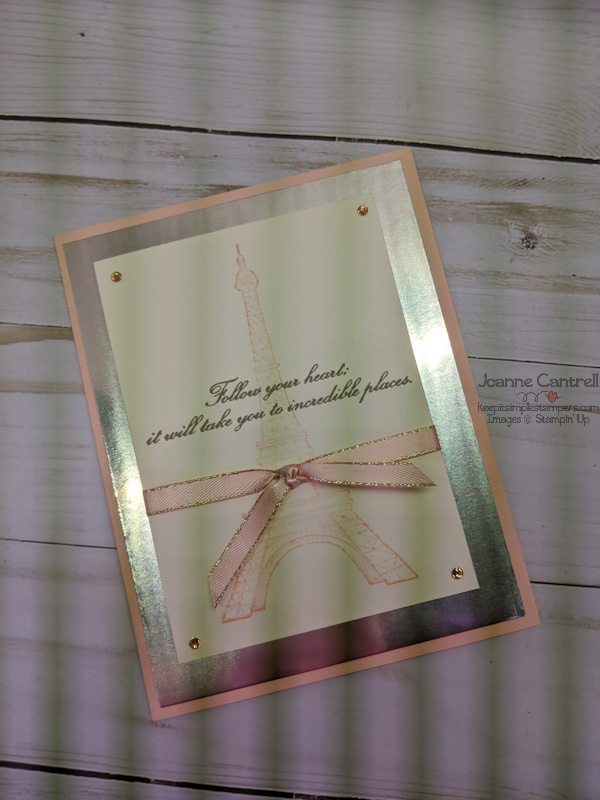
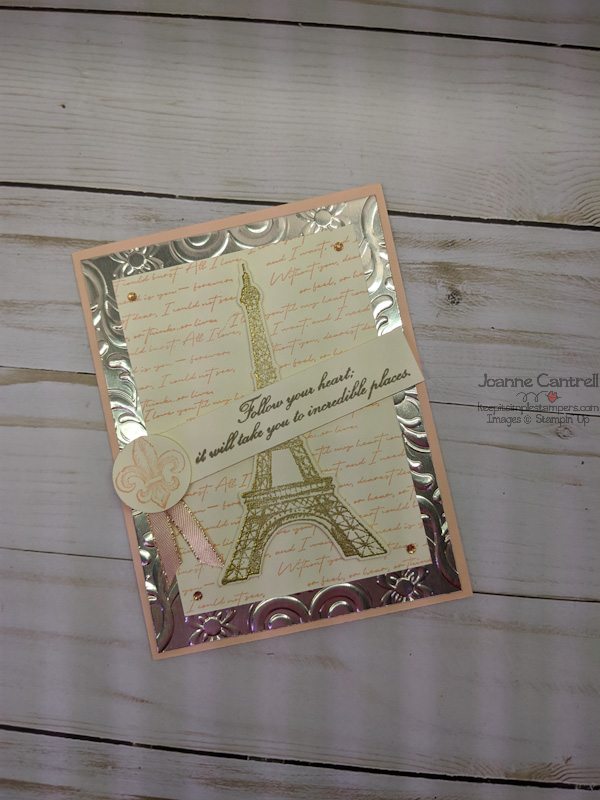
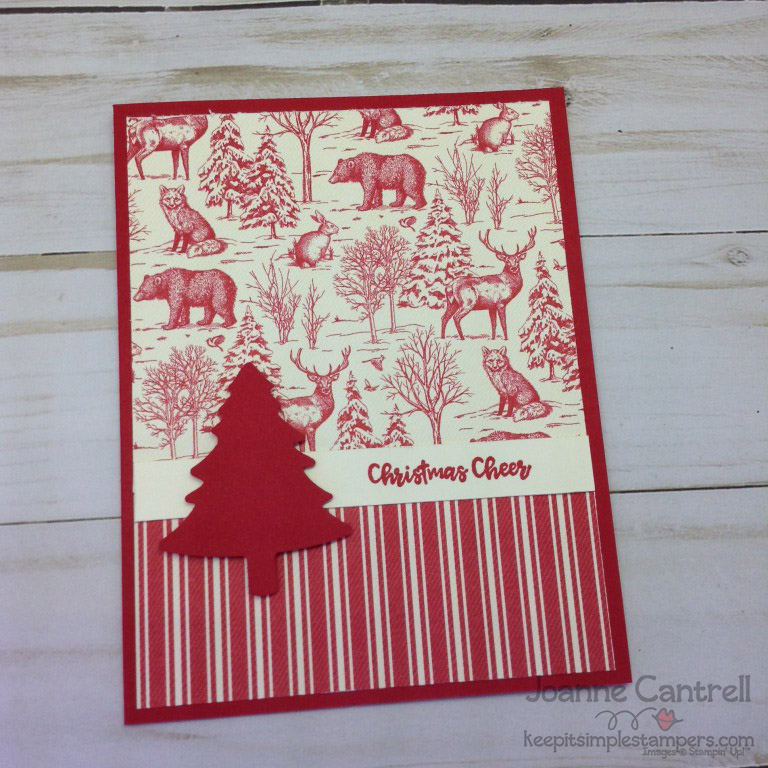
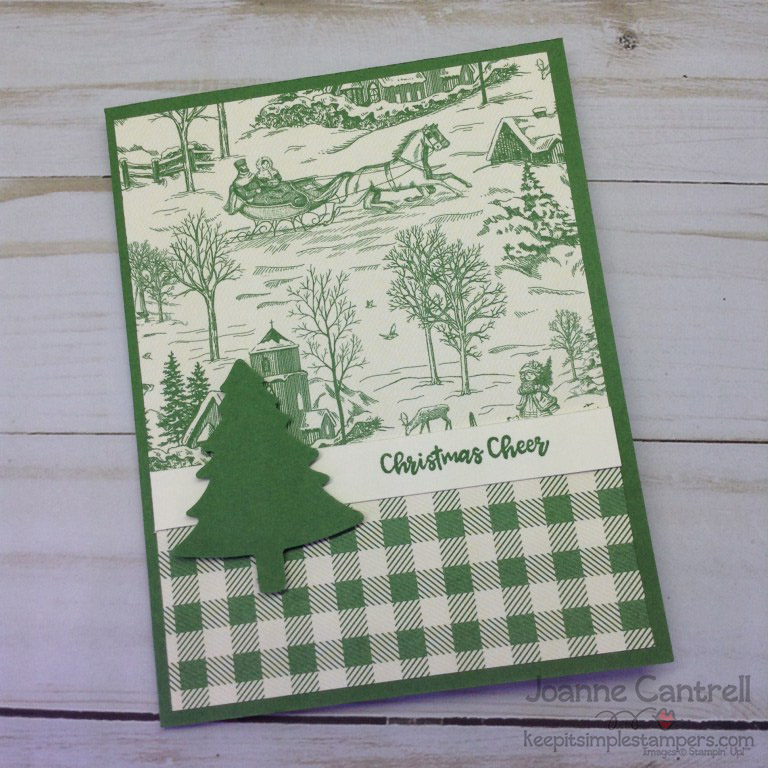
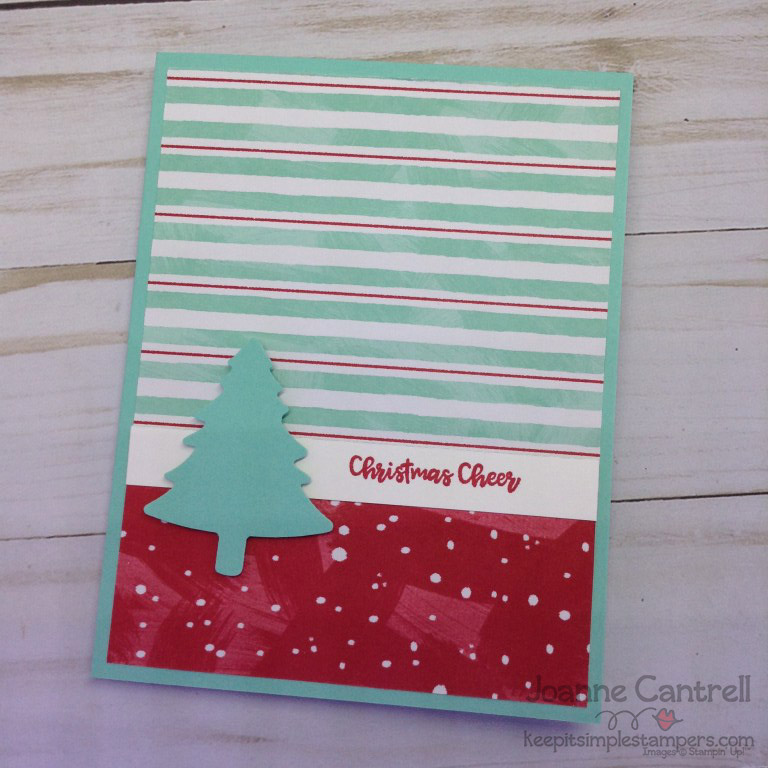
The holidays are such a busy time for everyone. I think having a quick, go-to card design is what you need to help take off some of the holiday pressure. And, that’s just what I have for you today!
These cards use Designer Series Paper, an Itty Bitty sentiment, and a punch. So quick and easy!
When you have gorgeous paper to play with, it makes even a simple layout look AMAZING!
These cards were inspired by a card created by Mary Knabe.
The top piece of DSP is 3-1/2″ x 4″. The bottom piece is 1-3/4″ x 4″. And the strip for the sentiment is 1/2″ x 4″.
The Christmas trees are punched from the same card stock as the base
Wait a minute… That’s not a ChristmasCard! Well, I don’t know about you, but my birthday IS a holiday! Really… It is! In France… But hey, a holiday is a holiday! (Bastille Day, if you are curious!)
Well, that’s all I have for you this month. It sure feels good to be up and stamping again!
Well, hello there and welcome to the October 2019 installment of the Stamper’s Dozen Blog Hop!
The weather has gotten a wee bit cooler around here, so we are talkin’ fall today!
What could better to use for fall than Harvest Hellos bundle?
This bundle from the 2019 Holiday catalog includes both the Harvest Hellos Cling Stamp Set and the Apple Builder Punch.
Actually, truth be told why I am using this set… It travels well! I have had a very busy last few weeks, so I decide to escape to Florida for the Fall Break 4-day weekend this weekend. Since I hadn’t had time to create my cards yet for this, I needed something that could be used to make projects with a big impact, yet would take up a little bit of room!
So, I can now say this is not only the perfect set for teacher gifts and fall decor, but to stamp-on-the-go!
I know… Let’s set the cards already, huh!
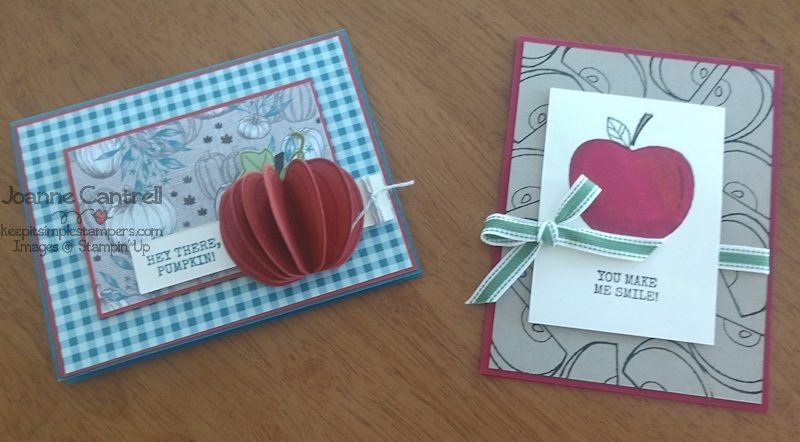
Well, here they are…
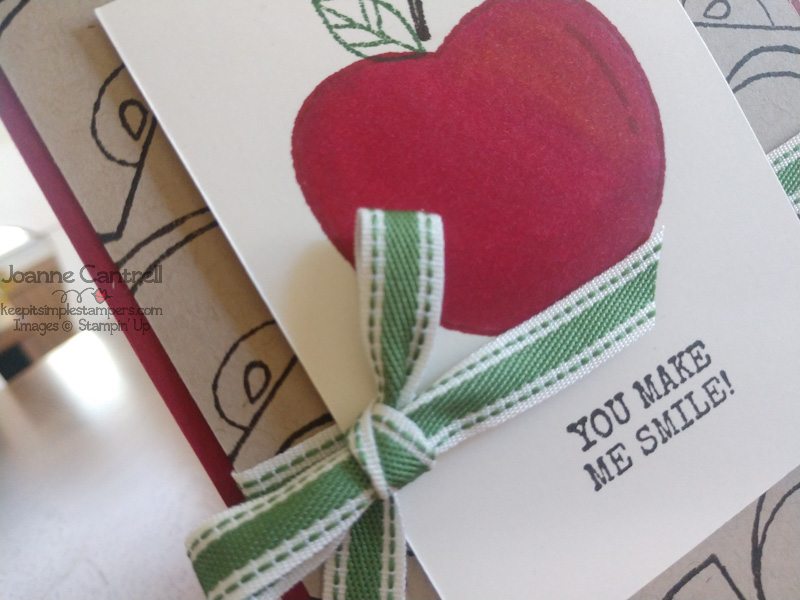
The Harvest Hellos stamp set makes both apples and pumpkins that can be punched out with the Apple Builder Punch or stamped and colored.
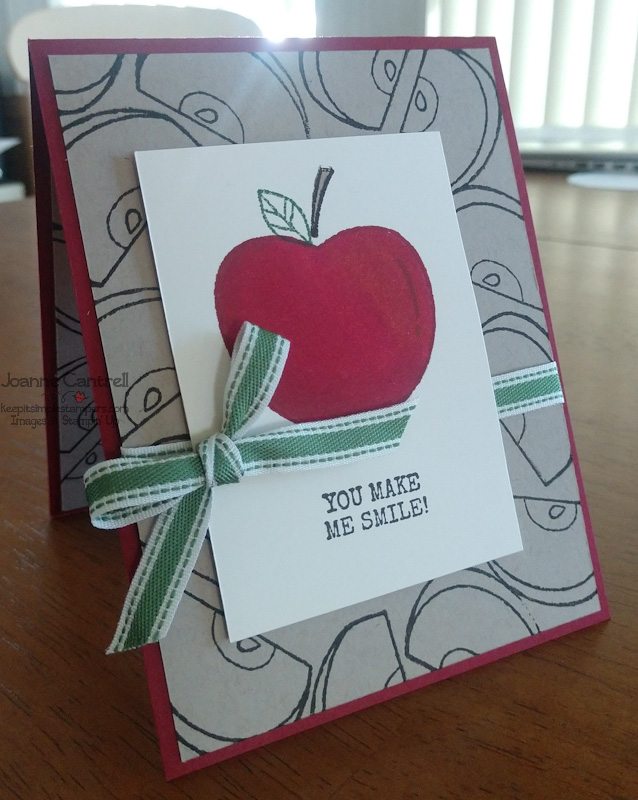
For the apple card, I used Cherry Cobbler, Crumb Cake, and Very Vanilla cardstock. For ink, I used Cherry Cobbler for the apple, Early Espresso for the stem and sentiment, and Garden Green for the leaf.
I colored the apple in the both the Light and Dark Cherry Cobbler Blends and added a little Dark Pumpkin Pie for extra depth in the top corner. I forgot green Blends, or I would have colored the leaf too! Or, I could have used green paper and cut it out using the punch… 🤦
A little of the Garden Green Double Stitched Ribbon adds a perfect finishing touch.
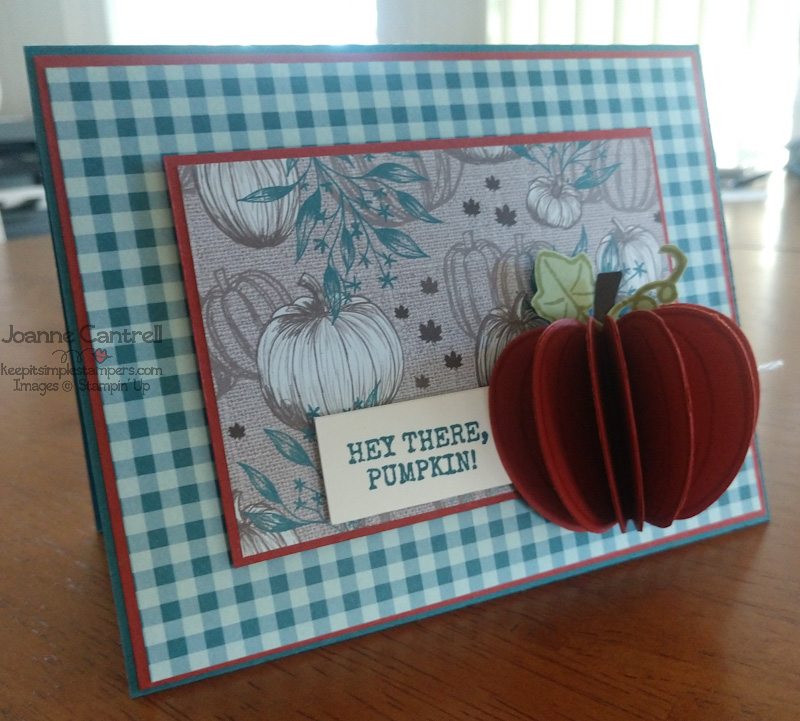
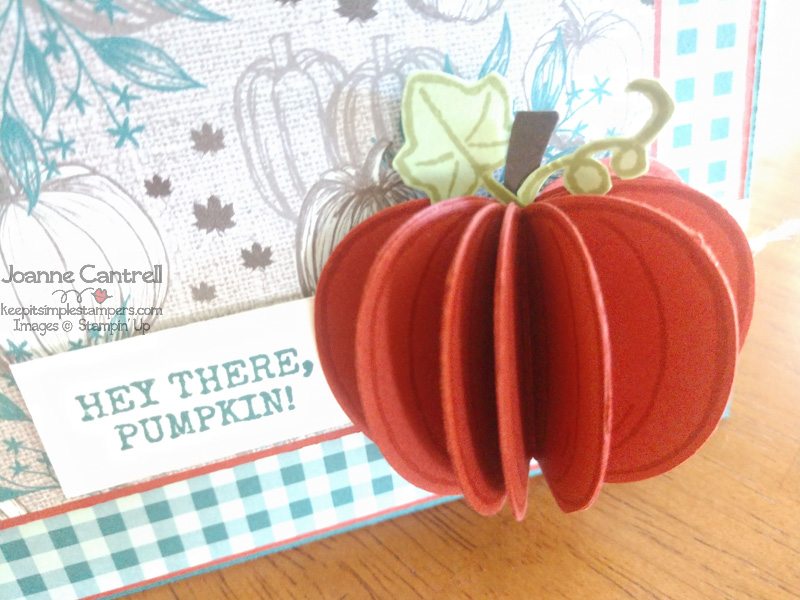
Here is a more Fall-ish card… I used Pretty Peacock, Cajun Craze, Very Vanilla, and Pear Pizzazz cardstock for this card as well as the Come to Gather Designer Series Paper. The ink used was Pretty Peacock, Cajun Craze, and Pear Pizzazz.
To creat the 3-D pumpkin, I stamped the pumpkin image in Cajun Craze ink on Cajun Craze cardstock. The I punched them out using the apple punch. I punch out 7 or 8 for make it look full. I used the Tombow Liquid Multi-purpose glue to attach them together after I scored them with the NEW paper trimmer!
I punched the stem from Early Espresso cardstock using the apple builder punch. The leaf and Vine are Pear Pizzazz on Pear Pizzazz and fussy cut. I used the Tombow glue to attach to the pumpkin and then used it to attach the pumpkin to the sentiment piece.
Well, that’s all I have for y’all today! Hop along to see what everyone did to celebrate fall…
Hello and welcome to this month’s installment of the Stamper’s Dozen Blog Hop! I am so excited that you stopped by to visit me!
This month we are doing something special and not showing you any cards whatsoever. How exciting is that!?! Did you even know you could do other things with SU! products besides making cards? I know, it’s hard to imagine. I can’t wait to hop through and see what all these great ladies have put together for y’all today!
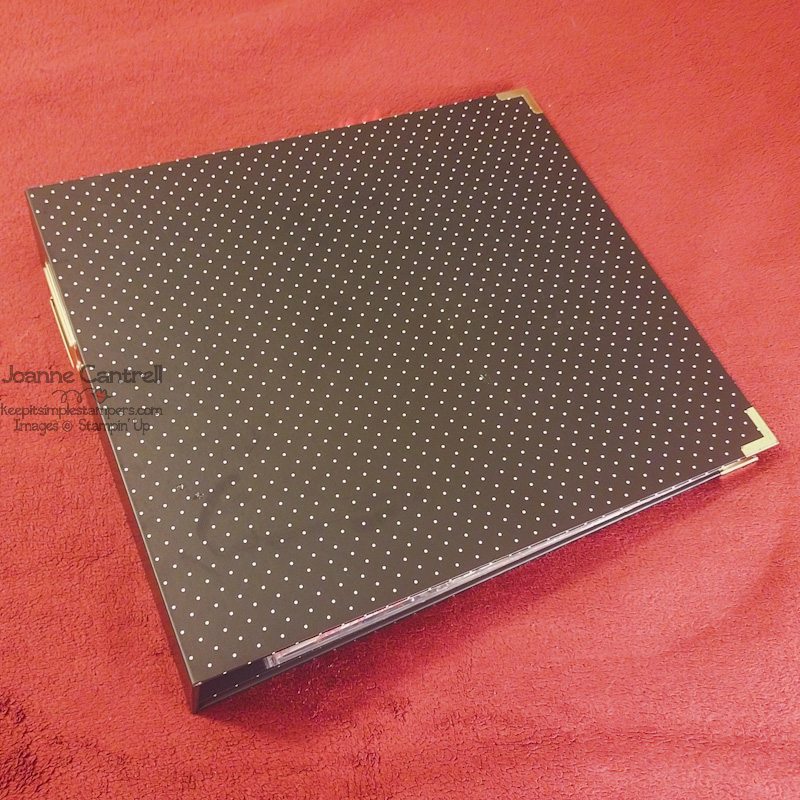
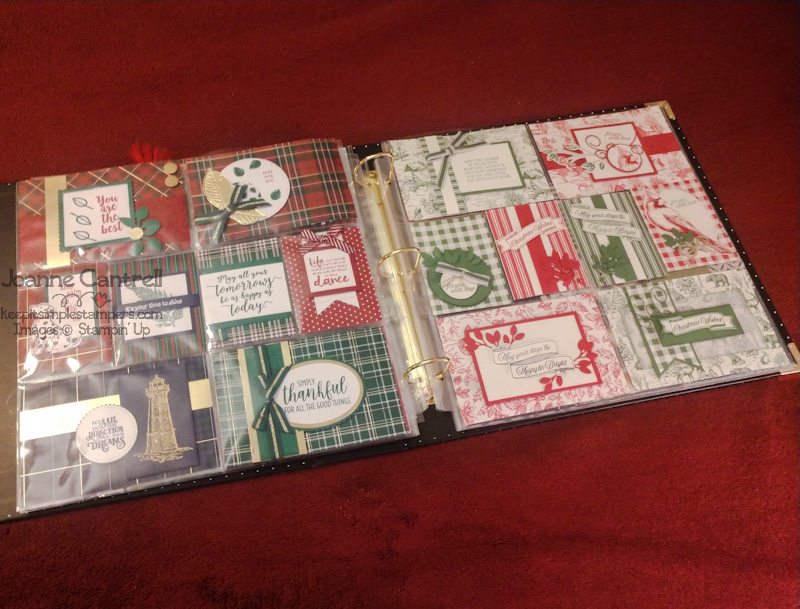
But, first things first… These sampler pages came from the pocket letter trend that I shared a while back. But, since SU! doesn’t sell the pockets, I converted the idea into an album using the Memories & More 12″ x 12″ black polka dot album and the 12″ x 12″ variety pack of page pages.
Let’s open it up and see what is on the inside.
This display the back side of the Wrapped in Plaid sampler and the front of the toilet sampler. You will notice the front side focuses on the items from the suite from the holiday catalog, and the back side shows how well the paper coordinates with the products in the annual catalog.
Well, in this instance, it shows the Annual catalog suite on both sides…
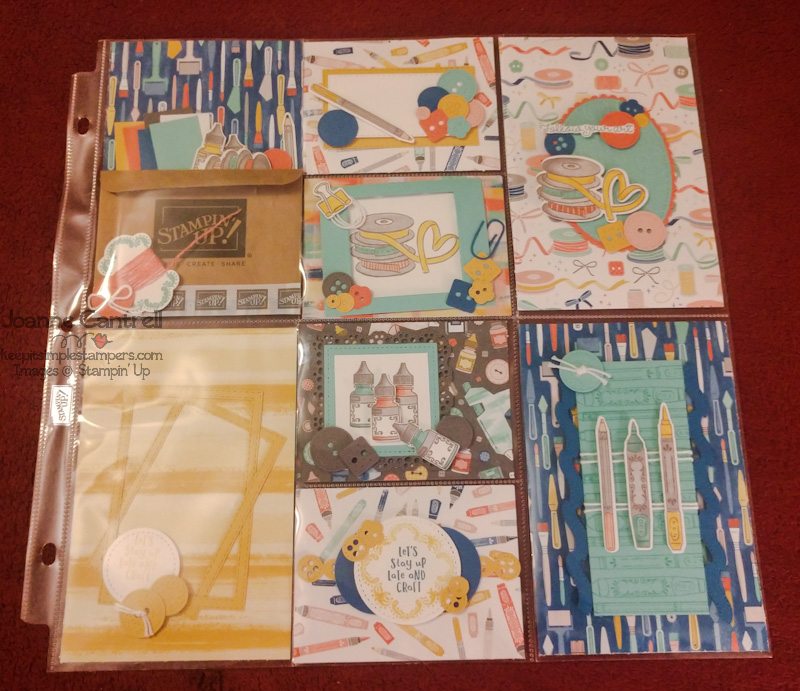
The front side shows the more colorful side of the Follow Your Art Designer Series paper along with the other items from that suite.
While the back side, shows the pastel color scheme of the reverse side of the paper. Isn’t it beautiful.
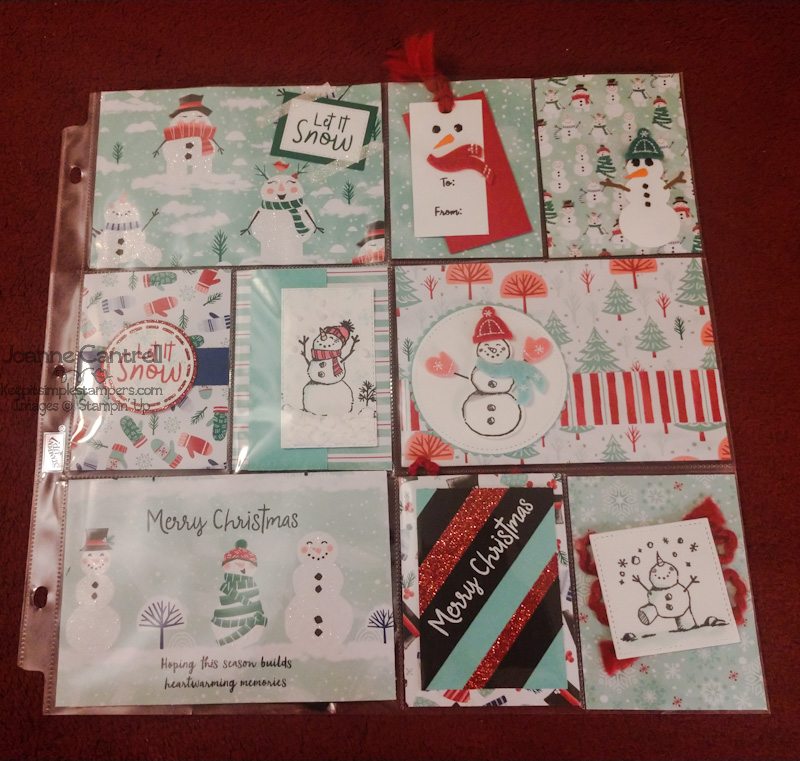
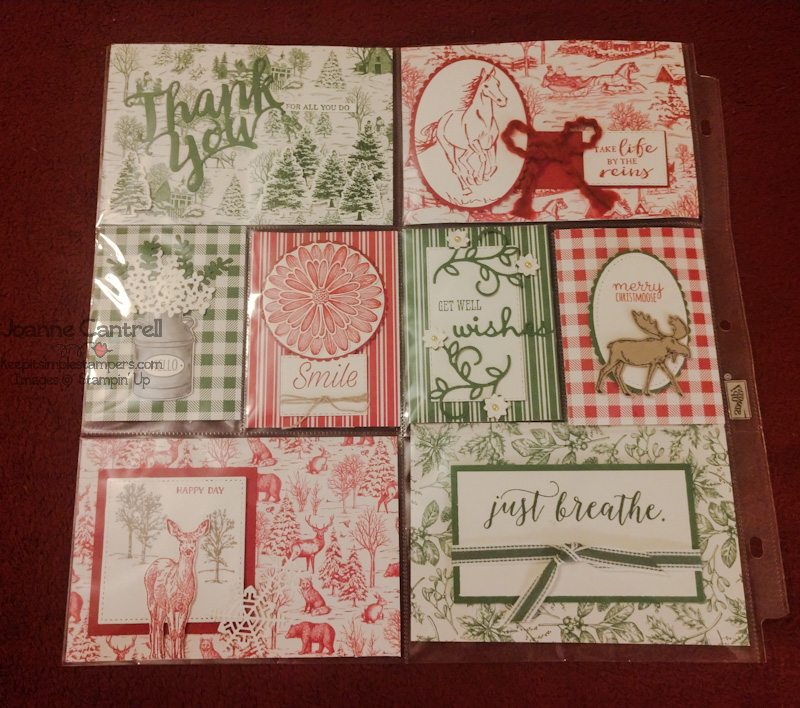
Here is the Let It Snow Suite. Don’t you just love those snowmen? And that paper… 😍.
Look at that pocket in the bottom left. It is simply sentiments stamped on paper. Nothing added! The paper speaks for itself!
At this point, I will speak on the importance of details. If you are working on births sides of the Designer Series Paper, you will want to make sure that it is in the proper direction BEFORE you adhere the stuff to it!
See Exhibit A… In the bottom right corner. 😱. Oh no! Oh well, ’tis but a teachable moment! Learn from my mistakes people! Learn! 😂
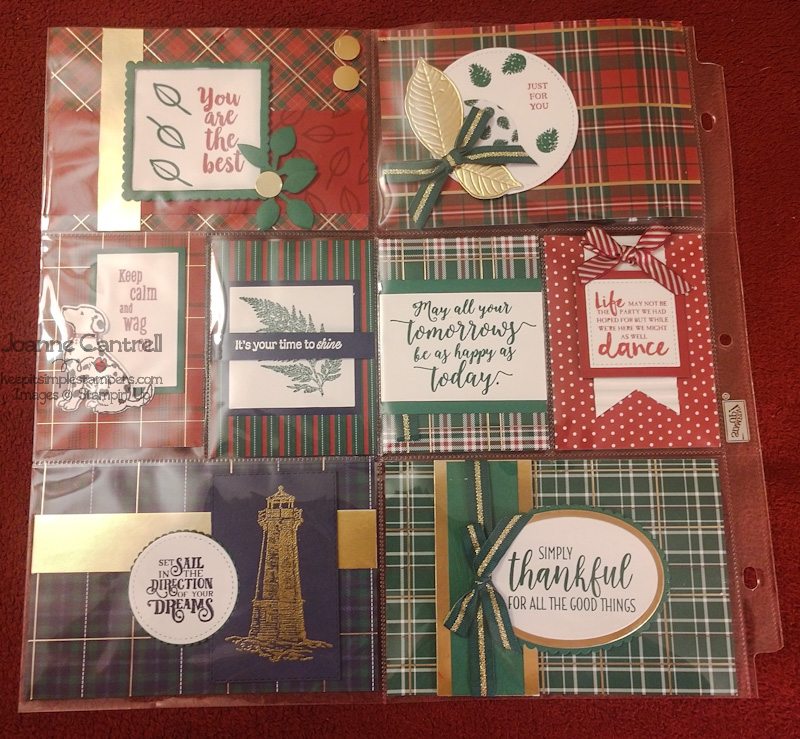
Here is the front side of the Wrapped in Plaid suite. Don’t you just love that paper?
And, the back side! Look at how well that can be incorporated into designs with non-holiday sentiments and dies!
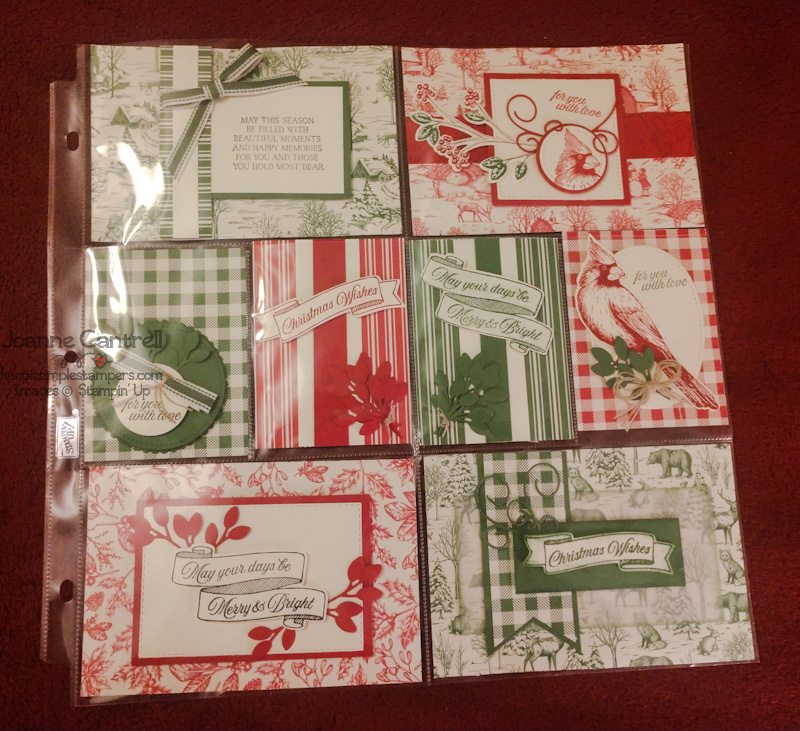
And the last page I will show you features that beautiful red and green Toilet Tidings.
Here is the back side. It was a little more challenging because of the color scheme. But, if you keep in monochromatic or add in blues and blacks and browns, it can change the vibe all together
Well, that’s all I have for you. If you have any questions this Suite Sampler Album, please let me know!
Hop along now and see what the others have created to inspire you!
Hello and welcome to the August 2019 installment of the Stamper’s Dozen Blog Hop! This month you are in for a special treat. It’s all about the Holiday Catalog!
I’m not sure where you live, but here in the middle of the United States, we are in the middle of a heat wave. The outside temperatures feel like they are over 100 degrees, and it’s definitely not a dry heat. Here in Southern Illinois, we call it “the air you can wear!” So, what better time of year to start thinking about the Holidays?
Can’t you just picture those leaves falling off the trees and swirling in the cool breeze? What about the icicles hanging from the edge of the roof? Snow banks and hot cocoa… it will all be here before you know it and you don’t want to be left unprepared!
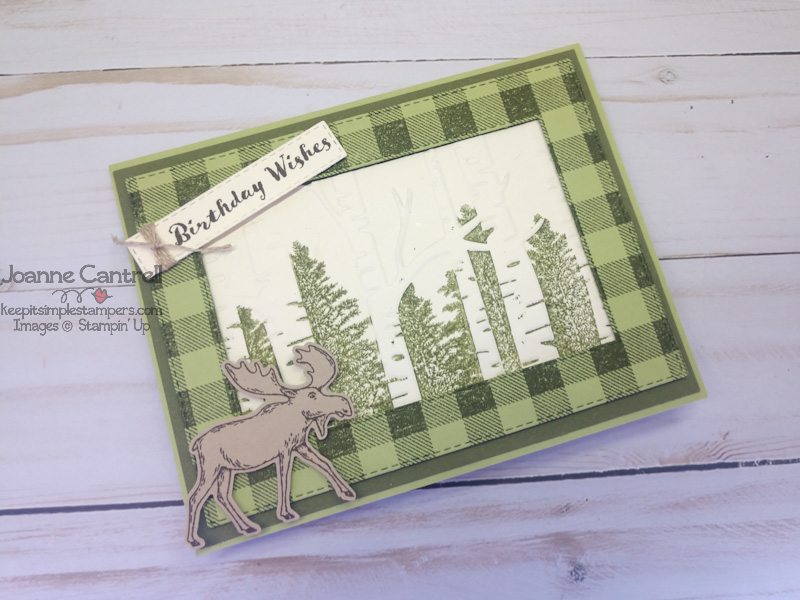
Or in this case… CHRISTMOOSE is coming!!!
Meet Marty Moose. I really don’t know if he already has a name.. but he does now. This is the first set in the new 2019 Holiday Catalog that I knew I must have! It’s not as strange as you may think.
Well, maybe it is. You see,. I have a sister that is an avid moose collector. She has tons of Meese… that’s the official plural of moose, right!?! It all started when we lived in Maine in the early 80’s. Since then, anytime I find moose stuff, I just have to get it for her… so, guess what was in my pre-order?!?
Yup, it’s the Merry Moose Bundle (found on page 27). It comes with the Merry Moose stamp set and a Moose Punch! I am so excited about that punch!
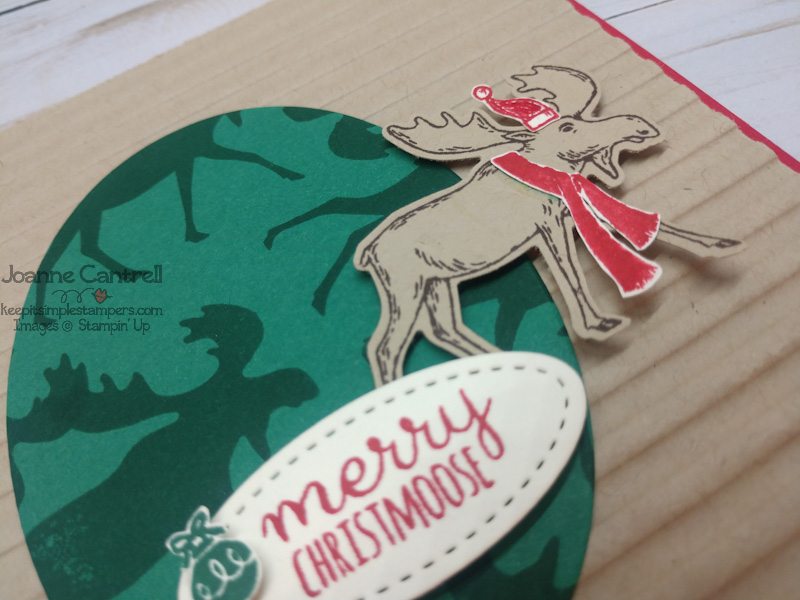
So, let’s take a closer look at that card above…
I used a Real Red card base. Ran a piece of Crumb Card cardstock through the Big Shot with the Corrugated Embossing folder. The oval is Shaded Spruce with the moose background image stamped in Shaded Spruce. The Moose is Early Espresso stamped on Crumb Cake Cardstock and punched out with the punch. The hat and scarf are Real Red ink on Very Vanilla cardstock and fussy cut. The ornament is Shaded Spruce on Very Vanilla and fussy cut. And, the sentiment is in Real Red on Very Vanilla and cut out using the smallest Stitched Shaped oval die.
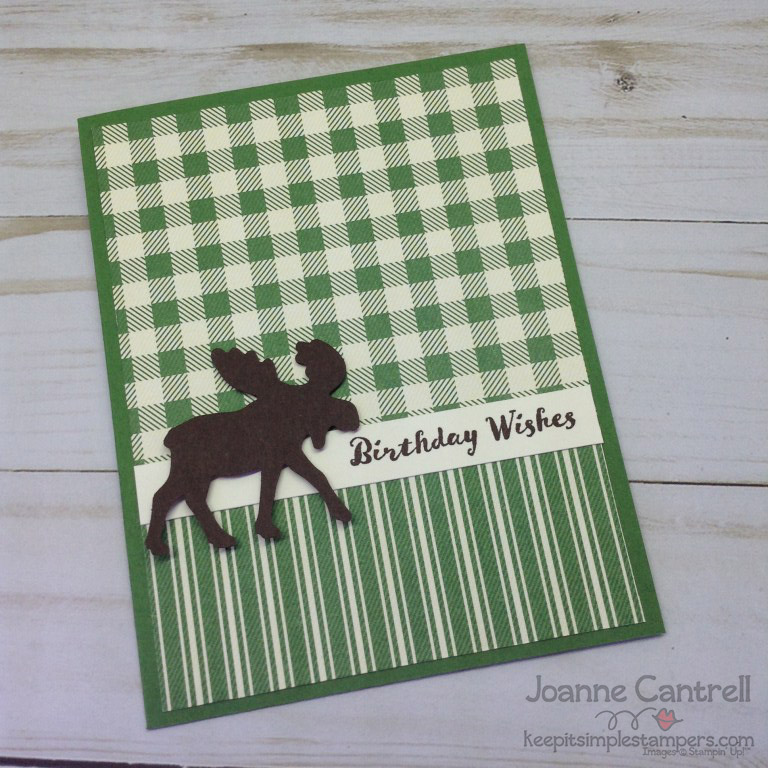
But, since it’s not quite Christmas yet, I decided to see how Marty fit on a birthday card!
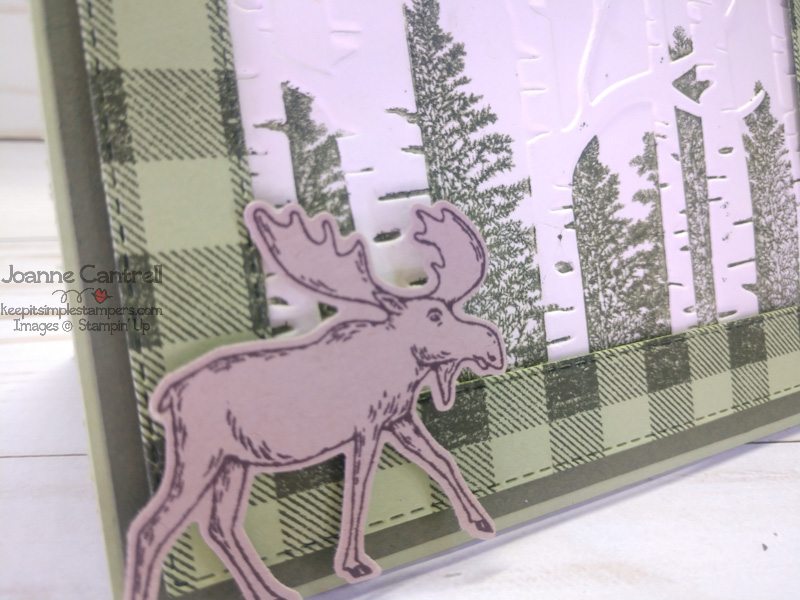
He looks right at home walking though the woods on this masculine birthday card. It’s Pear Pizzazz and Mossy Meadow. I stamped the Woodland embossing folder with the larger tree from stamp set before I ran the Very Vanilla piece through it. This makes it look like those pine trees are behind the birch trees. The sentiment is from Itty Bitty Birthdays in the Annual Catalog.
Here’s my close up on it…
I just really love this moose and see me using a lot of him in the future. This set is perfect to pair with others in the catalog which I will be doing so, so be sure to check back!
But for now, be sure to hop on through the rest of the Stamper’s Dozen to see what fun things they have created using the new Holiday Catalog items!
Welcome to Keep It Simple, Stampers! My name is Joanne Cantrell and I am from a tiny little town in the middle of the United States. Thank you so much for stopping by to see my project today!
Someone posted a wonderful card on Facebook that sparked my imagination. It was a dragon that was created by using the new petal punch. I thought it was a great idea. If I had a picture of it, I’d show it to you, but I don’t remember who posted it and it was a while back. But, That was my inspiration.
And, if you saw my last post, you have learned about how I am the maid with the dirty house. I create cards by the hundreds but I am the absolute worst when it comes to sending cards!
So, I made this card. With a purpose. To send it to my nephew. For his birthday. In a couple weeks.
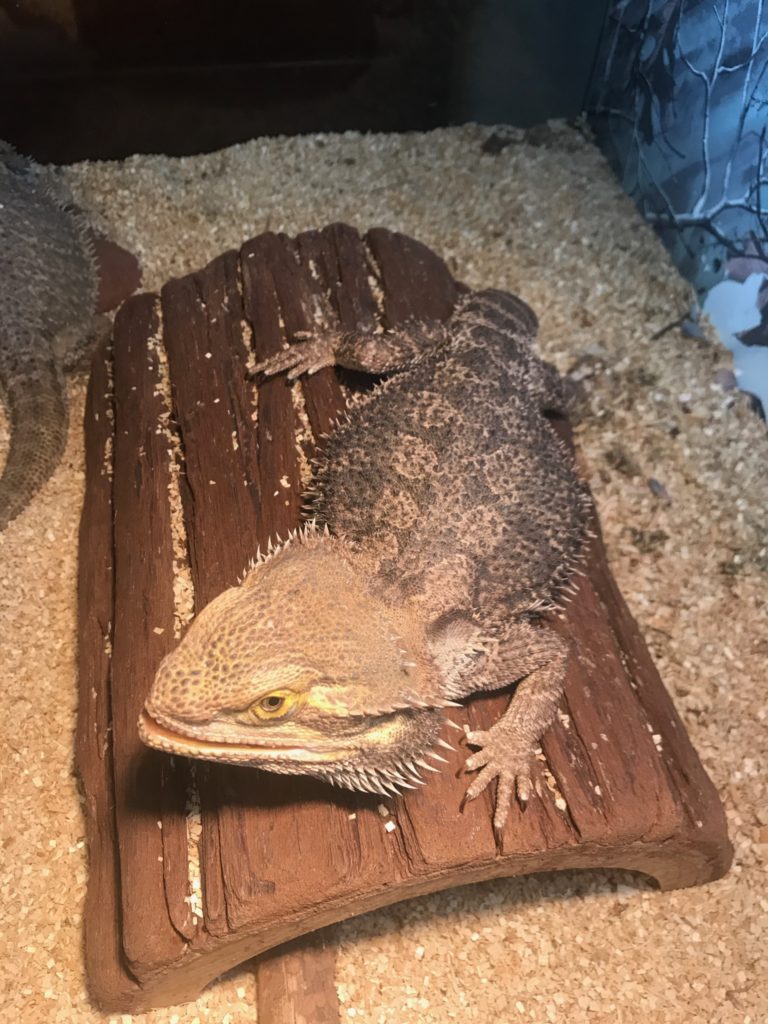
My nephew has bearded dragons, so I was trying to make a card that looked like them. I failed miserably. See the dragon below for reference! His name is Spike!
First, I’ll give you a couple photos of how I created this card, then I’ll continue with my story.
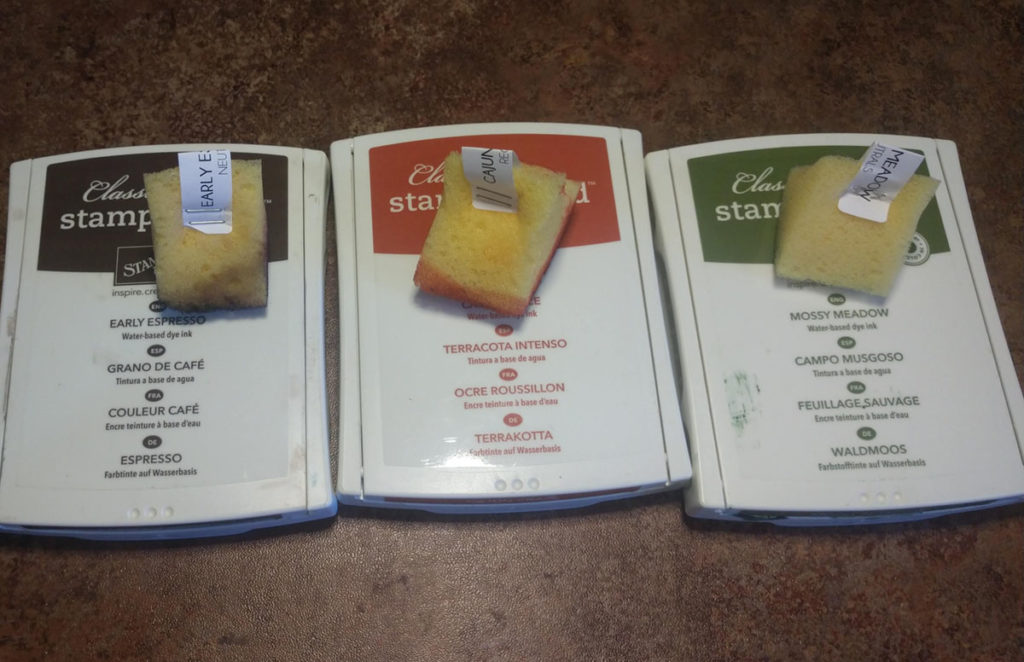
Here are the colors I used…
I sponged the edges of the punched pieces using these colors.
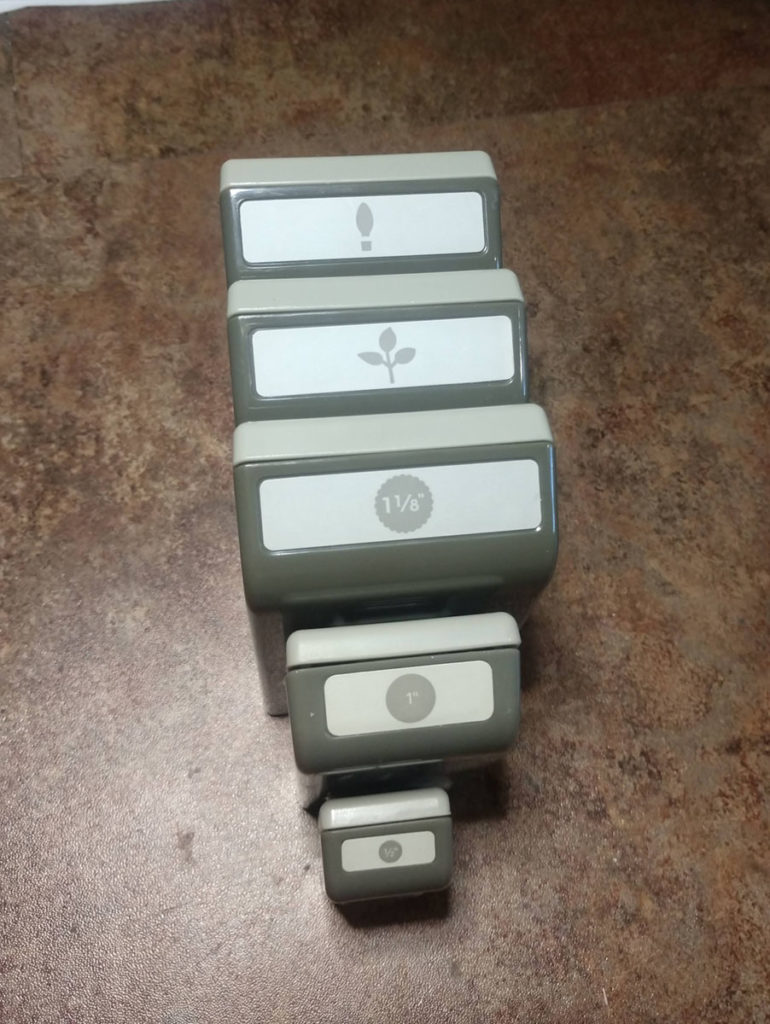
Here are the punches used…
The scales were all punched using the bulb punch. The teeth are the leaves from the leaf punch. The circle punches and starburst punch created the eyes.
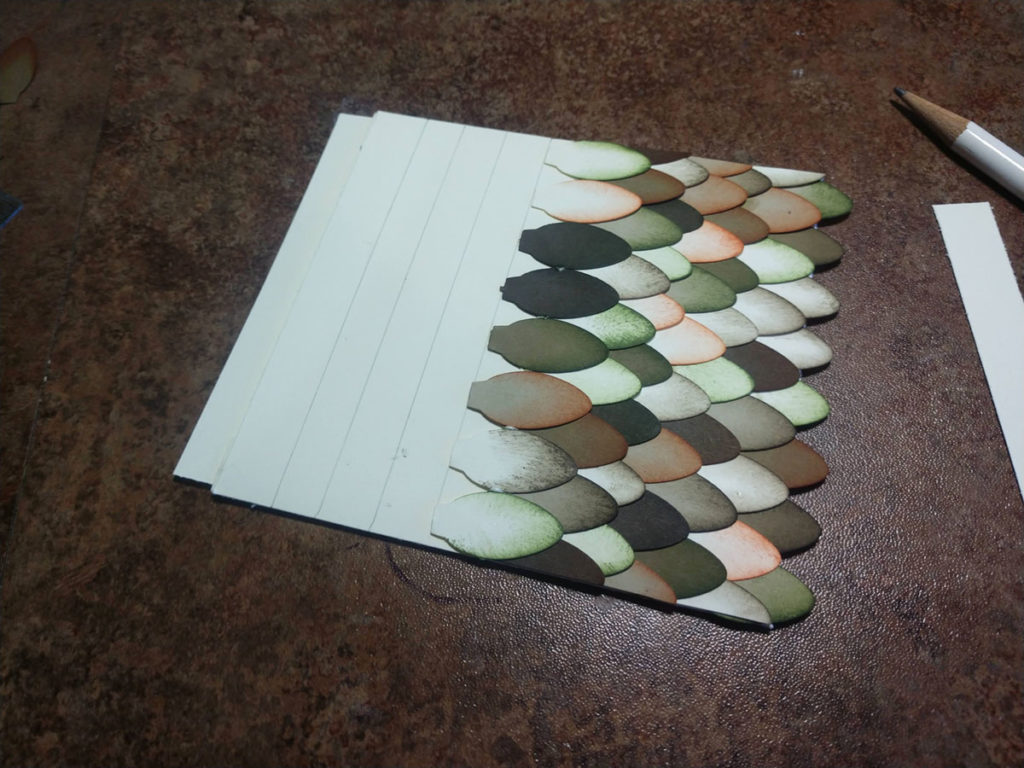
and, a little glimpse at how I lined up the scales.
I did try to do it by eye, but then the rows were getting all wonky, so I drew some lines. I used Tombow Multipurpose glue – in a line along the wide part of the bulbs. You can see a little of it peeking up between the bulbs in that top row.
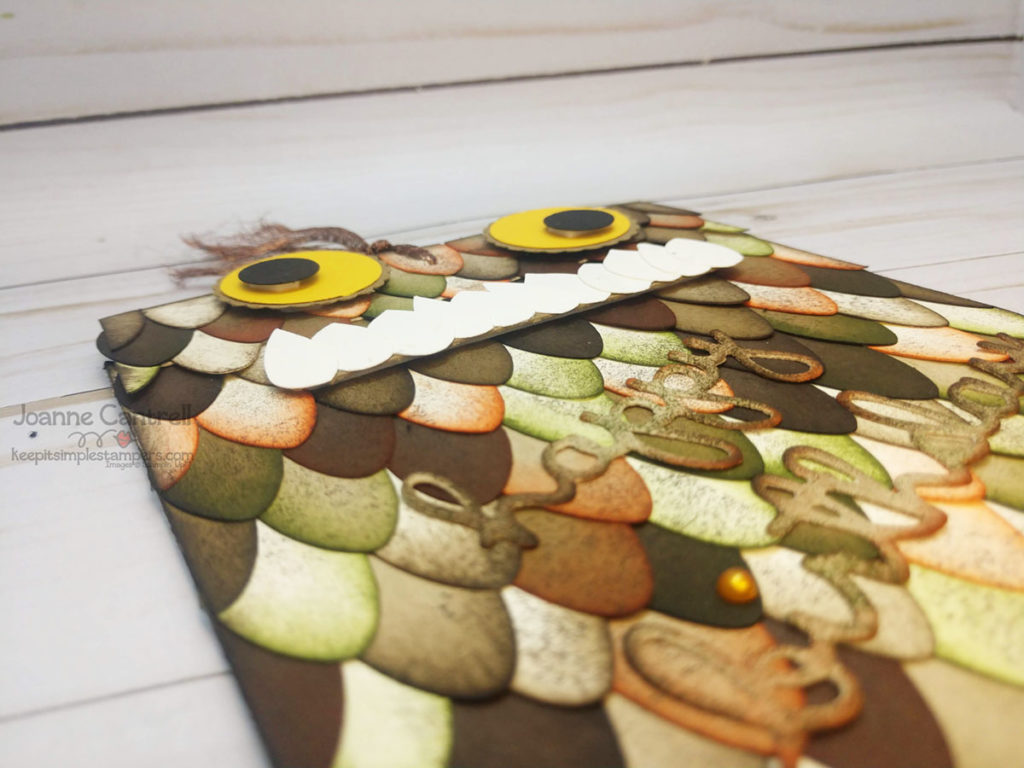
When I finished the rows, and figured out how to make the top of the slider…
Oh, did I forget to mention this card is a gift card holder and it slides up. It is a Pocket card or whatever it is called these days
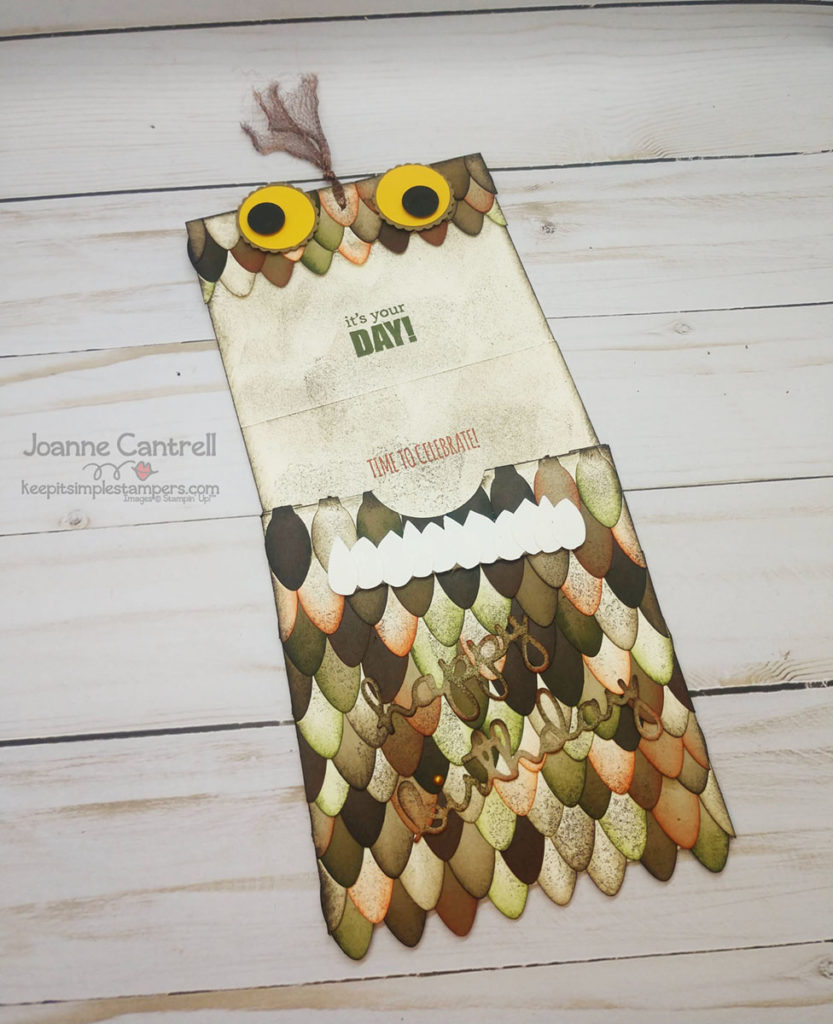
… anyway… It was looking like an owl so I added the silly eyes and the teeth.
Here is my mandatory close-up.
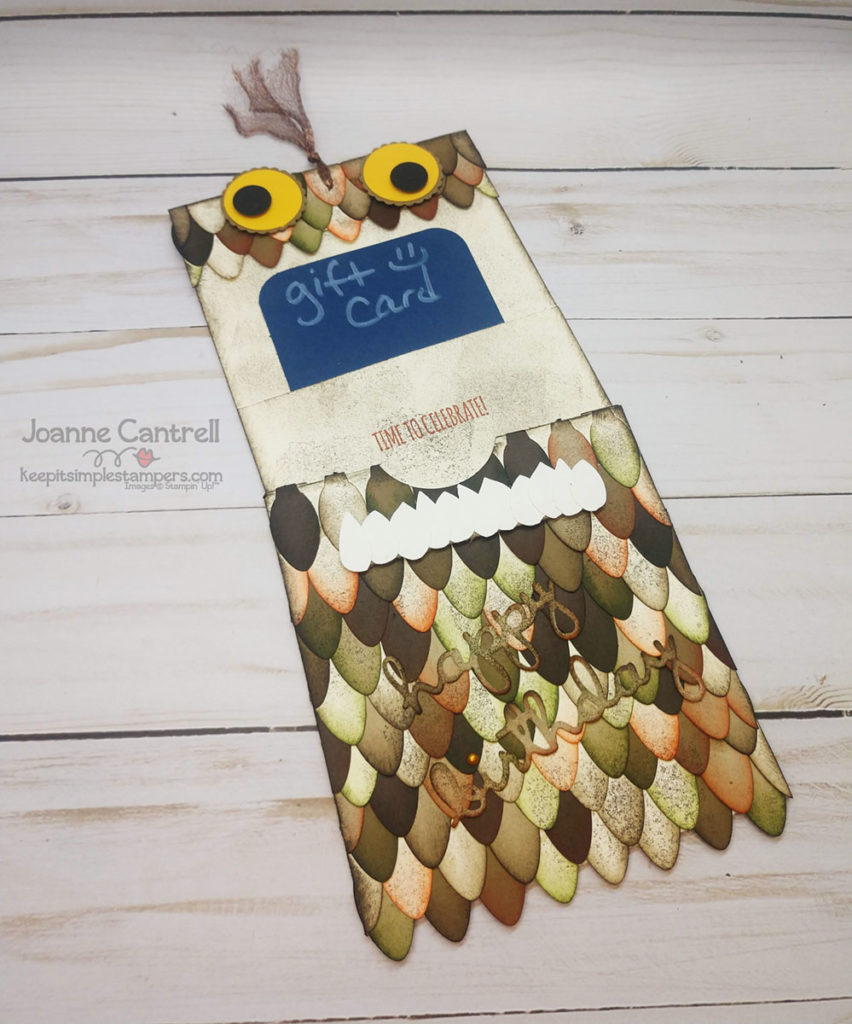
And here is the full card pulled out…
And, without the gift card in it’s pocket.
Well, I hope you enjoyed this project. I look forward to seeing you again! Now it’s time to hop along and see what every one else has for you!
You have stopped here in a small town in the middle of the United States to see what I have for you today. I will try no to disappoint!
So, I guess it’s time to be completely honest with you all. When it comes to sending cards, I am the worst! I make cards all the time. I must have thousands of them. But, I never send them or given them to anyone for any special purposes. I do give people cards to use and I do sell some of my cards at fairs, etc. I just never thing to make people a special card for their special occasion and send it.
Well, that’s not quite right either. I do think of it. I design the card in my mind. Lately, I just haven’t had the time to actually sit down and make it. And, if I want to give you a card, I want it to be made especially for you… Not just give you one out of my stash of club left overs and blog samples.
But!
But, I am going to change that… With these two cards.
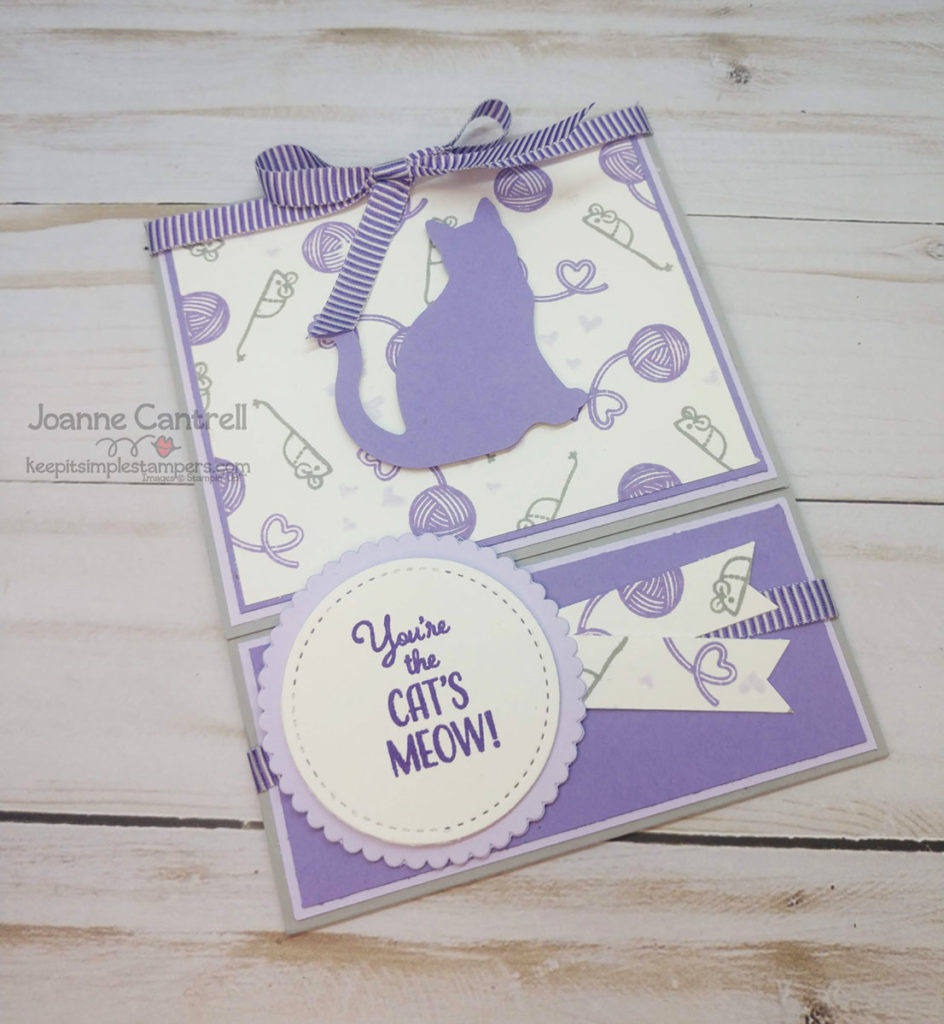
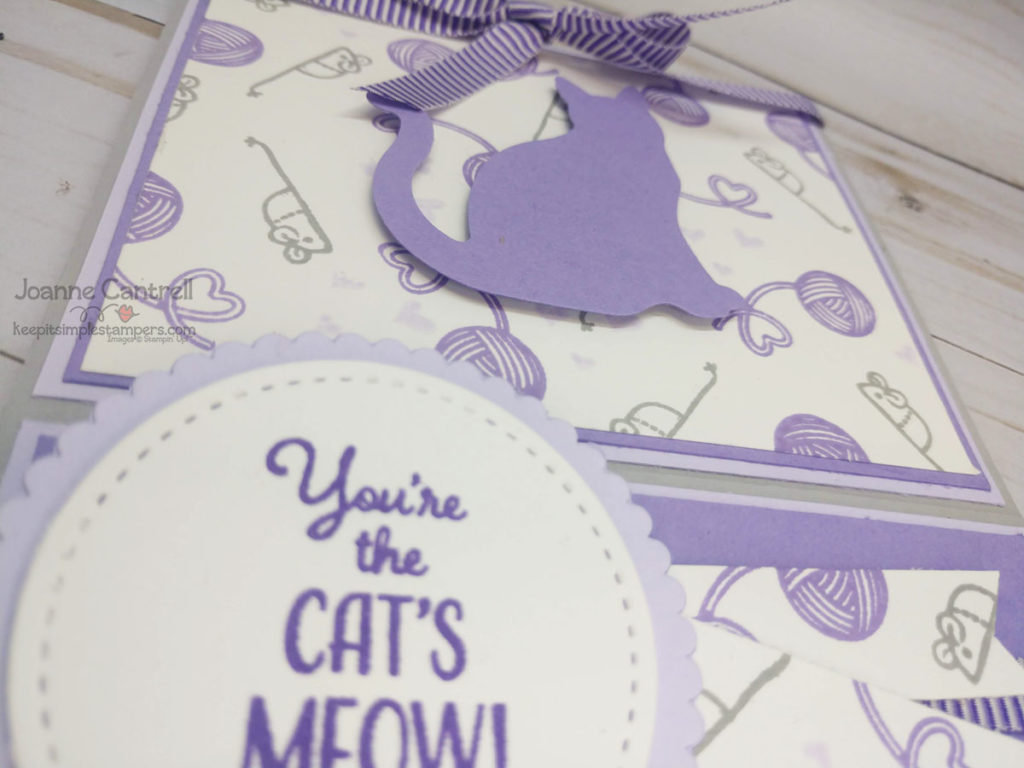
The theme for this IIBH monthly hop is Kids Cards and Crafts. So, my youngest niece turned 18 a week ago. I guess she is technically no longer a kiddo, but I think the card I made for her would make a great card for any cat-loving teenager.
I CASE’d (Copy And Share Everything or Copy And Selectively Edit) a card by Debra Harrison. But, I turned it into a gift card holder…
Whoa, what?!?
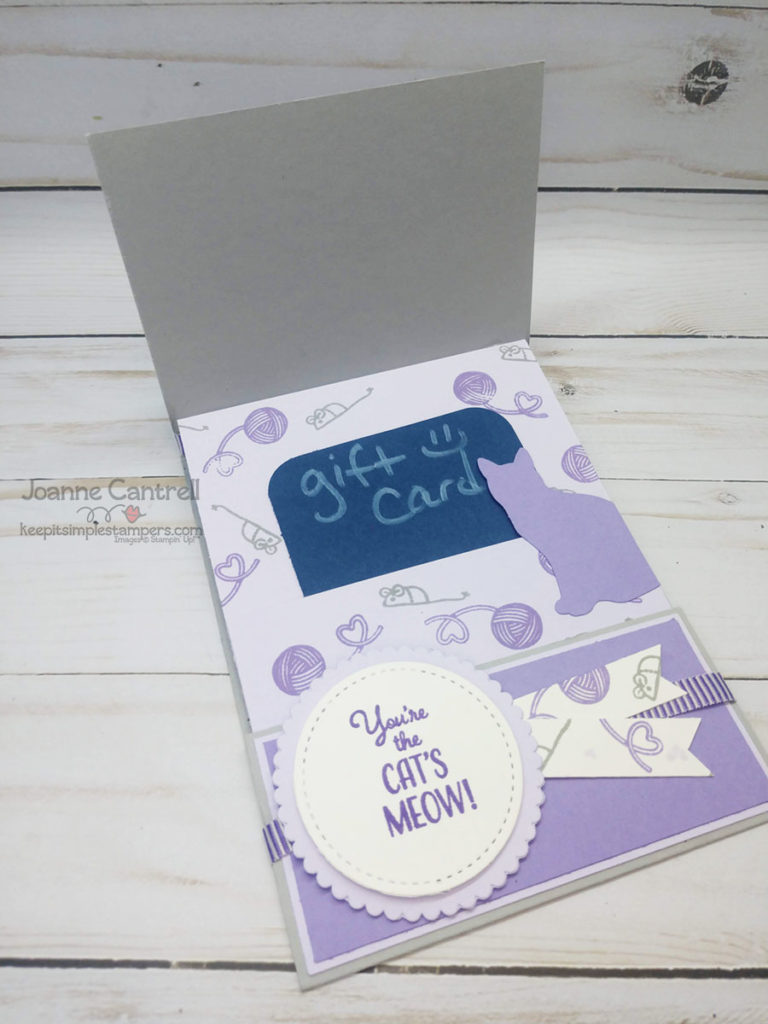
Yep!!! Check it out!
The gift card portion was inspired by Kat Kalthoff. I adapted her directions to suit my needs. It slides up when you open the card! What teenager wouldn’t like a fun gift card holder?
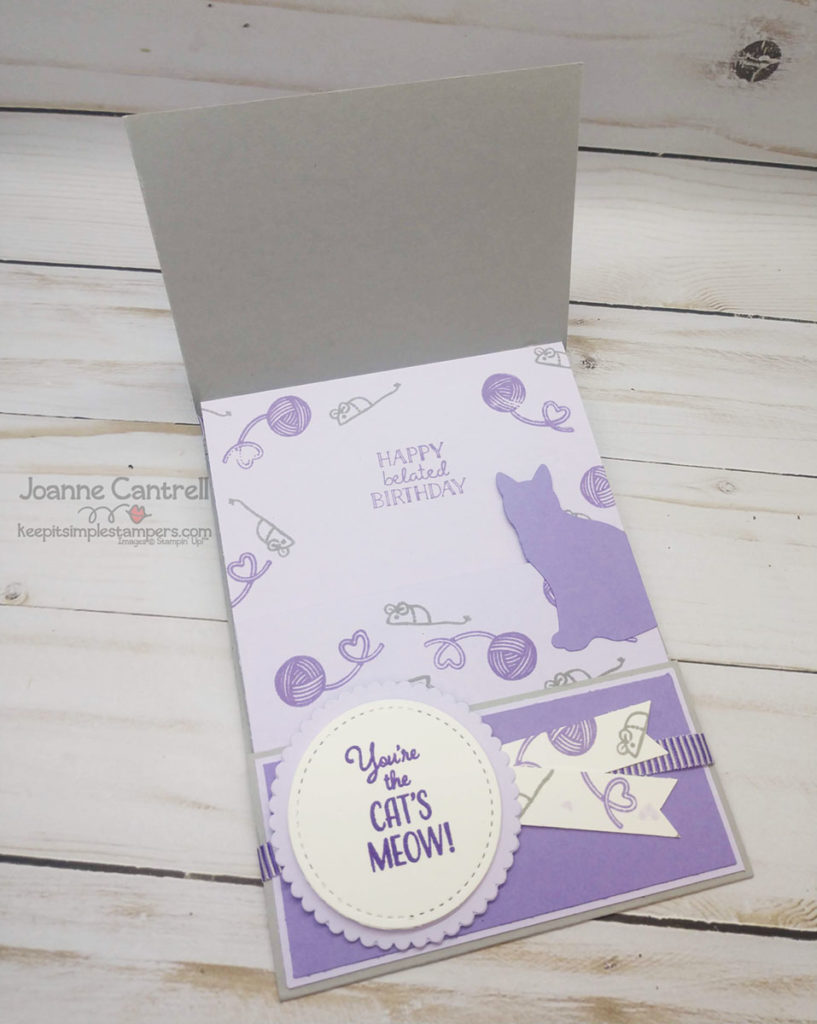
Here’s another shot of the inside with the fancy gift card removed!
And my mandatory close-up shot…
No, I didn’t do a tutorial for this card, but I do have some measurements for you and some photos to help out.
Base: 4-1/4″ x 11 scored at 3-1/2″ and 9″
Smokey Slate Base: 4-1/4″ x 11″, scored at 3-1/2″ and 9″
Purple Posy Inside: 4-1/8″ x 7″, scored at /2″ and 5″. (Note: measurement is wrong on photo!)
Layers: Purple Posy: 3-3/8″ x 4-1/8″and 1-7/8″ x 4-1/8″; Highland Heather: 3-1/4″ x 4″ a 1-3/4″ x 4″; and Whisper White: 3-3/8″ x 3-7/8″ – you will trim 1/2″ off after stamping.
And a couple tips… Use Tombow Multi-purpose glue or Tear and Tape to adhere the inside gift card inser to the card base. This will giveitthestrength needed to open and close multiple times as your teen shows off the card to all her friends!
[metaslider id=4786 cssclass=””]
Well, I had better go get the real gift card and out this in the mail to her! Time for you to hop along down the line…
In my Stamper’s Dozen blog hop post on Sunday, I talked about how I label my sponges… so I decided to show y’all.
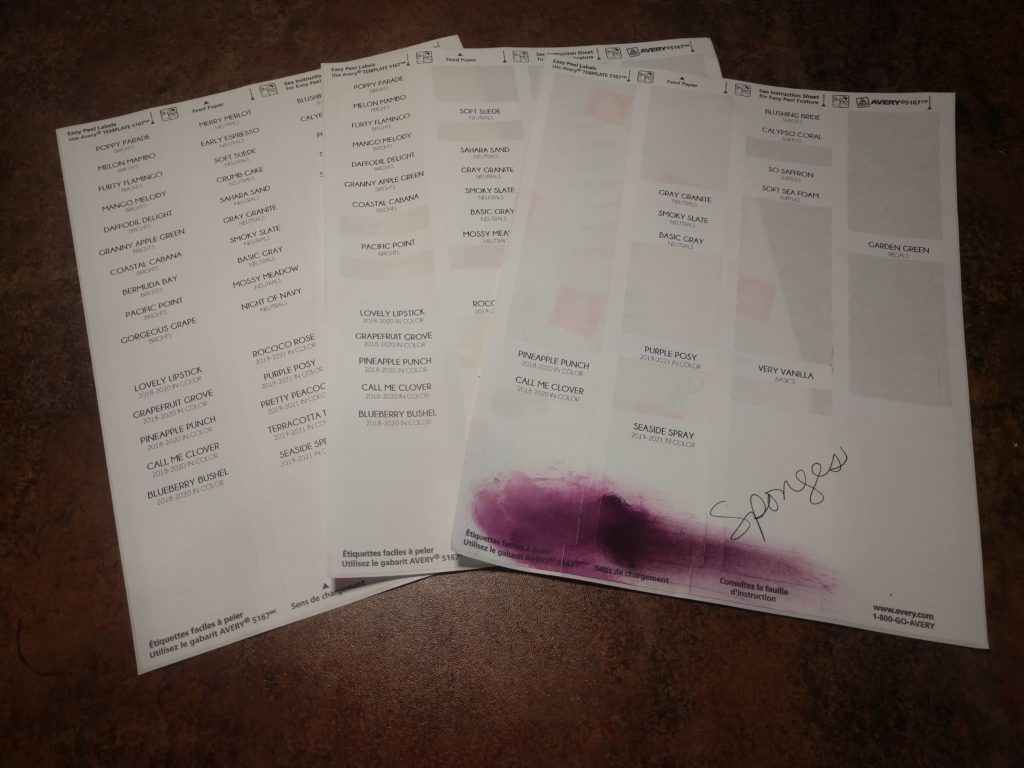
First of all, here are the labels that I use.
(I had a really inky Blackberry Bliss sponge so I tried to get rid of some of the ink on my extra labels!)
I’m not sure where the original file came from but I downloaded it a couple years ago and just change it as the new In Colors come out.
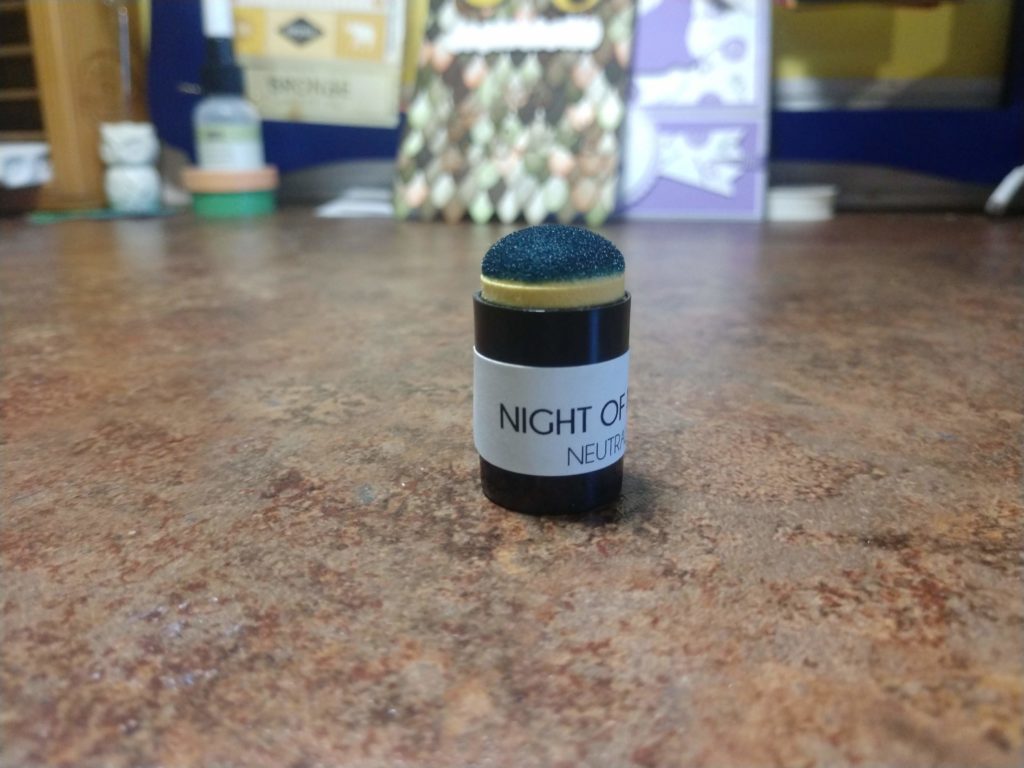
Here is how I use them on the sponges.
I use the now retired SU mini stapler to attach the labels to the sponges. I know you can find other mini staplers in office supply stores and craft stores. The labels are not sticky enough to stick to the sponges without it. Two staples keep it securely in place.
I always print several copies of the label sheets. I use them to label all sorts of things. I do write on the sheet of labels what it is for, then when I need to label something, I will have the label I need for that item.
I also use them on my daubers…
Trust me, you will want sheets of these around because the time to prepare for color tool labeling is before you actually need them. It’s always hard to go back and try to figure out what the color is supposed to be.
Other uses are…
Color Coach (I use clear labels for this)
Aquapainters
Containers of colored silicon for shaker cards
Containers of colored embossing paste
Cardstock organization
Spritzers
And many more…
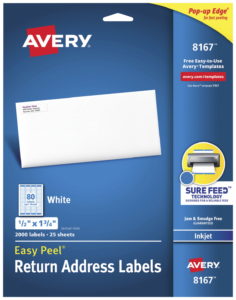
I use AVERY 5167 Return Address labels. They will work on any brand label that is compatible with those.
And, here is the file so that you can print your own.
Hello and welcome to this month’s installment of the Stamper’s Dozen Blog Hop!
Our theme for this month is Color My World. Our aim is to show you projects using our favorite coloring tools.
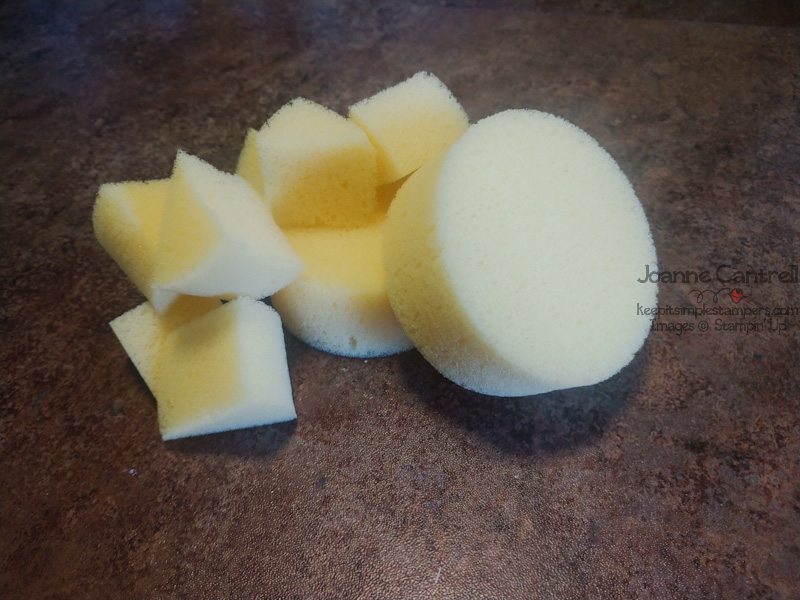
Well, my favorite coloring tool lives in a pineapple under the sea… it’s Stampin’ Sponge, Color Tool (said in my best “Sponge Bob, Square Pants chanting voice! )
Such humble little creatures they are. They are often overlooked when folks are looking to add splashes of color to their projects. Don’t overlook these most marvelous coloring tools. They are so eager to absorb some ink for you!
This is how I store my sponges. It’s a crafty organizing container I got at Walmart. I liked it because I can make the areas bigger and smaller… And store my daubers with then. To label my sponges, I use return address labels that I printed with all the colors and their color family. I use a small stapler to attach it to the sponges. (I printed an extra sheet of the labels for the daubers.). They are stored by rainbow and not by family so blues don’t get into oranges!
Sponges can be used multiple ways. One of the most used methods is the flicking method. It’s where you hold the card stock in one hand and flick the sponge along the edge to highlight it. I used the method in the first two cards I have to show you.
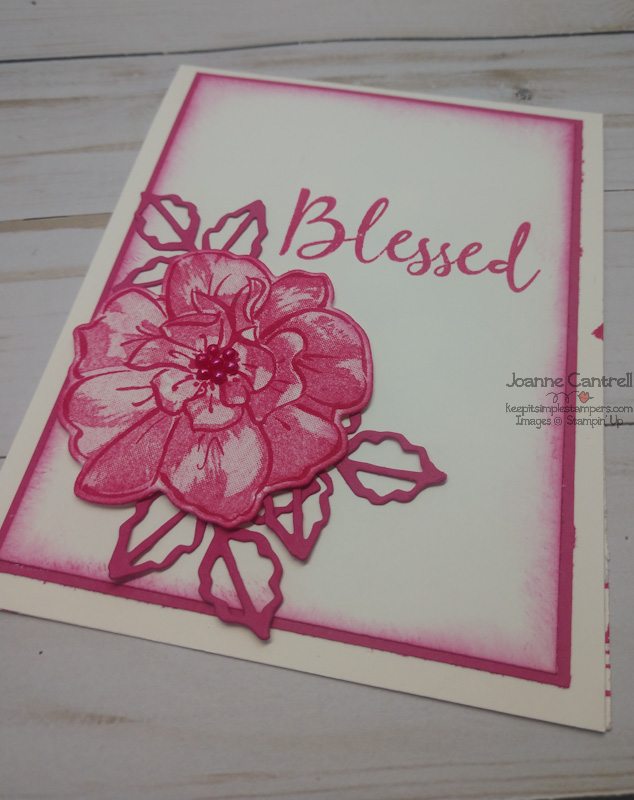
This card uses the To a Wild Rose stamp set and coordinating dies. I used Melon Mambo ink and paper.
I also used a sponge to apply the color to the inks. This set is a Distinktive photopolymer stamp set. In order to get the photo-like stamped image, you can’t have too much ink on the stamp. Using a sponge allows you to better control how much ink is applied.
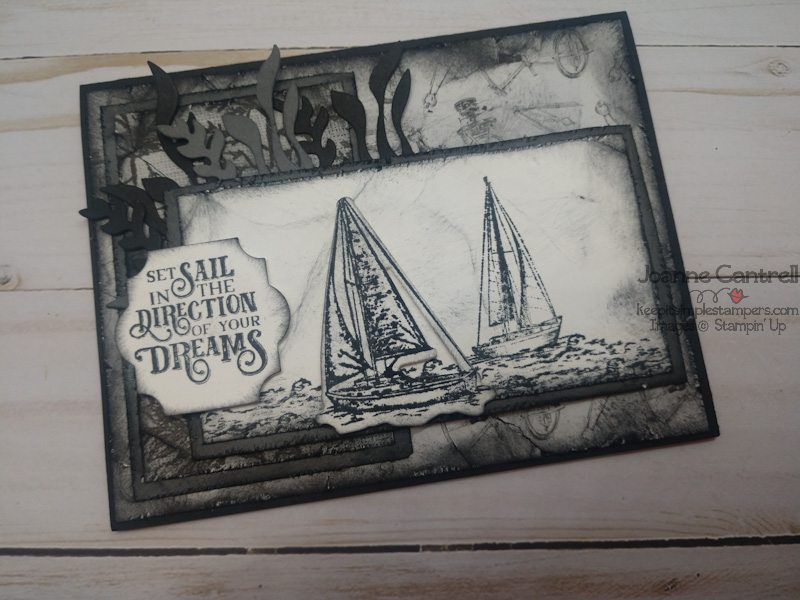
This card uses that same flicking method. But, before I did, I roughed up the paper a bit using the edge of my scissors. I also crumpled it a bit before I inked it.
You will also noticed I used the sponge to apply color (Basic Black) to the front of the paper to, to bring out some of the lines and soften the Whisper White.
I used the Sailing Home stamp set and the coordinating dies. The paper is Basic Black, Basic Gray and Whisper White cardstock as well as the Come Sail Away Designer Series Paper.
This card used both the flicking method and the coloring method that I used above. It just adds a bit of aging to the paper.
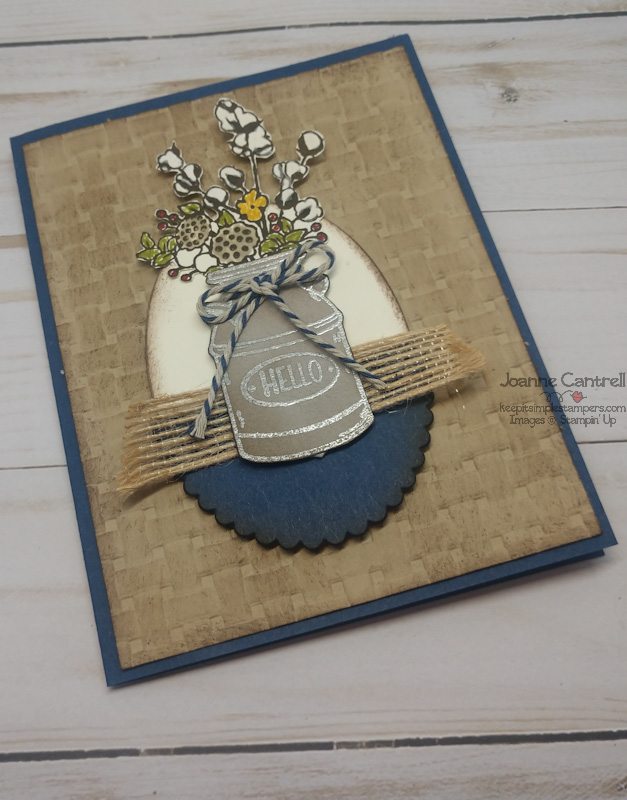
On this card, I used Early Espresso ink, Night of Navy cardstock, Crumb Cake cardstock, and Very Vanilla cardstock. Oh, on the milk can, that is Granite Gray cardstock and silver embossing powder. The stamp set is the Country Home set and I used the Layering Ovals dies. I added a little Crumb and Navy twine and a piece of Burlap ribbon… 🙂
This card used Petal Pink, Flirty Flamingo, and Melon Mambo inks. I did a bit of “masking” by tearing a sheet of scrap cardstock. I applied the Petal Pink first using the sponge. It’s okay if it looks splotchy because it will blend in as you swirl the sponge around adding layers of colors. Now, don’t go over board because you can apply more color but you can’t take it away. Next, I placed one of the pieces of the torn paper over the pink and applied the Flirty Flamingo ink. Then I covered the Flamingo with the other side of the torn cardstock and sponged on the Melon Mambo. When I was done, I used the three colors to blend them together a bit.
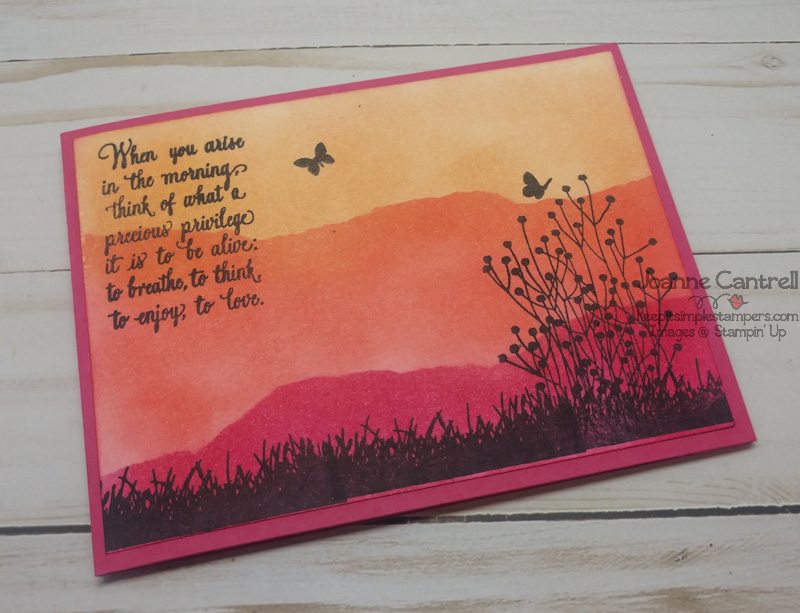
I used the Enjoy Life stamp set and Memento ink. It looks like a sunset in a wild west desert
For this card, I used one of the oval dies to create a mask. I then sponged Balmy Blue ink into the cut out. It leaves a perfect spot of color right in the middle. I used the Enjoy Life stamp set here as well.
For the butterflies, I sponged Pumpkin Pie and Crushed Curry ink on a bit of a scrap piece of Whisper White (Pumpkin on the top and bottom and Curry in the middle). Then, I stamped over the sponging with the butterflies in Memento ink. I used the Butterfly Duet punch to punch out the butterflies. Don’t forget to add the bodies before you punch them out
Oh, please continue to bear with me… There’s just one more card… I know, I got carried away. But, I love sponging and stamping!
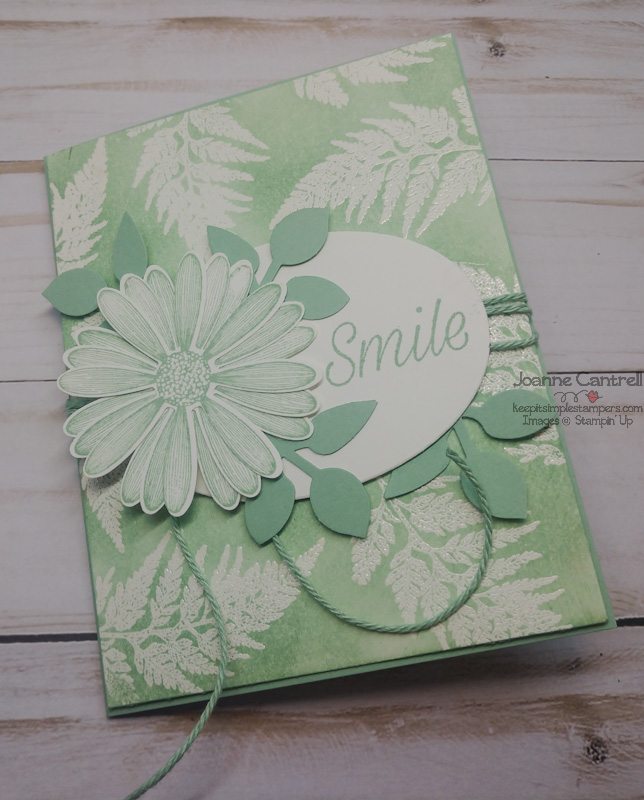
This is an embossed resist card. I used clear embossing powder and VersaMark ink to stamp the fern leaves. Then, I covered them with Mint Macaroni ink. When done, I used a tissue to wipe the extra ink off the embossing.
I used the Daisy Lane stamp set and Daisy Punch. The oval is from the mask I created in the butterfly card.
Well, that’s it from me today. Go hop on over the others now!