Make It Monday!

Welcome to another week in your life!

This Monday is so not that Monday-y sort of day.  Sure, it’s rainy and drizzly outside… but it’s a great day to start new routines!

This morning, I hopped out of bed, workout out, went shopping for healthy food for the next couple days, and went to work.  I know… I had a super weekend, so it was so easy to get a move on this morning!

So, speaking of starting new routines.. I am doing that right here on my blog too!

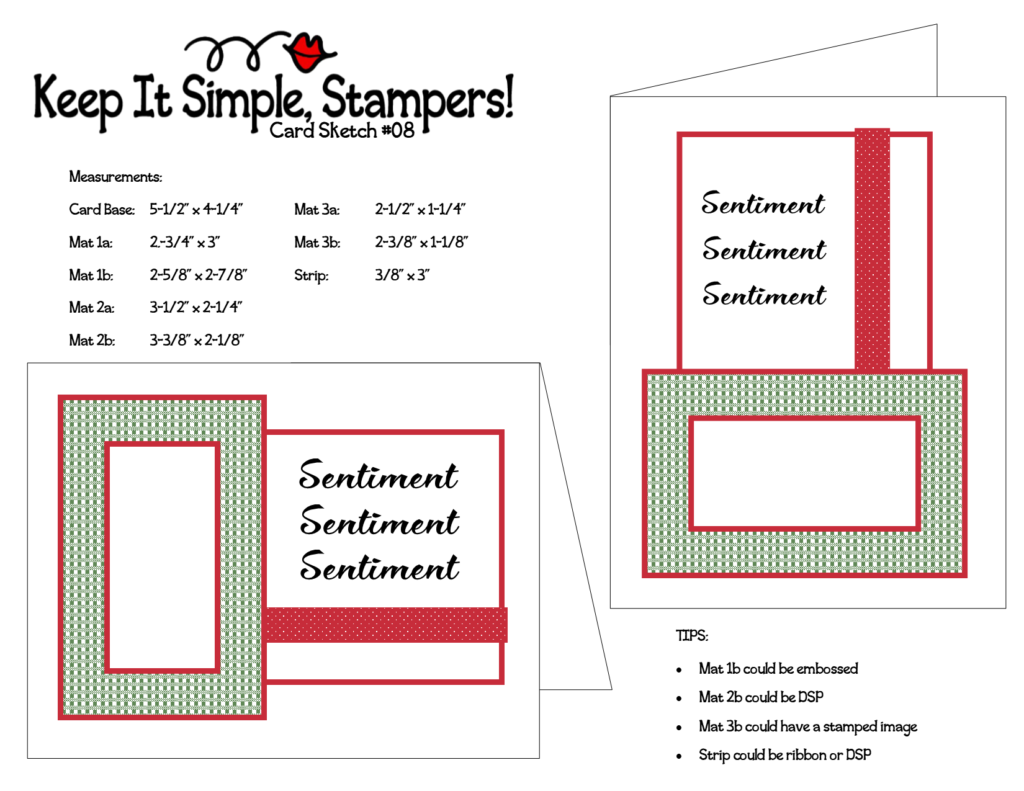
Every Monday morning, I will post a new card sketch.  I would love to see what you do with it.  Simply, jump on over to my Facebook page and post it in the comments of the sketch.  I will post mine there too!

On to today’s sketch…

This sketch was inspired by the new papers in the 2017 Holiday Catalog!

What, you haven’t seen the new papers?  It’s a perk of being a Stampin’ Up demonstrator.  You get to preview and preorder products from new catalogs.  For me, I love getting my hands on the product first.  I feel like it’s Christmas when the boxes arrive!  And, who isn’t ready for fall and Christmas yet?  I’m so done with summer!

So, remember – head on over to my Facebook page and upload your creation using this sketch to the comments under the sketch!

Until next time… keep it simple, Stampers!

🙂  Joanne

It’s a Process

In my many years here on earth, I have learned how I like to do things.  If you have ever watched me work, you will notice that I do things in order.

Here’s an example…

When a shipment of boxes comes into the candle store where I work part-time (to earn Stampin’ money), three things have to happen.  Product needs marked off the list, boxes need opened, stuff need to go on shelves.  There are two schools of thought as to how this should happen.

  • School 1 grabs a box, opens it up, marks off the contents, then puts product on shelves.
  • School 2 marks off all contents, opens all boxes, puts all the stuff away.

I am a fan of the second.  Sure, I have to move boxes a few times…  to line them up so I can see all the items numbers. Most of the candles come in a box with a number on the outside while smaller stuff comes in boxes with a packing label – these are handled a bit differently and last.  So, I can get through 100 boxes in about 3 hours.  After I mark them off, I open them all and take the candles out then I collapse boxes, then I stock the shelves.   Then I check off multi-item boxes with contents vs. packing list… put items away then check them off the list.

(Please note that everyone knows my way is better and is the reason I am called in to work to help with big shipments… they just stay out of my way and let me go…  🙂 )

An order to life…  do the first step of everything then do the second step.  That is my process of doing most things.  I can see why Henry Ford thought of the Assembly line.  He must have thought the same way.

I approach my mass card making the same way… and I did the same thing for the scrapbooks I did for a friend for Christmas.

  1. Design cards and jot down measurements
  2. Cut as many pieces for the cards that I can (I am a cut-then-stamp kind of girl – especially with photopolymer stamps!)
  3. Stamp everything
  4. Do any left over punching and cutting.
  5. Assemble!

So, I took yesterday day off to help my oldest boy with his taxes and budgeting but he was never home.  I ended up spending all day in the craftroom cutting down cardstock and DSP for about 20 different card designs.  Add this to the almost 20 I did the other…  and I am on track for the craft fair.  I have about 30 more designs to cut before I can start stampin’!  I’ll be sure to take a picture of my progress!

But, just so that you can start your process, here is a card sketch!cs-004

I envision it using Blushing Bride Glimmer paper and a black-based DSP.  But… there are new colors of Glimmer Paper!  Have you seen them yet?

sab-glimmer-paper.png

This 6″ x 6″ Glimmer Paper Assortment Pack comes with 12 sheets; 4 each of 3 colors (Bermuda Bay, Mint Macaron, Sweet Sugarplum) and is available only for a limited time and are FREE with a $50 purchase.

Imagine the possibilities!!!

Let me see what you come up with!

Until next time… keep it simple, Stampers!

🙂  Joanne


Card Sketch #3

Truth be told, I did get a start on the cards I am making for the craft fair coming up in less than two weeks.  I cut out everything I need for about 20 cards.  I had planned on doing a lot more yesterday, but got side tracked by life.. and bread… again!

This time, I taught my daughter how to make it.  She made loaves and I made rolls.  They were perfect.  The one loaf Kate made was so pretty, I hate to cut into it.  But, with three kids left along in the house today with tempting homemade bread, I am thinking it will be cut and gone by the time I get home tonight!

2017-02-19 15.58.32.jpg

So, I guess what I am saying is that I don’t have cards to show you.  I am just dying not actually making any cards for so long….  I may not have the energy to climb the stairs to the craft room.  Just kidding!  I can spring up those babies anytime I get the chance!

And, since I don’t have my card making materials here in my office (I think it’s probably because I am supposed to be actually working.. shhhhh!), I have done another card sketch.  I think I am liking to do these as much as I like to make the actual cards.  I am guessing that is because I love to work on the computer.  I am the one that many people call when they need flyers and whatnot for upcoming fundraisers!  Just one of my many talents!  (You just got to toot your own horn from time to time!)

So, here is the sketch…

cs-003

The colors used in the sketch are Daffodil Delight, Melon Mambo, Tempting Turquoise, and Whisper White.

I would love to see what color combinations you come up with as well your beautiful adaptions of this sketch.

Until next time…keep it simple, Stampers!

🙂  Joanne


Card Sketch #02

So, here I am making good on my promise to post at least one card sketch every week.  I think I will post them on Thursdays, just so that you know when to come back…

Wait, on second thought, I won’t tell you when I am going to post them.  Then you have to come back every day.  Which you already do.. .right!?!

Anywho…

Here is the sketch…  CS 002.jpg

In my mind, I can see using a DSP in the background (5-1/2″ x 4-1/4″)

Or, maybe as the Long Layer 2…  then you could put the sentiment on a banner and put over the bottom of the Small Layer.

Or…  what about… on the landscape card… adding some ribbon with a bow.  You could then hang the sentiment from that.

The possibilities are endless.. but just some tips:

  • Always include some type of sentiment on the outside.  In a very rare instance, will I ever not put some type of wording on the outside.  It may be small, but it is almost always there.  You need all sides of your card to speak.  Just a word, maybe a whole thought… but it needs to speak.
  • Graphic is a must – but there is a catch.  The graphic could be designer series paper.  The graphic could be a stamped image.  The graphic could be words stamped multiple times.  And, to add fun, sometimes a graphic in an unexpected place is great!  Think about a little head peeking over the top of the long layers…  or from behind the small layer.  Yes, I do have that crazy-haired chick in my mind right now!
  • To embellish or not to embellish… that is always an important question.  It should come as no surprise that I tend to lean toward the no embellish side.  I think some of the prettiest cards are the most simple.  Two colors.  Bold sentiment.  Small ribbon.  Maybe a strategically placed Rhinestone.  It doe not take a lot to dress up a card without over doing it. We’ve all seen those cards that are just too much…  well, too much something.  Knowing when to stop and having an eye for editing is very important!

So, what are you going to do with this sketch?  I can’t wait to see all the great projects!

Until next time… keep it simple, stampers!

🙂  Joanne